Ram Heavy Duty Forum

Register a free account today to become a member! Once signed in, you'll be able to participate on this site by adding your own topics and posts, as well as connect with other members through your own private inbox!

Etoimos' 2022 Power Wagon Build

Loosebolts

Active Member
Joined
Aug 26, 2021
Messages
83
Reaction score
115
They only sell through their local dealer network. Their site will just take you to a page to find a local dealer. I ordered mine through Line X and they wanted a 50% deposit.
Sounds good I was going to call line x today while your there ask them if they have any in stock so I can just pick one up! Are you going to install it yourself or have them do it, I’d prefer to do it myself however not sure if cause they are a dealer they must do it to keep the warranty on the cap itself.
 

Etoimos

Well-Known Member
Joined
Aug 5, 2021
Messages
360
Reaction score
617
Location
Colorado
Sounds good I was going to call line x today while your there ask them if they have any in stock so I can just pick one up! Are you going to install it yourself or have them do it, I’d prefer to do it myself however not sure if cause they are a dealer they must do it to keep the warranty on the cap itself.
I'm installing it my self tomorrow. No one said anything about it effecting the warranty so I'm not too worried about that.
 

Etoimos

Well-Known Member
Joined
Aug 5, 2021
Messages
360
Reaction score
617
Location
Colorado
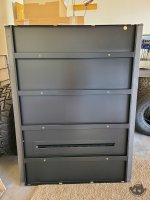
As mentioned above, my RSI SmartCap arrived this past Friday and we installed it on Saturday. The build and install was pretty straight forward and there were just two "tricky" parts on assembling it. Both were on the rear panel where getting the tabs to align with the slots was kind of a pain. One person had to lift up on the rear panel and at the same time push down on the side panel. The second person had to insert the hardware to lock it all into place.

It some in two very large boxes.
RSISmartCap-142028.jpg

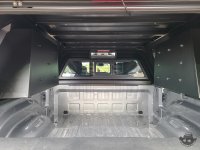
I did not get the built in table, so my roof just has the eight rivnuts in it. Those will come in handing for mounting something down the road I'm sure.
RSISmartCap-153417.jpg

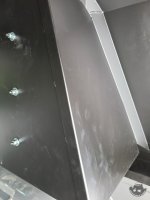
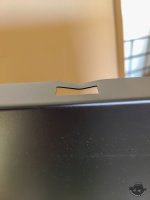
Some of the slots had a bend in them. At first I thought this was some type of damage, but the side panels had the "dents" in the exact same place. This makes me think they are from the manufacturing process. These did make it harder to insert the hardware into these slots.
RSISmartCap-153020.jpg

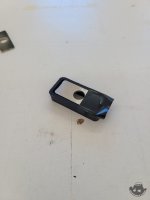
Speaking of hardware, when you take the hardware out of the front and rear panels, do your self a favor and take the black space pieces off and tape the silver metal plates to them. This makes things a lot less fiddly when you are holding the panels together and trying to install the hardware.
RSISmartCap-111922.jpg

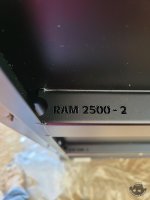
While putting this thing together you will notice that they did not skimp on the details. They even cut the part names into the parts. Each panel is also paired to the others with a hand written set number.
RSISmartCap-153127.jpg

Assembly is as simple as Insert Tab A into Slot B and then bolt it down.
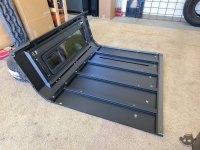
RSISmartCap-103035.jpg

The fully assembled SmartCap is pretty heavy. Two guys can pick it up off the floor, but would be hard pressed to lift it high enough to get on the truck... let alone have enough control to do it without damaging anything. I only had two buddies to help me, so we used my Jeep top/RTT hoist to lift it up and then backed the truck under it. That worked out great. We spread the load of the top across all eight M8x1.25 nuts in the built in rails.
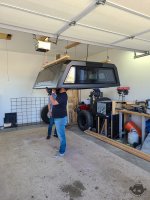
RSISmartCap-144028.jpg

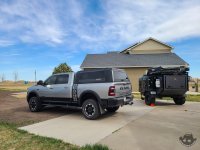
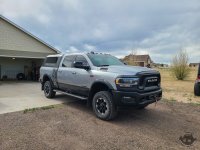
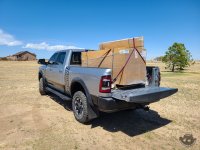
And here it is installed on the truck.
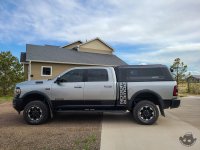
RSISmartCap-162722.jpg

RSISmartCap-162732.jpg

RSISmartCap-162754.jpg
 
Last edited:

Etoimos

Well-Known Member
Joined
Aug 5, 2021
Messages
360
Reaction score
617
Location
Colorado
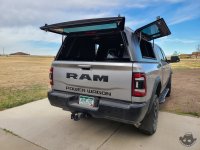
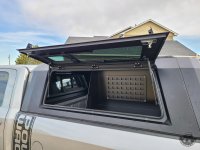
And some shots of it with the sides open showing the half bins and a few detail shots.
RSISmartCap-171146.jpg

RSISmartCap-171129.jpg

RSISmartCap-171154.jpg

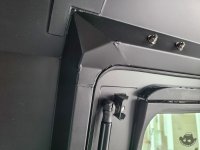
The window surrounds are very beefy. In fact, the windows as whole are very nice.
RSISmartCap-182718.jpg

The half bins are much more stable then I thought they were going to be as well.
RSISmartCap-182748.jpg
 
Last edited:

Etoimos

Well-Known Member
Joined
Aug 5, 2021
Messages
360
Reaction score
617
Location
Colorado
I'm very impressed with the quality of this top, even though I have seen several in person before. You just don't notice the little details when looking at another truck with it on. That said, my experience was not all roses. After getting everything installed me and my buddy took our wives out for dinner and I locked all of the windows as I had started installing stuff into the half bins. The next morning one of the latches would not unlock... No Matter What I Did To It. And of course it was the window that opened to the half bin that I needed to do the most work in :mad:.

I don't blame RSI for this issue since the latch is an off the shelf unit that they use and there was know way for them to know it would get stuck in the locked position (I had locked and unlocked it several times testing things out before it became stuck). I will say that the customer service regarding this issue has been great from RSI. I had a response to my initial email the same day, a Sunday no less! They have a full set of replacement latches in the mail to me one day later along with some bonus latch covers for my troubles.
 

Etoimos

Well-Known Member
Joined
Aug 5, 2021
Messages
360
Reaction score
617
Location
Colorado
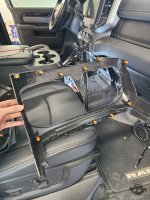
Over the weekend and into Monday I was also able to make some progress on installing some of my Comms gear. First up is the Midland GMRS radio. That consisted of ripping out the lower part of the center stack, the carpet and trim around the two drivers doors. I also removed the driver's side rear seat, but that is not completely necessary for how I ended up installing it all.

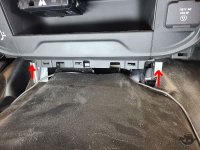
The lower center stack consists of three parts; the lower panel which just clips in, the bezel that surrounds very thing that has two small bolts (8mm I think) and clips and finally the little cubby with the change holder in it (all clips).

The bolt locations, and where my main radio unit is installed.
GMRS-142000.jpg

Lots of orange clips.
GMRS-142121.jpg

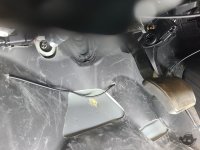
The antenna wire weaved to slits in my vinyl flooring to keep it up and under things so I don't step on it all the time.
GMRS-140522.jpg

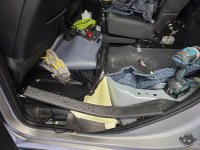
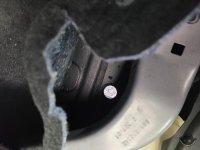
The rear seat, and door seal trim removed. I've also pulled the vinyl flooring away from the under seat cubby. There is a hole in the front of the cubby you can pass the wire though and then a sealed hole in the bottom of the cubby to underneath the truck.
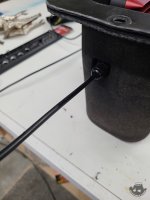
GMRS-135040.jpg

GMRS-135046.jpg

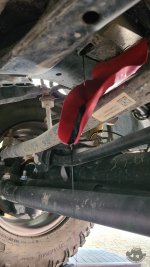
From there it was just a matter of routing the antenna a few feet under the truck and up between the cab and cap. My 3db gain antenna is just mounted with a make shift mount until I the aluminum T slot cross bars show up, so no pics of it just yet.
 

Etoimos

Well-Known Member
Joined
Aug 5, 2021
Messages
360
Reaction score
617
Location
Colorado
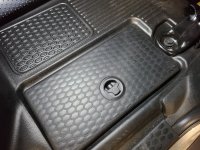
On the other side of the truck is where I'm installing all of my WeBoost cell signal booster at. This system has a fairly large module and rather small cable connections, so I decided to install it in the rear in-floor cubby on the passenger's side.

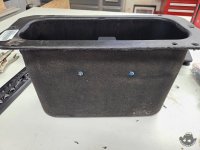
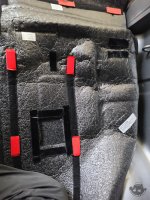
The cubby is made of three parts. First is the trim and lid, then the cubby liner, and finally the sound dampened cubby its self. I pulled everything out to do this install and it is kind of odd looking down at the rear floor of your truck and seeing the ground!

The WeBoost mount mounted through the main cubby. I used some lock tight so that the nuts would not fall off going down the road.
WeBoost-194847.jpg

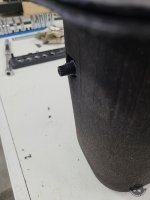
A cable gland allows for the antenna wire to exit the cubby while keeping the dust and water out of it.
WeBoost-194857.jpg

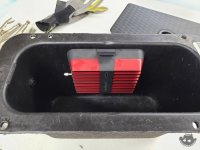
Here is the WeBoost module clipped into place.
WeBoost-194842.jpg

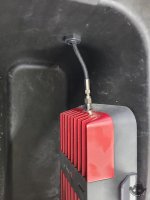
And how the antenna cable looks passing though it.
WeBoost-195230.jpg

WeBoost-195251.jpg

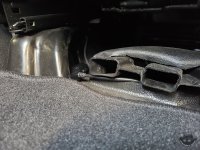
Here is everything back in the truck with the interior wires ran through a notch in the trim for a nice clean install. The wire are then ran under the vinyl flooring and exit under the passenger seat at the floor vent. This install keep feet from stepping all over the wires.
WeBoost-201549.jpg

WeBoost-201603.jpg

WeBoost-201611.jpg

WeBoost-201630.jpg

The antenna for this one is also waiting on the cross bars, so no pics of that either.
 

Etoimos

Well-Known Member
Joined
Aug 5, 2021
Messages
360
Reaction score
617
Location
Colorado
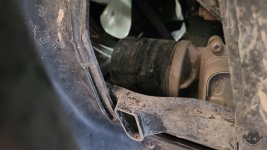
I did my first oil change on the PW this morning. I was dreading dealing with the side mounted oil filter since they always make a huge mess. RAM was kind of smart as they put a little oil catch and drain hole beneath the filter to help direct the oil... right onto your tie rod!

PW-Maintenance-6.jpg

The use of a Form-A-Funnel contained all most all of the mess though.

PW-Maintenance-7.jpg

It was not as easy as the 3.6 Jeeps, but it was also not has hard as the wife's RAM 1500.

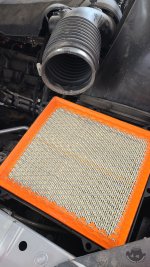
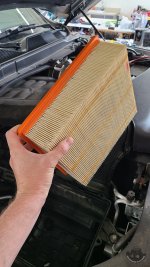
While the oil was draining, I took the time to inspect the air filter since we just completed a 3500+ mile overlanding trip. It was still really clear.

PW-Maintenance-4.jpg

PW-Maintenance-5.jpg

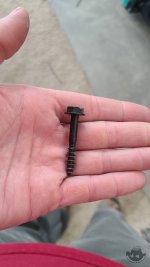
Why RAM thinks it needs six of these huge as screws to keep the filter box lid on, I have no idea.

PW-Maintenance-3.jpg

With the oil change and filter inspection done I gave the PW a good bath and re-blackened the plastic trim with Meguiar's Ultimate Black. This stuff seriously rocks. It is not shiny like most of the other trim treatments and it lasts for a good while.

PW-Maintenance-1.jpg
 

Etoimos

Well-Known Member
Joined
Aug 5, 2021
Messages
360
Reaction score
617
Location
Colorado
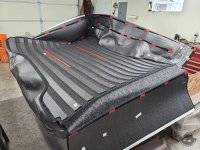
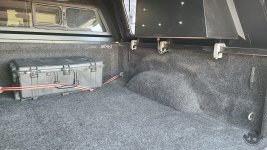
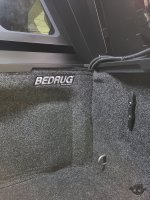
Prior to our trip, I was also able to get some of the mods done to the truck. First up were the bed mods. I had looked at the BEDRUG line of products online back in my Jeep days, but I'd never seen one in person. Now that I have one in the PW, I really don't know why I never got around to installing these in the Jeeps. This thing is super nice and makes crawling around in the bed way more comfortable.
BedRug-174814.jpg

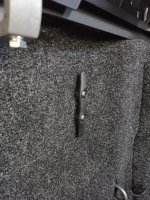
I did add extra hook and loop around the areas where you had to cut it to allow access to the bed tie downs.

BedRug-185633.jpg

BedRug-194034.jpg

BedRug-194447.jpg

The BEDRUG also comes in handy for hiding wiring for other projects.

BedRug-194243.jpg
 

Etoimos

Well-Known Member
Joined
Aug 5, 2021
Messages
360
Reaction score
617
Location
Colorado
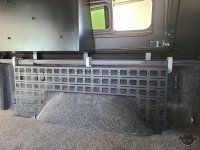
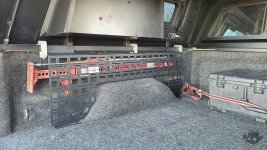
Next up for the bed was a driver's side MOLLE panel from Icky Concepts. I've ran MOLLE panels from other companies in the past, but the Icky panels are by far the beefiest panels I've had. The press brake bends in them really add to their rigidity.

BedMOLLE-134746.jpg

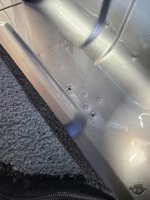
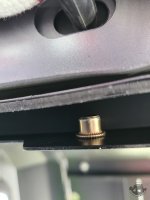
The one downside to them is that you must drill into your bed to install Rivnuts. Once you overcome that aversion, it really is not that bad and makes for a very solid panel.

BedMOLLE-130258.jpg

BedMOLLE-114446.jpg

One thing to keep in mind when installing the driver's side panel is that the hole you have to drill for the front is very close to the fuel filler neck under the bed. One of the rear's also comes close to hitting the under bed support frame member. On my install, the drilled hole actually was inside the U shaped support beam.

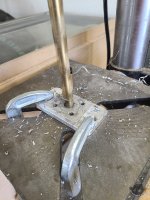
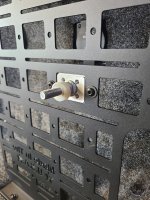
My plan was to mount my Hi-Lift jack to this panel like I had it mounted in my Gladiator. The differences in the MOLLE layout between that old panel and the Icky made it so that I needed a pair of the really cool Icky Concept MOLLE Backing Nuts. IC makes a Hi-Lift mount, but I already had a setup I used in the past and wanted to reuse it. This meant that I needed to drill a much larger hole through the center of the Backing Nuts.

BedMOLLE-141941.jpg

BedMOLLE-144045.jpg

With the hardware sorted, it was just a matter of mounting the jack to the panel.

BedMOLLE-144626.jpg

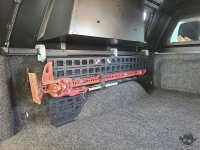
While held securely in place, the jack stuck out into the bed area too much and all those hard and rough parts of the jack was bound to destroy whatever rubbed against them. So, I determined that the jack could actually be mounted behind the panel! This solved the problem of the jack sticking out into the bed and also made it where I could still use that panel for lots of other things as well. Win win!

BedMOLLE-194432.jpg

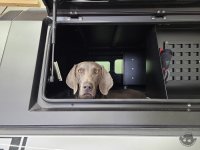
I'm really happy with the Icky Concept panels and have one for the front of the bed waiting to be installed along with some more bed mods in the future. More importantly, Maximus is happy with all of the bed upgrades.

Maximus-1.jpg
 

Etoimos

Well-Known Member
Joined
Aug 5, 2021
Messages
360
Reaction score
617
Location
Colorado
Weird my oil clears it just fine
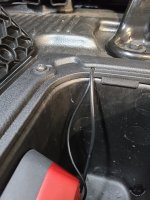
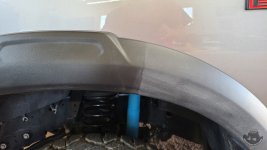
I had the front up on ramps to make it easier to get under the front of the truck. Maybe the angle was just enough to make it hit the tie rod. Next oil change I'll leave it flat on the ground and see what it does.
 

thkbaron

Active Member
Joined
Nov 29, 2021
Messages
242
Reaction score
130
How high do you need that sucker lol. Yeah mine is on flat ground then I can slide a 5 gallon bucket underneath no problem.
 

Etoimos

Well-Known Member
Joined
Aug 5, 2021
Messages
360
Reaction score
617
Location
Colorado
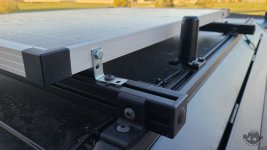
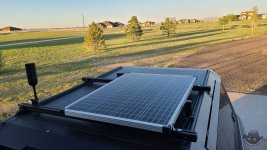
One of the future bed mods is going to be a slide for my truck mounted Dometic freezer/fridge. While I'm not quite ready to install the slide just yet, I did need the fridge on this past trip. This time I around I just simply ratchet strapped it to the MOLLE panel, but I did need to supply it with power. For this I hard mounted a HF 100w solar panel to a pair of TNUTZ 15 series aluminum profiles.

Solar-194824.jpg

There is still some room up top to mount my traction boards once the hardware shows up.

Solar-194917.jpg

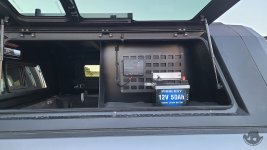
The solar panel is connected to a Renogy Wanderer charge controller and finally to an Amazon 50Ah lithium battery, all mounted in the driver side RSI half bin. From there a line is ran inside the bed to the fridge when mounted. To secure the battery in the bin, I made some quick brackets from spare metal laying around the shop. They turned out pretty good but I'm thinking about remaking them with purpose bought metal so that the sizing is a little better. I also need to powder coat whichever set I decide to go with.

Solar-194657.jpg
 

Users who are viewing this thread

Top