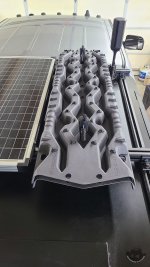
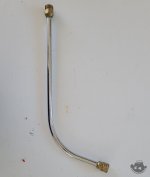
If I had a lift, it would have been up on that!How high do you need that sucker lol. Yeah mine is on flat ground then I can slide a 5 gallon bucket underneath no problem.
Ram Heavy Duty Forum
You are using an out of date browser. It may not display this or other websites correctly.
You should upgrade or use an alternative browser.
You should upgrade or use an alternative browser.
Etoimos' 2022 Power Wagon Build
- Thread starter Etoimos
- Start date
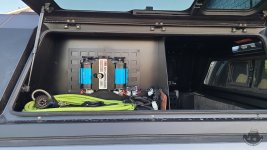
As posted earlier in my thread, the passenger side half bin is being used for my ARB twin compressor setup. For the time being I am just using a Flexzilla air hose and the ARB air gauge (that I'm not crazy about).
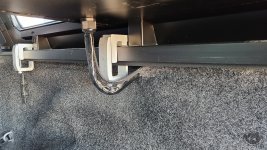
The wiring runs through the cable gland (thanks to @Fishnerd for bringing these things to my attention) in the front corner and then behind the BedRug and under the truck to where the Switch Pros is mounted.
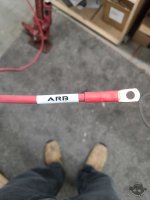
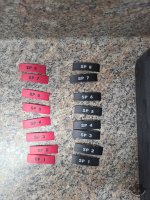
All the wires are labeled for easy identification later on (thanks @Trail_Wagon).
Future plans include permanently running air lines to all four corners of the truck (and two on the OGT trailer) where they will terminate with Schrader valves.
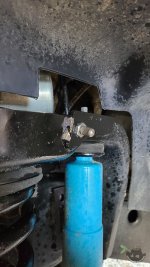
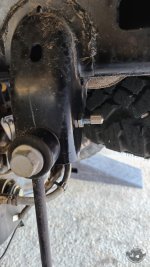
I have quick connect whips that will connect from those Schrader valves to the tires Schrader valves for airing up and down. The end goal is to use an ARB Pressure Control Kit to adjust the air in the tires to whatever settings I program into my phone. I'll still be able to air up or down manually with this system if I can't use the Bluetooth for some reason. I'm still sorting out all the fittings and lines to finish up this part of the on board air project though.

The wiring runs through the cable gland (thanks to @Fishnerd for bringing these things to my attention) in the front corner and then behind the BedRug and under the truck to where the Switch Pros is mounted.

All the wires are labeled for easy identification later on (thanks @Trail_Wagon).

Future plans include permanently running air lines to all four corners of the truck (and two on the OGT trailer) where they will terminate with Schrader valves.


I have quick connect whips that will connect from those Schrader valves to the tires Schrader valves for airing up and down. The end goal is to use an ARB Pressure Control Kit to adjust the air in the tires to whatever settings I program into my phone. I'll still be able to air up or down manually with this system if I can't use the Bluetooth for some reason. I'm still sorting out all the fittings and lines to finish up this part of the on board air project though.
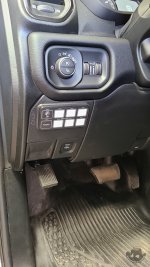
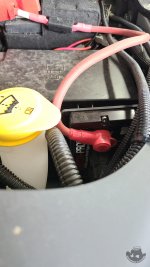
For my Switch Pros, I followed in the foot steps of many others and used the SDHQ replacement panel to mount it by my left knee.
The wiring is ran through a cable gland installed in a hole I drilled in the firewall clutch cover.
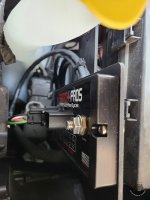
The SDHQ Switch Pros engine bay bracket does a good job of tucking everything out of the way.
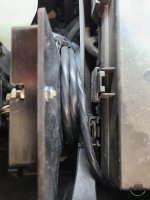
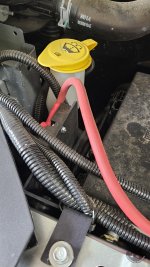
Continuing to follow the clean installs of @Fishnerd and @Trail_Wagon , I made a harness extension for the Switch Pros accessories wires and terminated with Deutsch connectors.
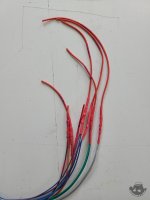
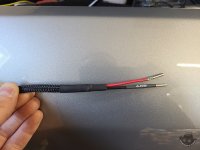
All cables were sheathed, shrink tubed, and labeled.

The wiring is ran through a cable gland installed in a hole I drilled in the firewall clutch cover.

The SDHQ Switch Pros engine bay bracket does a good job of tucking everything out of the way.


Continuing to follow the clean installs of @Fishnerd and @Trail_Wagon , I made a harness extension for the Switch Pros accessories wires and terminated with Deutsch connectors.

All cables were sheathed, shrink tubed, and labeled.


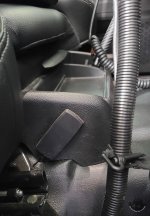
The ARB twin compressor required three wires coming from the engine bay. One was to connect it to the Switch Pros and the other two were the pos and neg wires. These were all ran through more cable glands installed along the fire wall. On the driver's side there was room to place them in the black plastic cover that runs along the back.
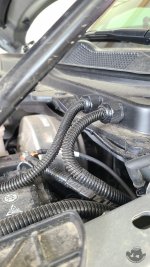
Wires go across the back, hidden under that plastic cover.
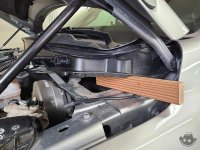
The passenger side does not have enough space on the plastic cover for the cable to exit, so I had to drills some holes in the firewall for them.
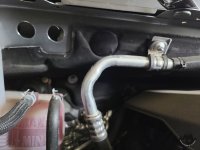
Cable glands were used on this side as well for a nice clean look. Unless you know these trucks, you can't tell these wires are not factory installed.
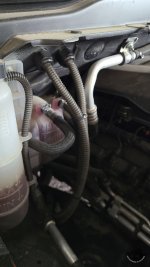

Wires go across the back, hidden under that plastic cover.

The passenger side does not have enough space on the plastic cover for the cable to exit, so I had to drills some holes in the firewall for them.

Cable glands were used on this side as well for a nice clean look. Unless you know these trucks, you can't tell these wires are not factory installed.

jadmt
Well-Known Member
I use a piece of aluminum foil to keep it off the drag link and tie rod.Weird my oil clears it just fine
jadmt
Well-Known Member
Nice clean wiring jobThe ARB twin compressor required three wires coming from the engine bay. One was to connect it to the Switch Pros and the other two were the pos and neg wires. These were all ran through more cable glands installed along the fire wall. On the driver's side there was room to place them in the black plastic cover that runs along the back.
View attachment 39826
Wires go across the back, hidden under that plastic cover.
View attachment 39827
The passenger side does not have enough space on the plastic cover for the cable to exit, so I had to drills some holes in the firewall for them.
View attachment 39828
Cable glands were used on this side as well for a nice clean look. Unless you know these trucks, you can't tell these wires are not factory installed.
View attachment 39829
Thanks. Messy wiring triggers my OCD!Nice clean wiring job
Great White North Eh
Squish Cat - And So
- Joined
- Nov 10, 2019
- Messages
- 1,737
- Reaction score
- 2,864
That’s the type of wiring my brain does.……… then my hands fork it all up  .
.
Loosebolts
Active Member
- Joined
- Aug 26, 2021
- Messages
- 83
- Reaction score
- 115
SameThat’s the type of wiring my brain does.……… then my hands fork it all up.
Lol, I was that way once. Then I got into Jeeps and had to do tons of wiring for them.That’s the type of wiring my brain does.……… then my hands fork it all up.
Your build is turning out awesome! I may have missed it but where did you place your weboost internal antenna? I have a weboost in my other vehicle and may just buy antennas for the truck and just move the unit back and forth.
Thanks. Your build is awesome as well and I stole several idea from it. I did not do anything fancy for my weboost internal antenna, just velcroed to the side of the floor center console.Your build is turning out awesome! I may have missed it but where did you place your weboost internal antenna? I have a weboost in my other vehicle and may just buy antennas for the truck and just move the unit back and forth.
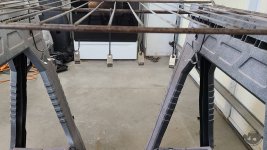
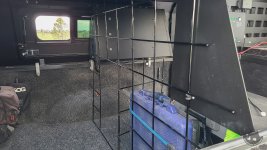
I also got some more bed modifications done. First up was the create for Maximus. I made this from a hog/cattle panel that my dad had laying around his property.
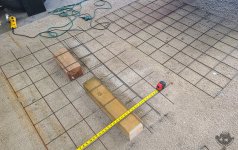
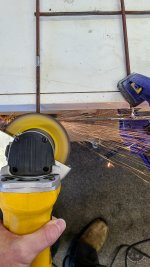
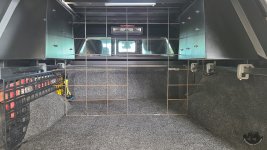
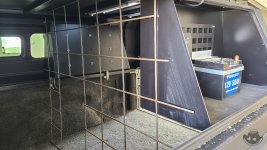
Once it was all cut to shape and size, I dropped it off at a buddies business to be powder coated as it was too large for me to do in my shop.
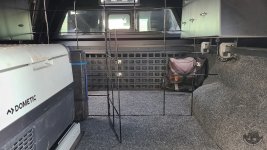
I used 550 cord to lash the door panel to the overall panel to make the hinges. This works better than I thought it was going to. The orange 550 cord zipper pull just right of center in the above photo is used to secure the door closed.
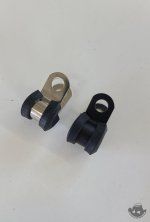
To attach the panel to the RSI SmartCap I used four stainless steel cable clamps. I powder coated these to get rid of the shinny bits.
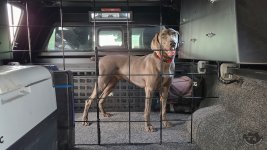
Maximus seems to really enjoy having his own room in the truck now.
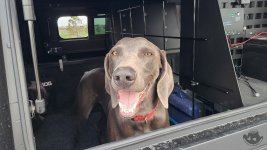


Once it was all cut to shape and size, I dropped it off at a buddies business to be powder coated as it was too large for me to do in my shop.

I used 550 cord to lash the door panel to the overall panel to make the hinges. This works better than I thought it was going to. The orange 550 cord zipper pull just right of center in the above photo is used to secure the door closed.
To attach the panel to the RSI SmartCap I used four stainless steel cable clamps. I powder coated these to get rid of the shinny bits.


Maximus seems to really enjoy having his own room in the truck now.


You can also see the Icky Concepts bulkhead MOLLE panel installed in some of the above photos. It was kind of a pain in the ass to install with the BedRug and Smart Cap already on the truck. I had to pull the BedRug away from the bulkhead so that I could install the riv-nuts.
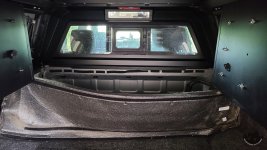
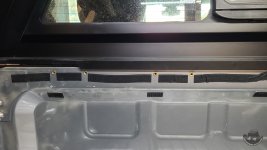
The biggest pain was that the SmartCap came down to low for me to install the upper riv-nuts. I had to loosen the cap's clamps and then use my hoist to lift just the front of the cap up enough to get the required room to install them.
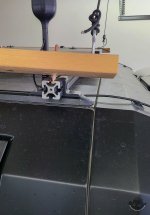
After that it was a quick job of putting the BedRug back in place and bolting the panel on. You probable also so in the previous photos that I got my secondary Dometic fridge installed in the bed as well. It is mounted to a slider that allows it to slide out flush with the end of the tail gate.


The biggest pain was that the SmartCap came down to low for me to install the upper riv-nuts. I had to loosen the cap's clamps and then use my hoist to lift just the front of the cap up enough to get the required room to install them.

After that it was a quick job of putting the BedRug back in place and bolting the panel on. You probable also so in the previous photos that I got my secondary Dometic fridge installed in the bed as well. It is mounted to a slider that allows it to slide out flush with the end of the tail gate.
Last week I was also able to finish up the on board air system with an ARB Air Compressor Pressure Control system. If you are unfamiliar with ARB Pressure Control system, it allows you to configure preset tire air pressures in an app and then inflate or deflate your tires by simply connecting a "whip" to each tire and then hitting a couple of buttons in the app. On my setup I can inflate all four of my stock tires from my Overlanding pressure of 20psi to my Daily Driving pressure of 36psi (I'm still fine tuning my daily pressure) in just a tad over 7 minutes. Deflating from 36psi to 20psi take about the same amount of time... if you trick the system a little. This system, at least on my truck, has a hard time deflating to the last psi. It will release some air which will drop it down to the target psi and stop. The pressure rises 1psi once the valve closes and this sets off a cycle of very small adjustments trying to deflate that last psi down to the target. What I have found best to do is set your target psi to 1psi less than what you really want. This way the system takes it down to your true target psi and you can turn the system off before it goes through that whole cycle mentioned above.
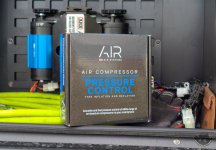
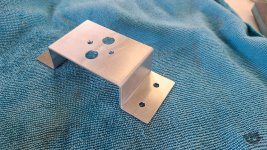
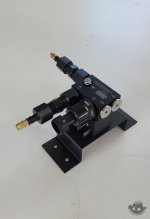
The mounting bracket they include did not work for my needs, so my hotrod building neighbor made me up a bracket to mount it to my passenger side half bin MOLLE panel.
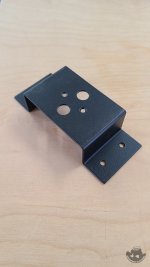
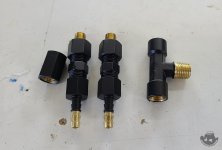
I then rounded up everything else I need to powder coat and hit them all with a satin black that is a very close match to the SmartCap.
Here is everything put together and attached to the pressure control module.
Previously I had hard mounted the Schrader valves to the truck, so at this point I just had to run the tubing from the four corners back to the compressor area. That was done with parts from the Up Down Air system that I had bought for the Gladiator and never got around to installing on it.
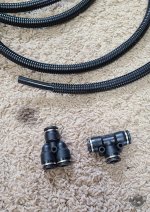
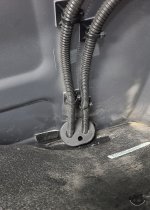
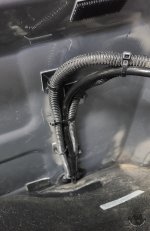
Of course, the BedRug had to be pulled back again to run the tubing up and into the bed of the truck.
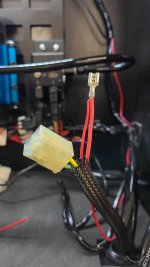
The pressure control unit had to be tapped into the ARB compressor harness so that it turns on when the compressor does. For this I removed the pin from the connector and spliced the new wire into that and put it back into the connector.

The mounting bracket they include did not work for my needs, so my hotrod building neighbor made me up a bracket to mount it to my passenger side half bin MOLLE panel.

I then rounded up everything else I need to powder coat and hit them all with a satin black that is a very close match to the SmartCap.


Here is everything put together and attached to the pressure control module.

Previously I had hard mounted the Schrader valves to the truck, so at this point I just had to run the tubing from the four corners back to the compressor area. That was done with parts from the Up Down Air system that I had bought for the Gladiator and never got around to installing on it.

Of course, the BedRug had to be pulled back again to run the tubing up and into the bed of the truck.


The pressure control unit had to be tapped into the ARB compressor harness so that it turns on when the compressor does. For this I removed the pin from the connector and spliced the new wire into that and put it back into the connector.

Last edited:
With everything hard plumbed it was time to connect the tires via the "whips" and see how the system did.
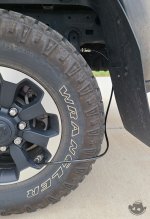
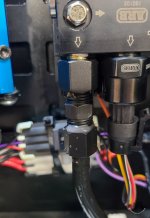
There were a few leaks in my fittings up at the control module that needed to be taken care of. These leaks also showed me that quite a bit of moisture was being generated by the compressor. I am going to have to get an inline moisture trap installed at some point in the near future.
The next series of upgrades will focus on lighting. I have plans for some offroad lights as well as some lights for inside the SmartCap. Until then, have fun out there guys!

There were a few leaks in my fittings up at the control module that needed to be taken care of. These leaks also showed me that quite a bit of moisture was being generated by the compressor. I am going to have to get an inline moisture trap installed at some point in the near future.

The next series of upgrades will focus on lighting. I have plans for some offroad lights as well as some lights for inside the SmartCap. Until then, have fun out there guys!
Last edited:
RHINO69
Active Member
- Joined
- Jan 20, 2022
- Messages
- 178
- Reaction score
- 160
With everything hard plumbed it was time to connect the tires via the "whips" and see how the system did.
View attachment 42205
There were a few leaks in my fittings up at the control module that needed to be taken care of. These leaks also showed me that quite a bit of moisture was being generated by the compressor. I am going to have to get an inline moisture trap installed at some point in the near future.
View attachment 42206
The next series of upgrades will focus on lighting. I have plans for some offroad lights as well as some lights for inside the SmartCap. Until then, have fun out there guys!
Hey there, I've got some questions about wiring the ARB Compressor. I am not going the pressure control module route, just mounting it under the passenger seat.
Where did you tap the RED/YEL wire (ignition/ACC power circuit) and BLU/WHT wire (illumination circuit)? I am having a hard time finding a thread where someone else utilized the under seat mount.
Thanks!
Wobly
Well-Known Member
How do you access the wingnuts to get the Hi-Lift out? I'm looking at getting a Hi-Lift and this looks like a great idea.While held securely in place, the jack stuck out into the bed area too much and all those hard and rough parts of the jack was bound to destroy whatever rubbed against them. So, I determined that the jack could actually be mounted behind the panel! This solved the problem of the jack sticking out into the bed and also made it where I could still use that panel for lots of other things as well. Win win!
View attachment 39795
I'm really happy with the Icky Concept panels and have one for the front of the bed waiting to be installed along with some more bed mods in the future. More importantly, Maximus is happy with all of the bed upgrades.
I have my compressor wired into my SwitchPros, the the RED/Yellow wire goes to it. Since I'm not using the ARB switch, I don't think I connected the Blue/White wire at all. I'd have to double check that though.Hey there, I've got some questions about wiring the ARB Compressor. I am not going the pressure control module route, just mounting it under the passenger seat.
Where did you tap the RED/YEL wire (ignition/ACC power circuit) and BLU/WHT wire (illumination circuit)? I am having a hard time finding a thread where someone else utilized the under seat mount.
Thanks!
Users who are viewing this thread
Total: 1 (members: 0, guests: 1)

