
Ram Heavy Duty Forum
You are using an out of date browser. It may not display this or other websites correctly.
You should upgrade or use an alternative browser.
You should upgrade or use an alternative browser.
Dash camera
- Thread starter carlrx7
- Start date
Werkerb
Active Member
- Joined
- Jun 19, 2021
- Messages
- 48
- Reaction score
- 157
Where did you locate the fuse block?I have the two wires de-pinned but can’t find a good place for the fuse block. I am using Stackable Add-on fuse block so I can hook up both the switched and battery supply line so I can use the parking mode of the dash cam.I used my IGN+ and BAT+ from the jumper for the dash cam, but I'm going to add in a fuse block so I can also still bring IGN+ and BAT+ to the blunt cut wires in the back.
I used the pas-thru circuit to bring AUX6 back into the cab for my 2-LO box.
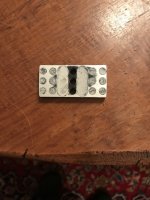
I found this one with 6 separate circuits that can be slaved together as needed. It actually measures on 5Hx2W.
View attachment 11281
Where did you locate the fuse block?I have the two wires de-pinned but can’t find a good place for the fuse block. I am using Stackable Add-on fuse block so I can hook up both the switched and battery supply line so I can use the parking mode of the dash cam.
Sadly, I have not yet installed the fuse box.
Werkerb
Active Member
- Joined
- Jun 19, 2021
- Messages
- 48
- Reaction score
- 157
Understand. I will be working on this next week when it warms up a bit. If I figure out a good place I’ll let you know. Thanks.Sadly, I have not yet installed the fuse box.
NVYCHF
Active Member
Brutal_HO,Can I connect different gauge wires? 12awg to 24awg specifically.
Yes. I recommend using a but-splice crimp. You can strip the 24AWG wire long and fold it, or wrap it around the 12awg wire if the butt splice allows (has no stop in the middle).
Can I connect different wire materials? Copper and Aluminum - have seen online that special care needs to be taken when connecting these together.
Something that small, kept in the dry cab and well sealed isn't going to be a problem. low voltage wiring is less of an issue than high voltage (AC wiring).
My preference is to always use a gas-tight butt-splice with a proper ratchet crimp tool and sealed with marine shrink tubing (has glue inside).
Can I put the 5amp fuse that came with my dash cam in the fuse block for switch number 6? If I leave the original fuse in place, what would it do, or cause with regard to the dash cam function? Blown fuses, over heated wires, et cetera.
Do not replace the AUX fuse with the dashcam fuse (if even the same type). AUX1-AUX6 can take any of the fuses in the PDC (you can move them around) as long as you don't exceed the total allowed load on the PDC. Put in the lowest fuse that's in there (10A?) and leave your camera inline 5A fuse on the camera power wiring.
If your dashcam has park-mode, you'll want to wire that up to constant 12V.
Good afternoon All Knowing Moderator!!
I need another assist please. Current state; dash cam accessory wire (24 awg folded for connection (red)) connected to pigtail (Ram 12 awg) and plugged into Aux 6, dash cam battery wire (24 awg dead ended to not create short or ground (yellow)), black ground connected to body ground. Aux switches in OEM configuration. When ignition powered to accessory - dash cam does NOT power up, when engine running - dash cam does NOT power up.
Connections checked / crimped completely (slight tug test, no wire movement). Verified good solid "click" when connecting to Light Gray Aux connector. As you recommended, no fuses replaced and inline fuses provided with dash cam still in original condition / location.
Thank you for your time...and patience.
Be safe,
Randy
Brutal_HO,
Good afternoon All Knowing Moderator!!
I need another assist please. Current state; dash cam accessory wire (24 awg folded for connection (red)) connected to pigtail (Ram 12 awg) and plugged into Aux 6, dash cam battery wire (24 awg dead ended to not create short or ground (yellow)), black ground connected to body ground. Aux switches in OEM configuration. When ignition powered to accessory - dash cam does NOT power up, when engine running - dash cam does NOT power up.
Connections checked / crimped completely (slight tug test, no wire movement). Verified good solid "click" when connecting to Light Gray Aux connector. As you recommended, no fuses replaced and inline fuses provided with dash cam still in original condition / location.
Thank you for your time...and patience.
Be safe,
Randy
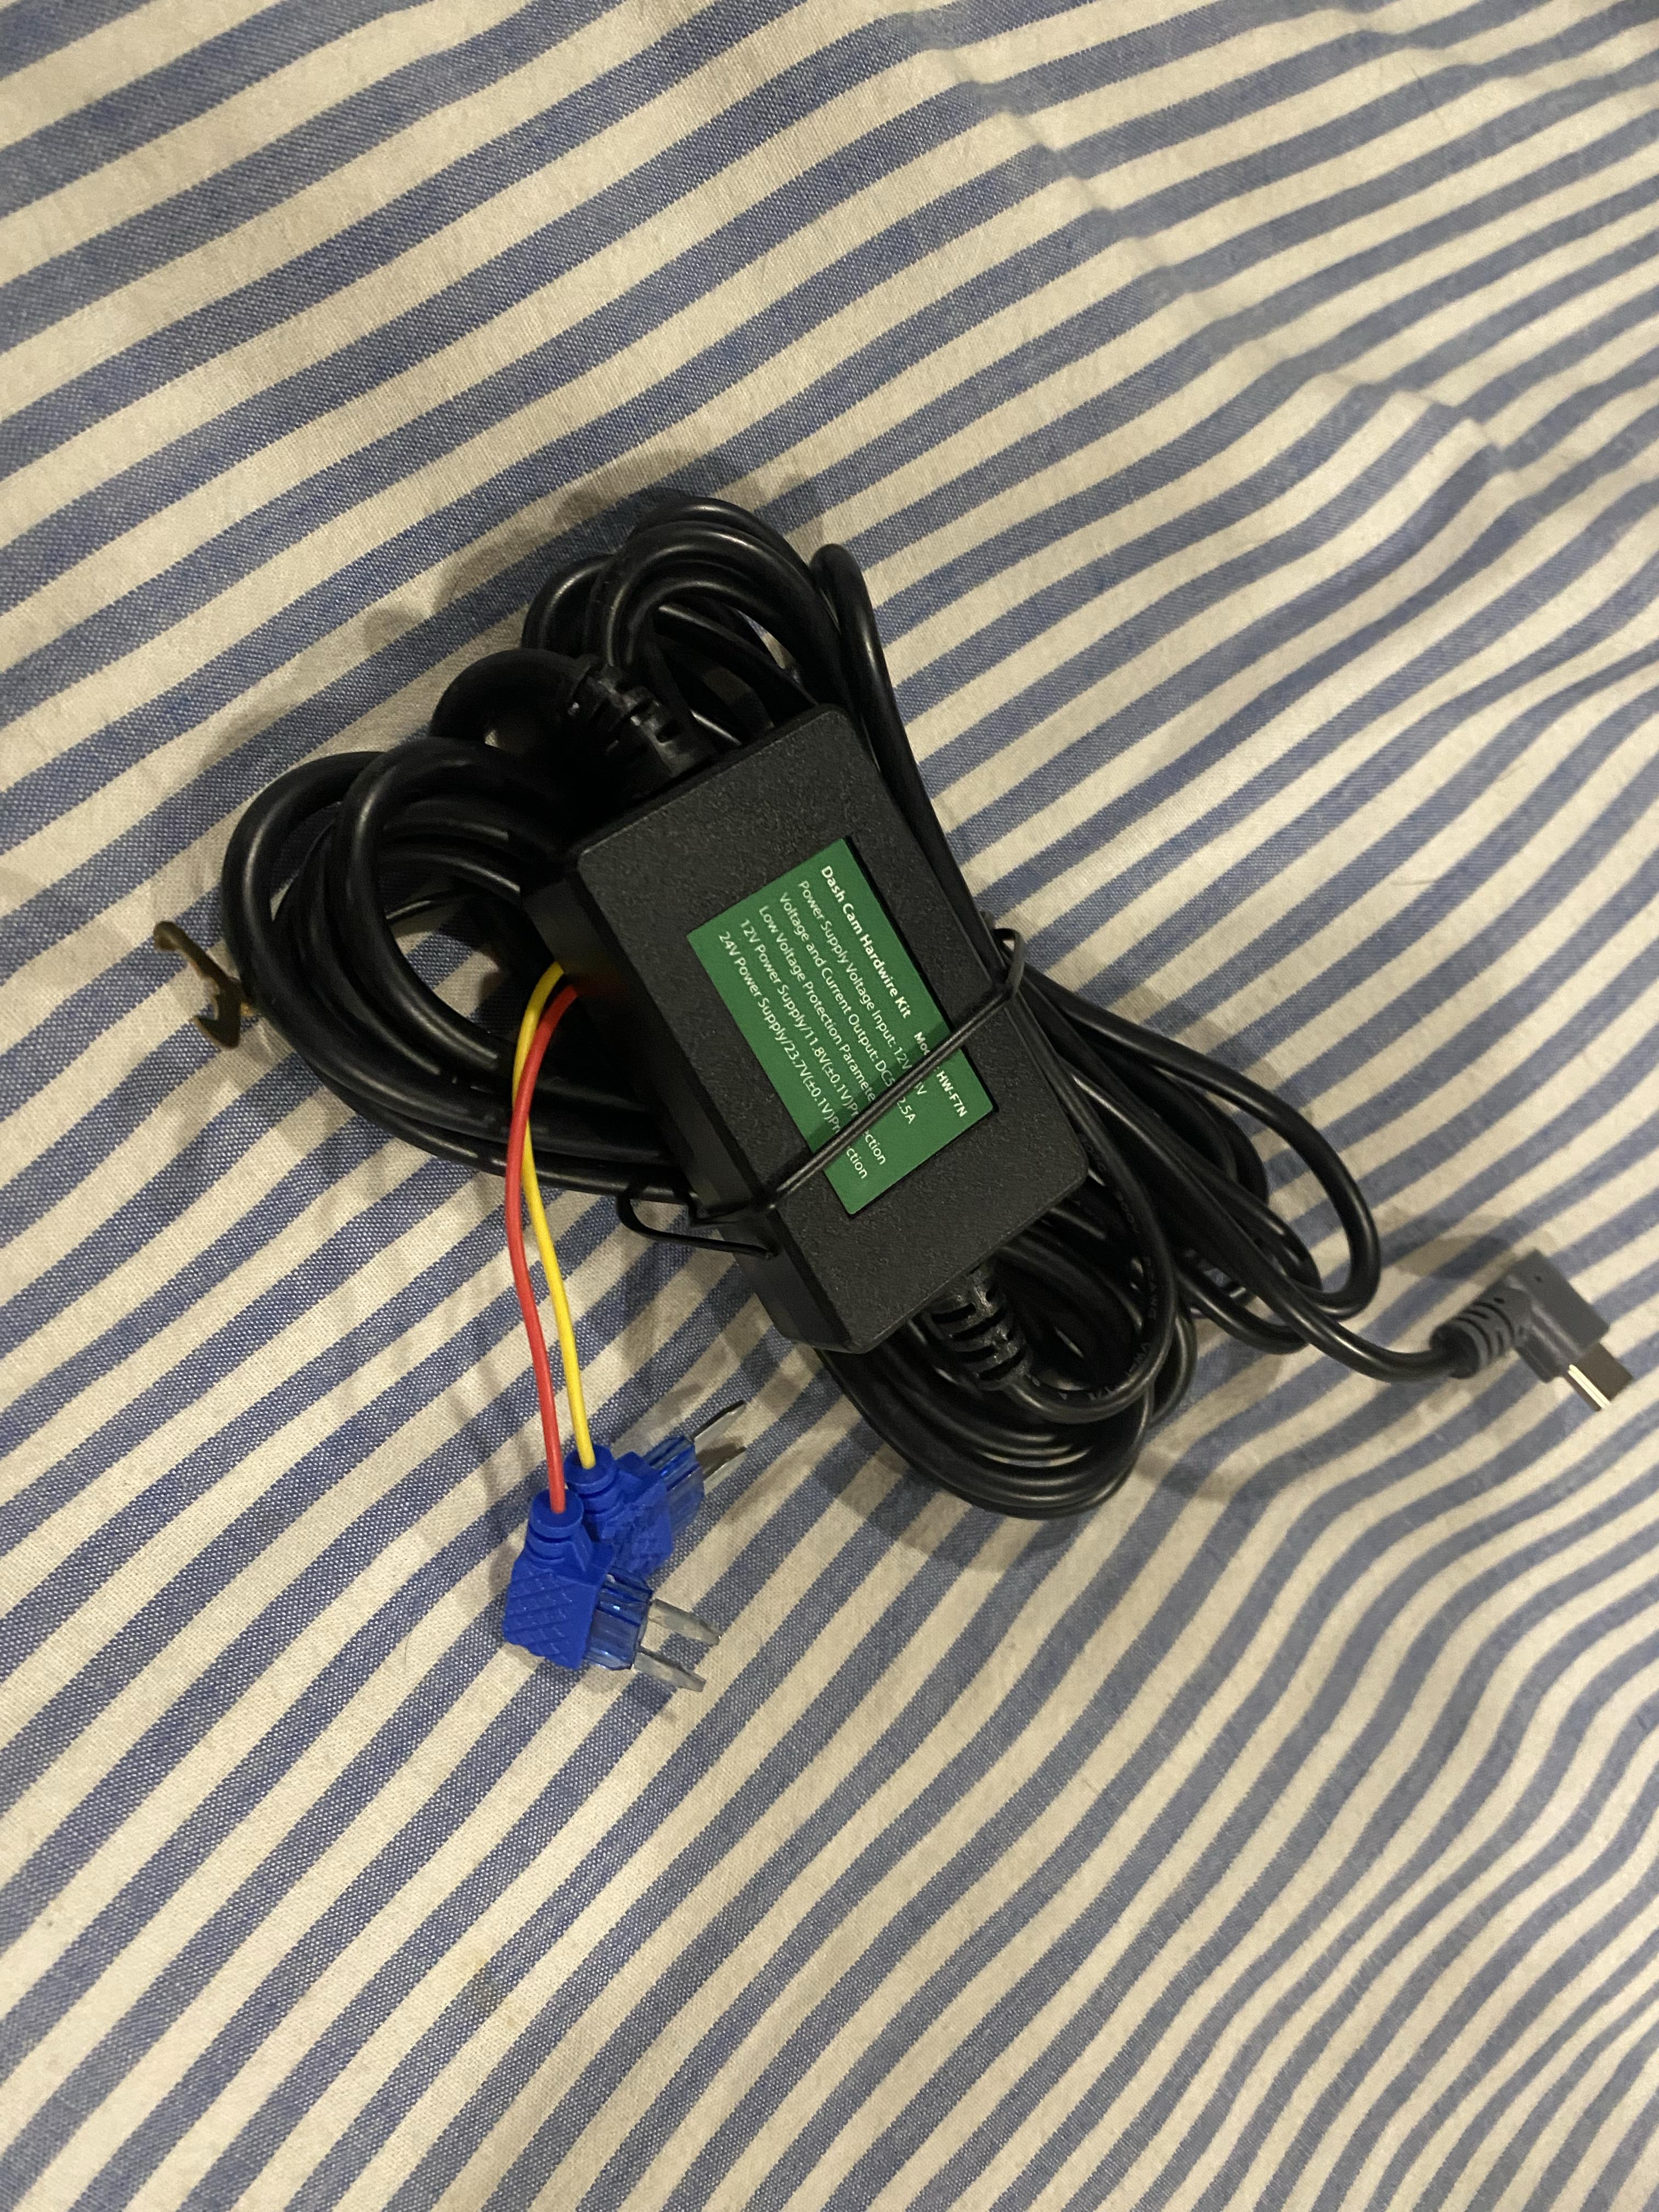
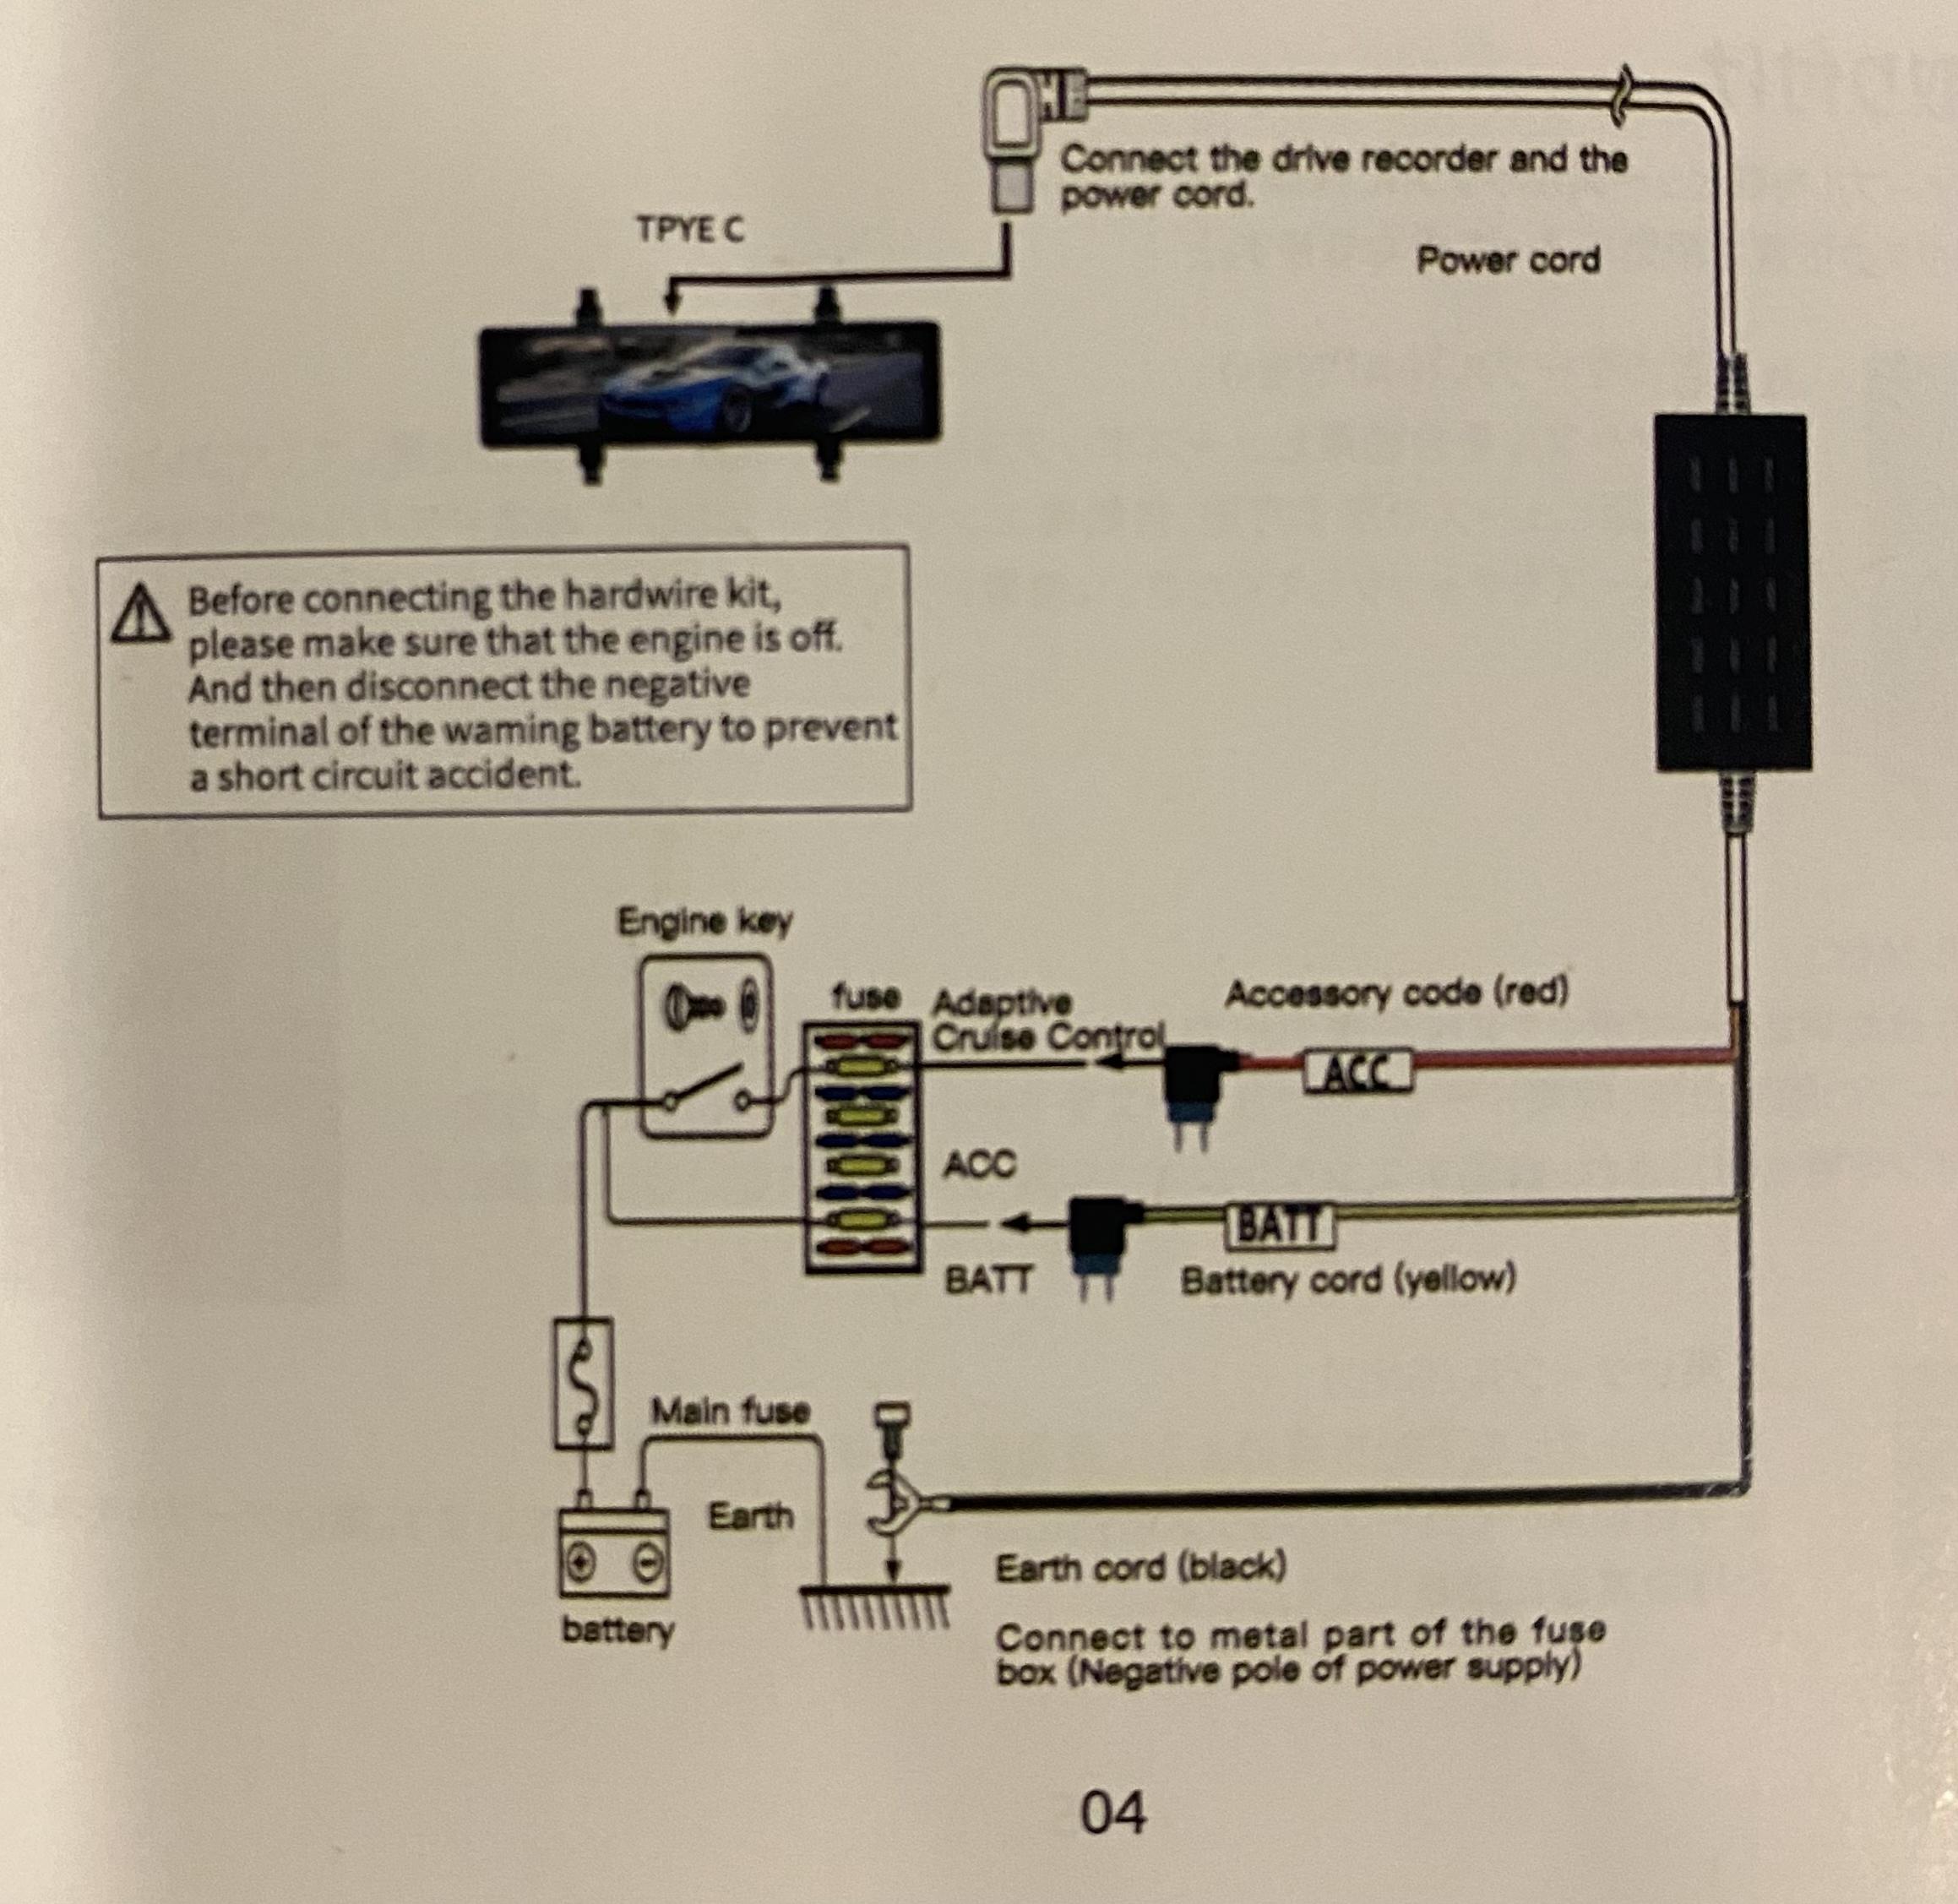
What does the wiring diagram for the dashcam power module show? Usually if you're not using parking guard (bat) you tie that BAT wire into IGN as well. Also, most hardwire kits I have seen, Yellow is ACC, Red is BAT.
Cantw82roam
New Member
- Joined
- Jan 1, 2021
- Messages
- 4
- Reaction score
- 11
This may have already been discussed, but to use the dash accessory outlet for a camera that needs switched power, you need to shift fuse 90 over to 91 (shift left in the 90/91 socket. That changes the outlet from battery fed to accessory fed. Very clever of MOPAR!
Sent from my iPhone using Tapatalk
rfullen280
Active Member
- Joined
- Jul 5, 2021
- Messages
- 331
- Reaction score
- 161
Resurrecting an old thread - does anyone know the part number for the D2641A connector and pins (for the jumper side?).
@Brutal_HO or @Jimmy07
@Brutal_HO or @Jimmy07
That grey jumper plug is also what brings power to the rear frame blunt cut Ignition and BAT wires. Explains why I've seen a few posts of owners not measuring any voltage there.
De-pin #1 and #4 if you need ignition or BAT inside the cab. I will probably use those for my dash cam.
View attachment 4286
Brutal,
I’m a little late to the party but I’m just getting around to hard wiring a Viofo A139 Pro dashcam into my 2019 3500HD SRW HO. I’ve got the outfitter package but I don’t want to use the Aux switches. I was going to run the dashcam hardwire through the firewall out to the PDC and use add-a-fuses until I saw what you were doing. Could you tell me if I’m planning this correctly in order to have IGN and BATT power connected to my dashcams power cables inside the cab.
I take the grey plug/wire harness and remove pins 1 & 4 and plug into the grey female connector close to the firewall. I then cut the #1 & 4 pins off and splice #1 wire with the ignition wire of the dashcam and splice #4 wire to the battery or constant wire of the dashcam. In the butt splices I’m going to put inline 3 or 5 amp micro 2 fuses. Attach my ground wire.
Does this resemble anything close to what you did prior to installing your fuseblock. Or have I totally misunderstood what’s going on here. Thanks for your input.
What you're doing will work and it's what I did as I didn't need any power at the rear of the truck at the time. If you don't want to burn those circuits, you can also get power in the overhead and/or A-pillars.
One of these days I'll get around to updating al the #1 posts asking about wiring to point to this primer that should answer 95% of all questions like this:
 hdrams.com
One of these days I'll get around to updating al the #1 posts asking about wiring to point to this primer that should answer 95% of all questions like this:
In Cab Power FAQ -- AUX Switch power info -- Chassis power info
This is a roll-up thread that should answer most if not all questions regarding power availability in the cab. A lot of the credit for technical detail goes to @Jimmy07 without whose help and guidance much of this info would be hard to assemble. There are other contributors, you know who you...
hdrams.com
Brutal,
Thanks for the quick response. I swear I read the aux pwr and dashcam threads 5 times each. Just needed a little confirmation that I was on the right track. And thanks for the thread covering all things In Cab Power. Obviously I missed that gem. I might plug the harness in tomorrow and put a meter on the wires and check the voltage. Still need to order the camera tomorrow. Anyway, thanks a million. It’s getting crazy out there. Stay safe and Happy Holidays.
Thanks for the quick response. I swear I read the aux pwr and dashcam threads 5 times each. Just needed a little confirmation that I was on the right track. And thanks for the thread covering all things In Cab Power. Obviously I missed that gem. I might plug the harness in tomorrow and put a meter on the wires and check the voltage. Still need to order the camera tomorrow. Anyway, thanks a million. It’s getting crazy out there. Stay safe and Happy Holidays.
TruckinThumper
Member
- Joined
- Nov 15, 2022
- Messages
- 38
- Reaction score
- 28
The DashCam Store should be able to help you.Same here in Austin. These aux switches are throwing me for a loop. Maybe I’ll get the dealer to wire up one circuit for me and then I’m good to go. My brain hurts from reading this thread
May as well pick up a blackview too

MEGA HO
Well-Known Member
Blackvue you mean? Blackview is a mobile phone manufacturer from Hong-Kong.The DashCam Store should be able to help you.
May as well pick up a blackview too
I have a Blackvue in my car in Thailand, don't remember which model but it's dual camera model. Not very happy how it worked over the years. I have a Voifo in my truck and a Thinkware in my wife's Infinity, all dual cam models, work much better than the blackvue.
TruckinThumper
Member
- Joined
- Nov 15, 2022
- Messages
- 38
- Reaction score
- 28
yup Blackvue.... LOL auto correct got me
I have had 2 from work for the last 6 or so years and one took a dump on me.
As for the ones we sell, very view are defective.
I highly recommend Blackvue
I have had 2 from work for the last 6 or so years and one took a dump on me.
As for the ones we sell, very view are defective.
I highly recommend Blackvue
ClawSS
Well-Known Member
Not that it matters, but I am a Viofo fan. Picking up a 4k Duo model today, Cyber Monday. Handing down my 2k Duo to my son's truck for Christmas.
gator6
Well-Known Member
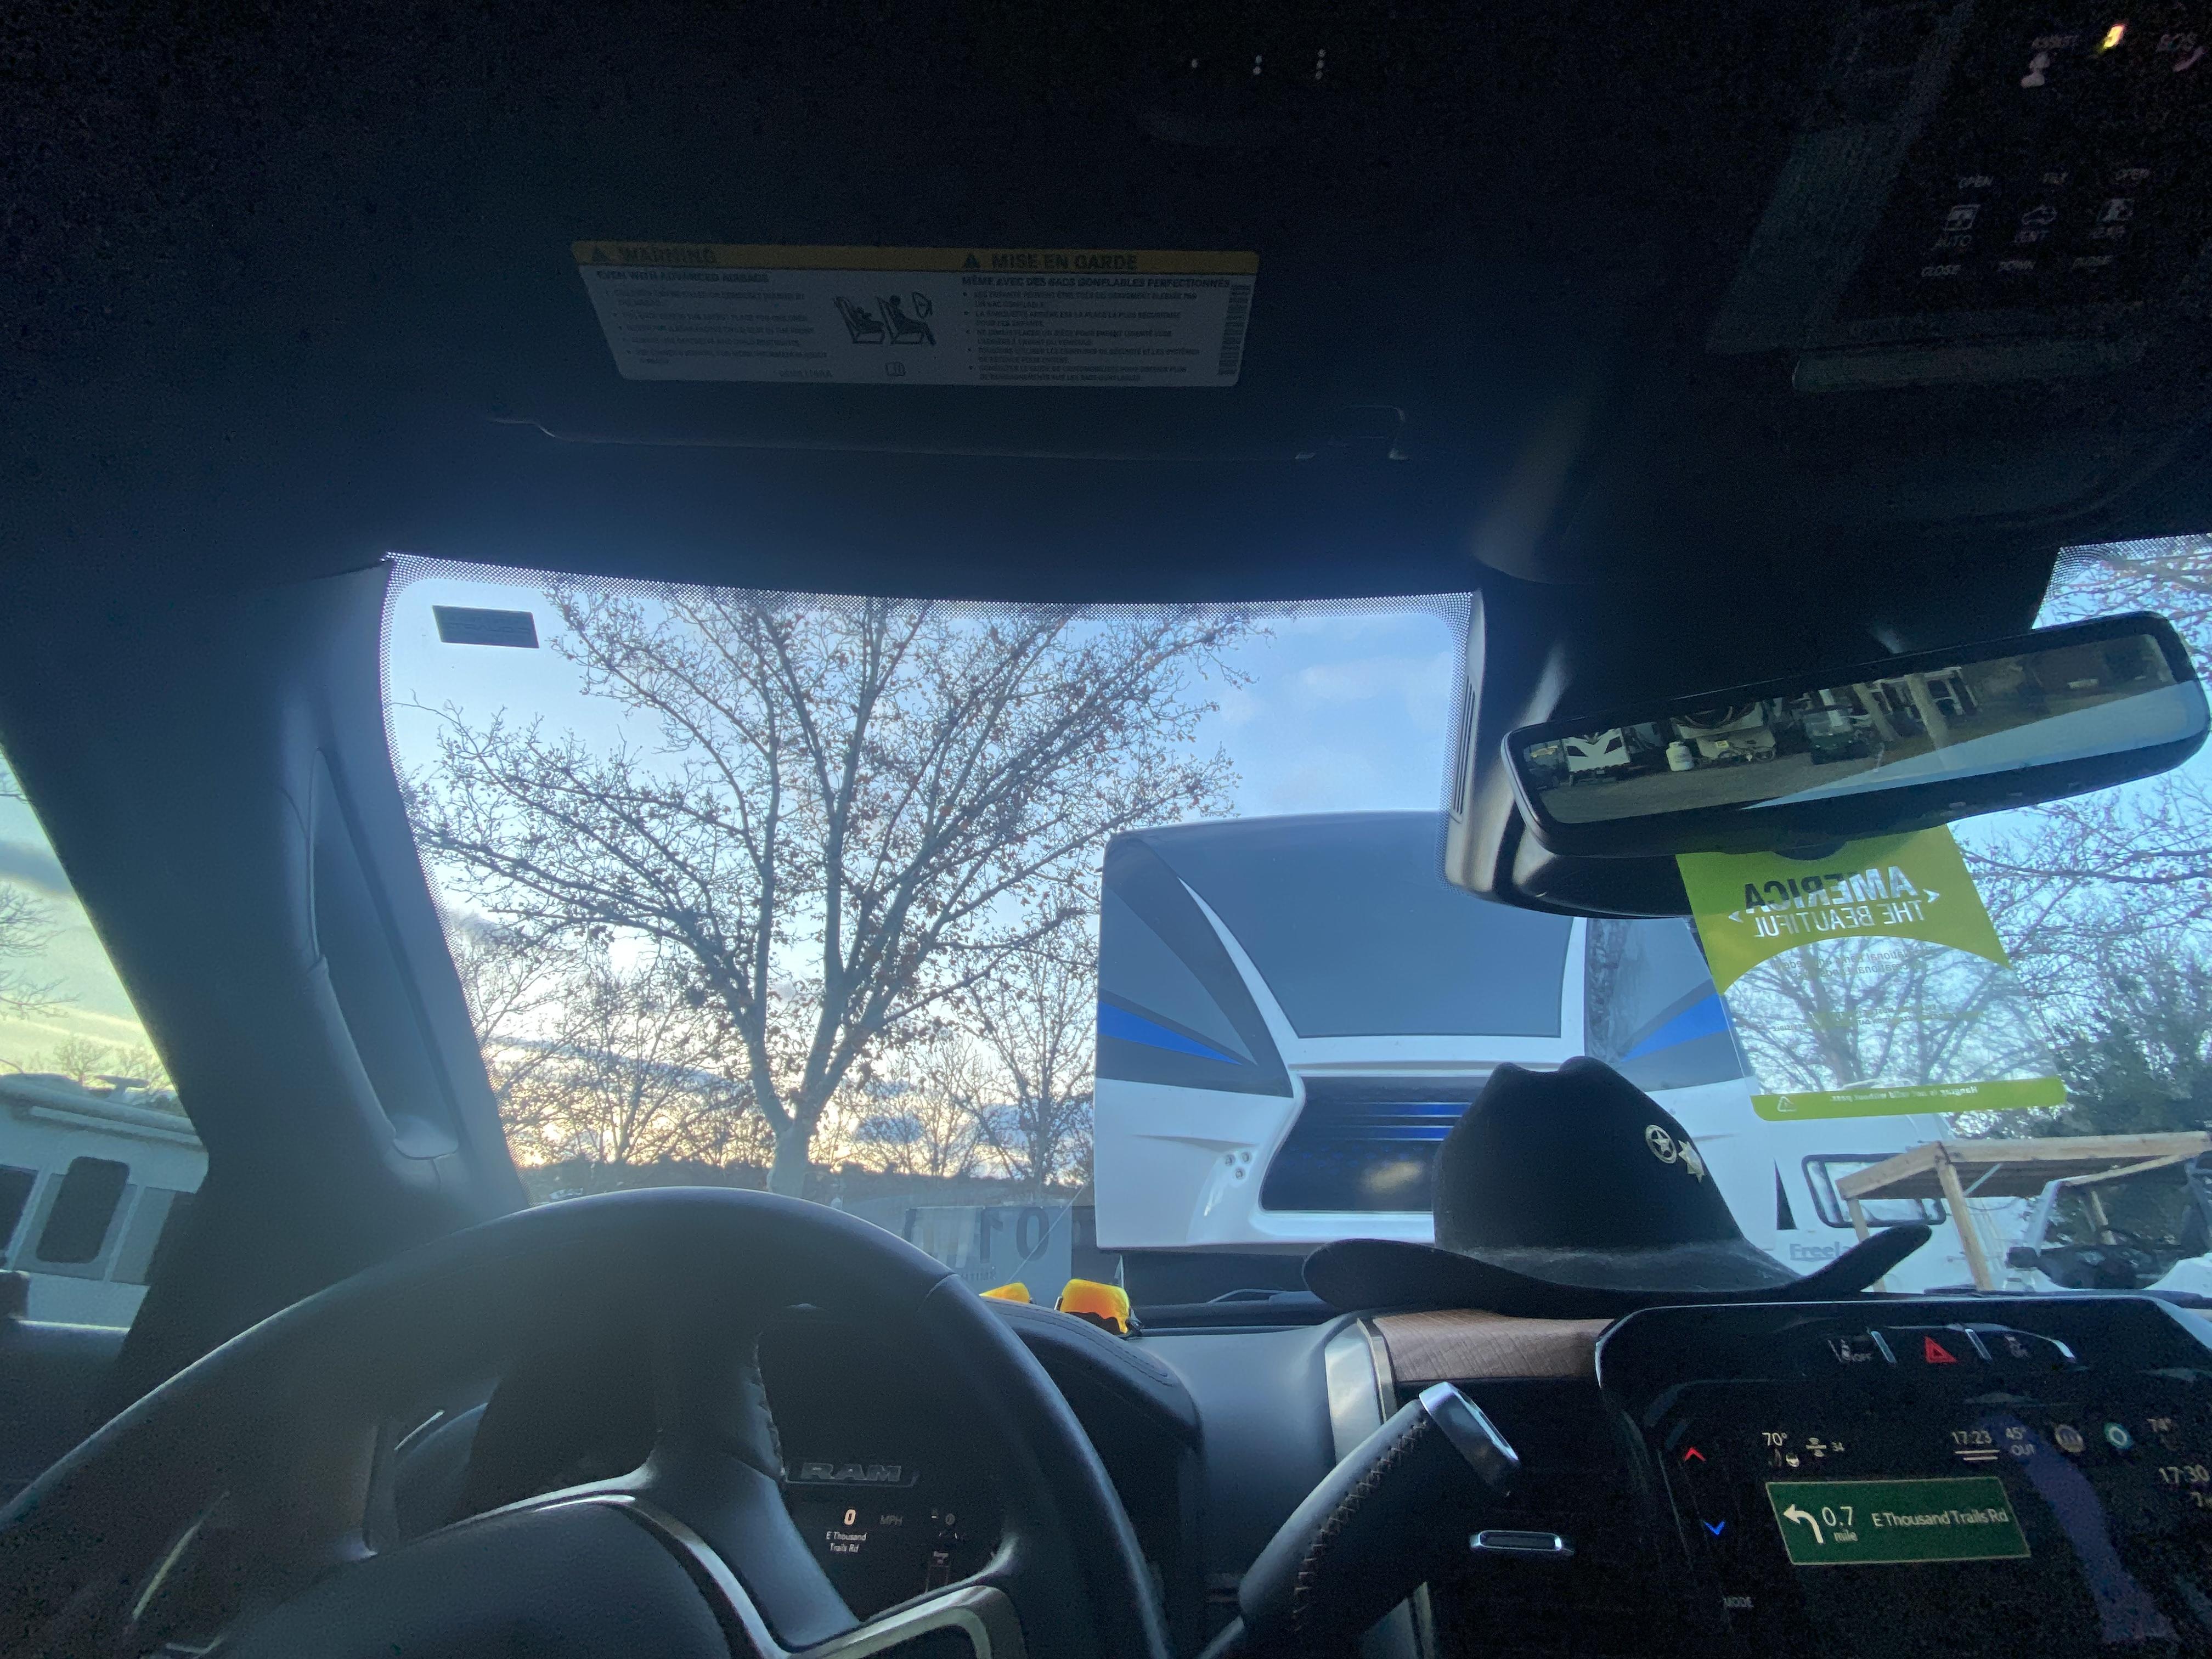
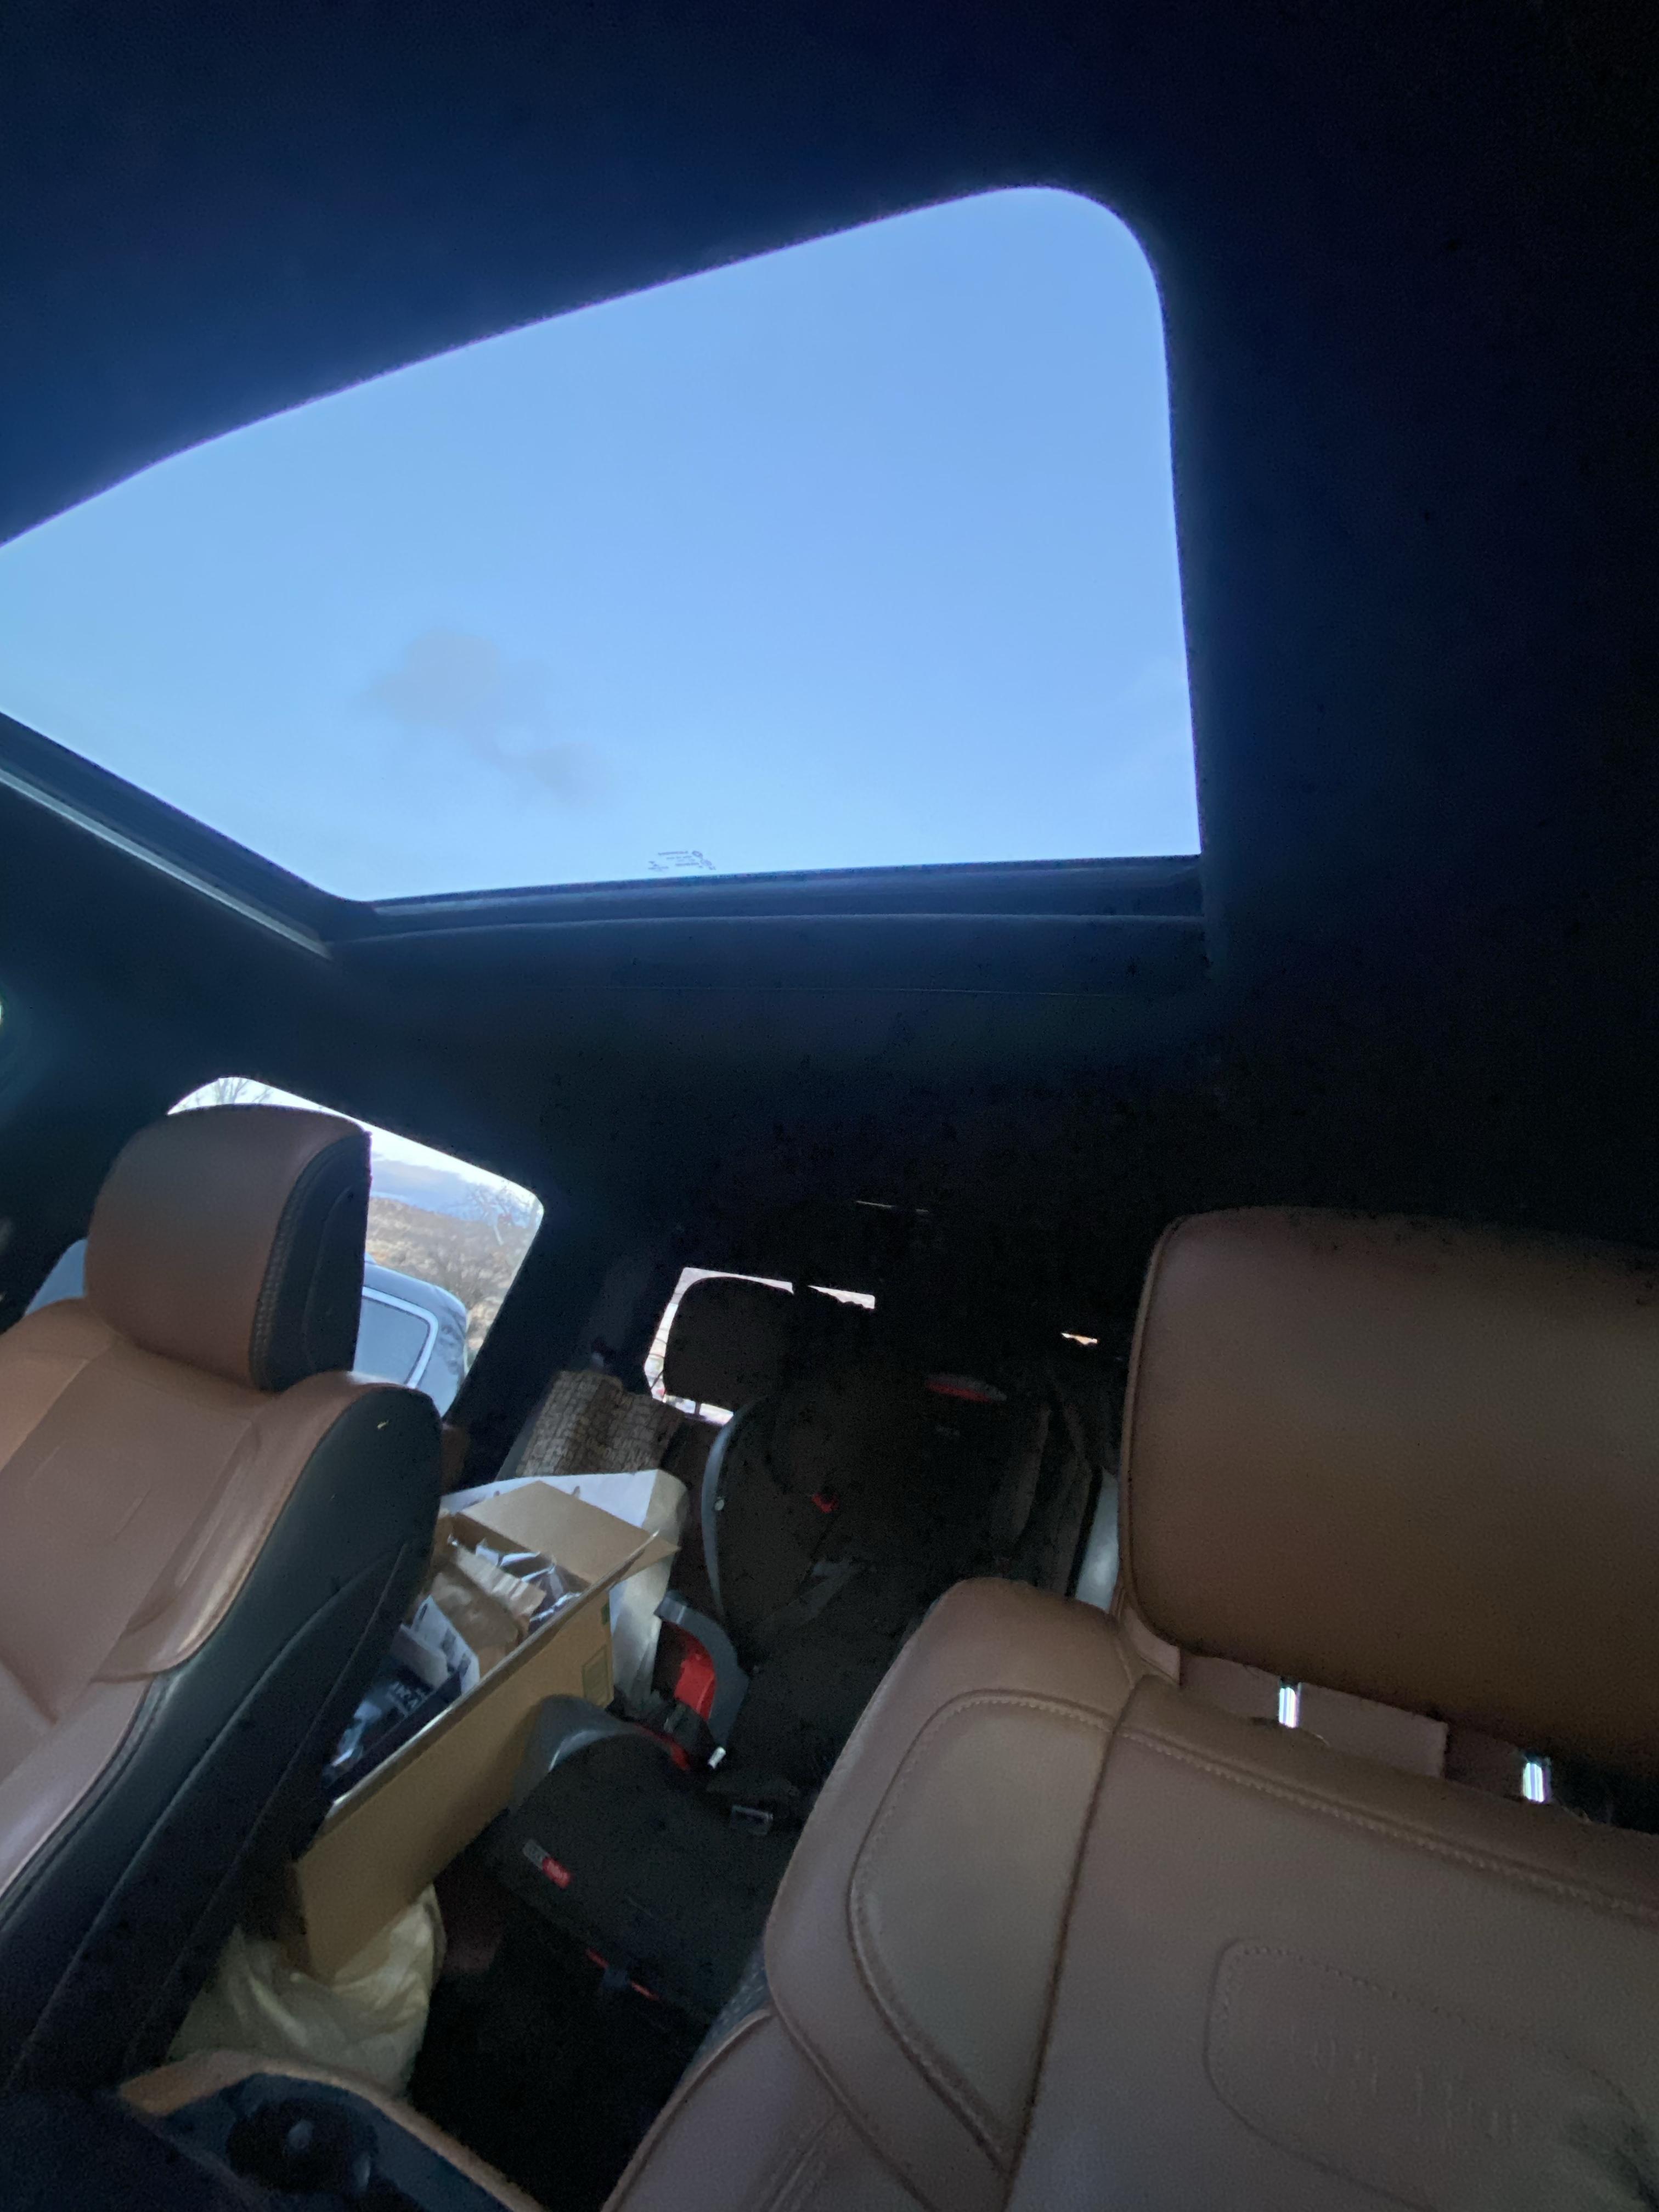
Hope I’m not resurrecting an old post. I just got a Red Tiger F7NP and want to put it in the ‘22. It has the large sensor around the mirror, sunroof, and sliding rear window.
Years ago, I installed cab overs on my ‘06, and put a CB in using the blank access panel that is located near the pedals on the 3rd Gens. Problem is I don’t see that access plate on the DRW. I’ve been told there is an access plate behind the dash, so may have to go that route.
Wondering if any of y’all have done an install like this, and what tips you may have going forward.
Sent from my iPhone using Tapatalk
Aaandroger
Well-Known Member
- Joined
- Dec 15, 2021
- Messages
- 155
- Reaction score
- 276
Hope I’m not resurrecting an old post. I just got a Red Tiger F7NP and want to put it in the ‘22. It has the large sensor around the mirror, sunroof, and sliding rear window.
Years ago, I installed cab overs on my ‘06, and put a CB in using the blank access panel that is located near the pedals on the 3rd Gens. Problem is I don’t see that access plate on the DRW. I’ve been told there is an access plate behind the dash, so may have to go that route.
Wondering if any of y’all have done an install like this, and what tips you may have going forward.
Sent from my iPhone using Tapatalk
Every connection that you need is in the upper console / mirror.
Connector for the tailgate button has 12v and ground.
Auto dim mirror has ACC ( pink with yellow stripe)
In Cab Power FAQ -- AUX Switch power info -- Chassis power info
This is a roll-up thread that should answer most if not all questions regarding power availability in the cab. A lot of the credit for technical detail goes to @Jimmy07 without whose help and guidance much of this info would be hard to assemble. There are other contributors, you know who you...
hdrams.com
I got the same Redtiger F7NP camera for Christmas. I found an adapter on Amazon, SimpleUSBPort Dash Cam Power Adapter (10-pin Type D) https://a.co/d/3Pix5Ls, I'm going to try. I think it was mentioned somewhere on here. I'm going to try the parking mode, if I can find a constant +12 in the mirror or overhead console.
Razzman
Well-Known Member
- Joined
- Jan 10, 2021
- Messages
- 379
- Reaction score
- 440
I used the Dongar adapter when I installed my Rove dash cam. Picked up a short right angle USB cable on Amazon to minimize the cable run and it works flawless, never worried about the constant power for the park mode as I rarely park anywhere to worry about it.I got the same Redtiger F7NP camera for Christmas. I found an adapter on Amazon, SimpleUSBPort Dash Cam Power Adapter (10-pin Type D) https://a.co/d/3Pix5Ls, I'm going to try. I think it was mentioned somewhere on here. I'm going to try the parking mode, if I can find a constant +12 in the mirror or overhead console.

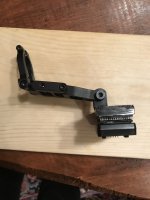
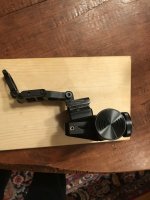
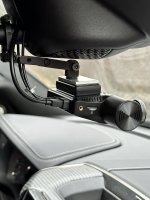
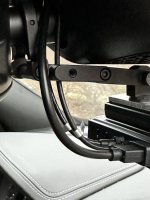
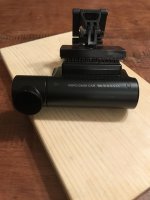
If any Viofo users are interested in using the Blendmount mirror mount vs mounting directly to the windshield. This is what I did.
Blendmount doesn’t make a mount for the Viofo cameras. They do make a mount for the GoPro. In the first modified version of the mount, I used a cutdown photography cheese plate, a GoPro camera adapter, and 3M Dual Lock attachment strips. The cheese plate has a 1/4” x 20 thread pattern which matches up with the GoPro adapter. I then attached the Dual Lock to the other side of the cheese plate and to the flat side of the Viofo GPS attachment module. The GoPro adapter, with attached cheese plate, screws onto the end of the Blendmount and the camera attaches to the GPS mount. The two pieces are the joined together with the 3M Dual Lock.
This all worked, but the added thickness of the cheese plate combined with the thickness of the Dual Lock resulted in a bulkier looking mount which was not what I wanted.
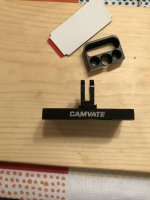
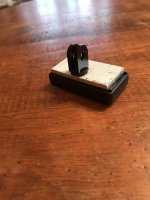
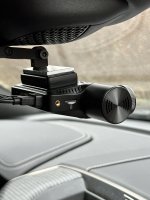
Version two. I cut a 1” x 2” piece of 1/8” aluminum flat plate. Drilled and tapped a 1/4” hole for the GoPro adapter and used 3M double sided tape to stick the Viofo GPS attachment module to the aluminum plate. I haven’t painted the plate but the end result is much better looking. The camera is also up higher and out of the way behind the mirror so it doesn’t block my vision as much as the windshield mount.
Blendmount doesn’t make a mount for the Viofo cameras. They do make a mount for the GoPro. In the first modified version of the mount, I used a cutdown photography cheese plate, a GoPro camera adapter, and 3M Dual Lock attachment strips. The cheese plate has a 1/4” x 20 thread pattern which matches up with the GoPro adapter. I then attached the Dual Lock to the other side of the cheese plate and to the flat side of the Viofo GPS attachment module. The GoPro adapter, with attached cheese plate, screws onto the end of the Blendmount and the camera attaches to the GPS mount. The two pieces are the joined together with the 3M Dual Lock.
This all worked, but the added thickness of the cheese plate combined with the thickness of the Dual Lock resulted in a bulkier looking mount which was not what I wanted.
Version two. I cut a 1” x 2” piece of 1/8” aluminum flat plate. Drilled and tapped a 1/4” hole for the GoPro adapter and used 3M double sided tape to stick the Viofo GPS attachment module to the aluminum plate. I haven’t painted the plate but the end result is much better looking. The camera is also up higher and out of the way behind the mirror so it doesn’t block my vision as much as the windshield mount.
Attachments
-
 C38EFB95-F77C-428F-BFE6-74807815559A.jpeg403.6 KB · Views: 30
 -
 743CCA66-31D7-49FC-87DA-6B26F881D20D.jpeg279.8 KB · Views: 29
 -
 B3982B9C-BCA2-49A7-9534-1E81F780DAC0.jpeg361.3 KB · Views: 28
 -
 982658A6-45A8-4F8F-8296-A541BCCFB31C.jpeg338.1 KB · Views: 26
 -
 8E156F4C-747C-4E4D-88BB-C6F2B9FD4DEF.jpeg393.3 KB · Views: 26
 -
 4569ED10-34D5-450E-A856-0161FEC5D67D.jpeg295.9 KB · Views: 34
 -
 AB41435D-28B2-4C98-B3CE-C1108BCFF247.jpeg362.4 KB · Views: 35
 -
 F68CDD43-1286-40D4-87C4-CAAF9536CC1D.jpeg383.4 KB · Views: 37
 -
 35325ED6-43FC-47C4-BDD9-566000B5DE77.jpeg339 KB · Views: 36
 -
 19D0E6F5-39AC-413E-B83B-76EED4AA388C.jpeg304.7 KB · Views: 35
Users who are viewing this thread
Total: 1 (members: 0, guests: 1)