Ram Heavy Duty Forum
You are using an out of date browser. It may not display this or other websites correctly.
You should upgrade or use an alternative browser.
You should upgrade or use an alternative browser.
Dan's 2023 2500 Tradesman UNLimited
- Thread starter 44Dan44
- Start date
NHOverland
Well-Known Member
Thank you!Super Clean! Nice work.
Eatonpcat
Well-Known Member
Great job, can you do this for me?? lolThank you!
Sure can! Won't be cheap thoughGreat job, can you do this for me?? lol
Last edited:
I posted a bit of this elsewhere so ICYMI here are the full details.
I REALLY like the surround view systems on cars and trucks, I have it on current vehicles and past vehicles but for this theme of my UNlimited Tradesman I did not want to pay $2200 for the towing technology group to get it and any possible forced option that might be required. More importantly, while the systems are great as far as they go, they leave me wanting more.... I want it always on if I want it on, I think it'd be really cool have all those cameras also act as a dashcam and record events. There is really no way to do that with the stock system, there are some half baked surround view systems out there that aren't quite there yet, the closest best things are coming from Jeep-world as trail cameras that are good but pretty expensive and still limited on capabilities so what's a fella to do?
$249 later.....
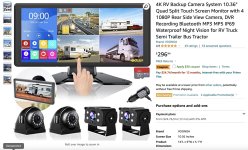
The coupon fluctuates so be on the look out if you're interested. I have the long bed and the cables supplied are more-than adequate to get any where you want to go on the truck.
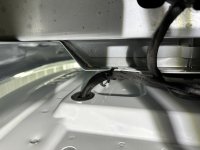
From the front of the truck I went down the passenger side frame rail with front cameras cables, crossed over to the drivers side and met up with the rear camera cables and entered the cab drivers side rear at a pre-existing grommeted hole.
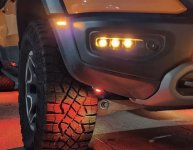
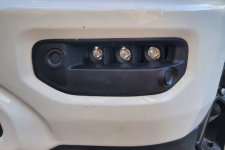
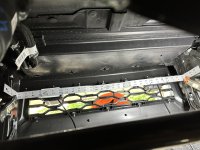
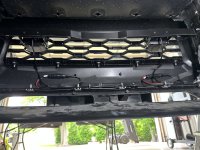
To mount the cameras up front I made a bracket from material on hand that day, planning it just as a template, and I would pick up some aluminum stock later to permanently mount. The template worked too well so I just painted it and rolled with it. If you have been following along you'll recall I forgot to order tow hooks with my truck so I pre-ordered hooks and bolts and the correct lower grille for tow hooks so I had no qualms cutting into my lower grille as I have a replacement on hand if it all went wrong, it didn't. I still have the lower grille as I chose to cut out for the tow hooks as well versus the more-open correct grille for tow hooks. Simple cuts with a hacksaw blade. Not much removed at all.

I REALLY like the surround view systems on cars and trucks, I have it on current vehicles and past vehicles but for this theme of my UNlimited Tradesman I did not want to pay $2200 for the towing technology group to get it and any possible forced option that might be required. More importantly, while the systems are great as far as they go, they leave me wanting more.... I want it always on if I want it on, I think it'd be really cool have all those cameras also act as a dashcam and record events. There is really no way to do that with the stock system, there are some half baked surround view systems out there that aren't quite there yet, the closest best things are coming from Jeep-world as trail cameras that are good but pretty expensive and still limited on capabilities so what's a fella to do?
$249 later.....

The coupon fluctuates so be on the look out if you're interested. I have the long bed and the cables supplied are more-than adequate to get any where you want to go on the truck.
From the front of the truck I went down the passenger side frame rail with front cameras cables, crossed over to the drivers side and met up with the rear camera cables and entered the cab drivers side rear at a pre-existing grommeted hole.

To mount the cameras up front I made a bracket from material on hand that day, planning it just as a template, and I would pick up some aluminum stock later to permanently mount. The template worked too well so I just painted it and rolled with it. If you have been following along you'll recall I forgot to order tow hooks with my truck so I pre-ordered hooks and bolts and the correct lower grille for tow hooks so I had no qualms cutting into my lower grille as I have a replacement on hand if it all went wrong, it didn't. I still have the lower grille as I chose to cut out for the tow hooks as well versus the more-open correct grille for tow hooks. Simple cuts with a hacksaw blade. Not much removed at all.


The rear cameras are mounted on the bed rails for now and I have plenty of cable available for a future ladder rack.
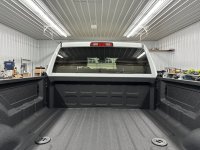
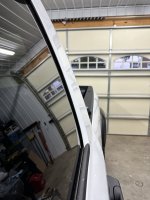
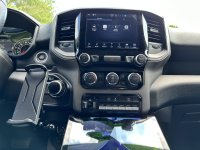
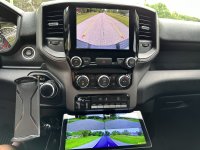
Inside the cab, my goal was to have the monitor mounted below the upfitter switches as seen below. I did not want anything on the dash or hanging from the mirror, and since I do not have a full center console this made sense to me.
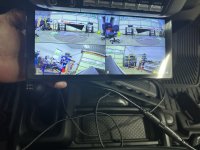
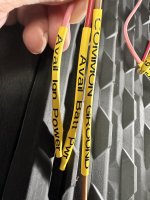
For power I tapped the pass-throughs I created upthread. Red to ignition power, yellow to battery power to retain settings, and of course ground. I did not want or choose to use any of the included trigger wires that came with this system, i.e. turn signal activation, reverse activation, etc. I just went simple all-on, all the time.
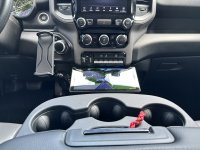


Inside the cab, my goal was to have the monitor mounted below the upfitter switches as seen below. I did not want anything on the dash or hanging from the mirror, and since I do not have a full center console this made sense to me.

For power I tapped the pass-throughs I created upthread. Red to ignition power, yellow to battery power to retain settings, and of course ground. I did not want or choose to use any of the included trigger wires that came with this system, i.e. turn signal activation, reverse activation, etc. I just went simple all-on, all the time.


Last edited:
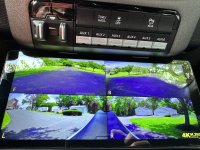
And lastly, just some shots with traffic cones to demonstrate what's in-view as I currently have the cameras mounted. I'm pretty happy with the "surround view" I have created.
Front Cameras:
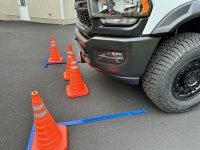
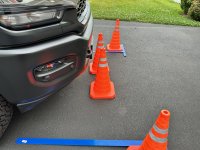
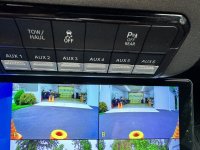
And with those cones in place, as close as they are, here is the view in the monitor. It's approx 2 foot at the corners from the bumper, and straight on, you can't get much closer, handy for parking the long boy. All 4 cones from above pics are in view.
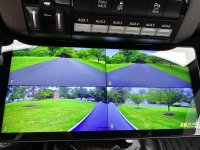
In the rear I've placed six cones around. In conjunction with the reverse camera in the truck I think its pretty good.
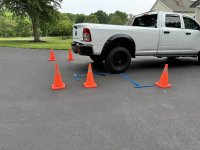
And those cones as seen in the monitor. Obviously they are very low so if I can see them, I'm happy.
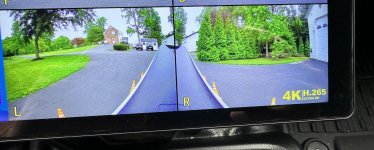
Front Cameras:


And with those cones in place, as close as they are, here is the view in the monitor. It's approx 2 foot at the corners from the bumper, and straight on, you can't get much closer, handy for parking the long boy. All 4 cones from above pics are in view.

In the rear I've placed six cones around. In conjunction with the reverse camera in the truck I think its pretty good.

And those cones as seen in the monitor. Obviously they are very low so if I can see them, I'm happy.

Last edited:
I posted a bit of this elsewhere so ICYMI here are the full details.
I REALLY like the surround view systems on cars and trucks, I have it on current vehicles and past vehicles but for this theme of my UNlimited Tradesman I did not want to pay $2200 for the towing technology group to get it and any possible forced option that might be required. More importantly, while the systems are great as far as they go, they leave me wanting more.... I want it always on if I want it on, I think it'd be really cool have all those cameras also act as a dashcam and record events. There is really no way to do that with the stock system, there are some half baked surround view systems out there that aren't quite there yet, the closest best things are coming from Jeep-world as trail cameras that are good but pretty expensive and still limited on capabilities so what's a fella to do?
$249 later.....
View attachment 58599
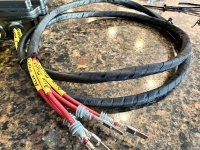
The coupon fluctuates so be on the look out if you're interested. I have the long bed and the cables supplied are more-than adequate to get any where you want to go on the truck.
From the front of the truck I went down the passenger side frame rail with front cameras cables, crossed over to the drivers side and met up with the rear camera cables and entered the cab drivers side rear at a pre-existing grommeted hole.
View attachment 58600
To mount the cameras up front I made a bracket from material on hand that day, planning it just as a template, and I would pick up some aluminum stock later to permanently mount. The template worked too well so I just painted it and rolled with it. If you have been following along you'll recall I forgot to order tow hooks with my truck so I pre-ordered hooks and bolts and the correct lower grille for tow hooks so I had no qualms cutting into my lower grille as I have a replacement on hand if it all went wrong, it didn't. I still have the lower grille as I chose to cut out for the tow hooks as well versus the more-open correct grille for tow hooks. Simple cuts with a hacksaw blade. Not much removed at all.
View attachment 58601
View attachment 58602
View attachment 58603
Follow up note. One camera was flickering, contacted seller and they replaced quickly. Reminder to myself to add a nice review to their listing.

As I knew would happen, and as happens to all of us, summer has had me busy but finally got the rear seat delete / flat floor / dogs are people too project completed.
I like the GooseGear kit except for the fact that its slippery and first priority is my dogs comfort and not having them step on awkward and uneven surfaces. While I could have done some hatches pretty easily to access the minimal cubbies underneath the platform it just wasn't a priority so here is my simple project.
Templating with the box my bushwhacker flares came in.
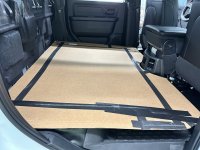
I am using ¾" Plywood for the base, I have done this before in other vehicles, I don't like wobbly or deflecting, just nice and sturdy so this is what I use. Here is a full 4x8 sheet for perspective on how much is used.
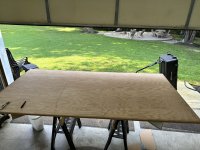
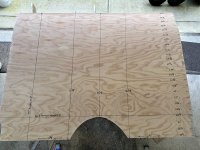
Here I have the sheet marked out with measurements that will get you real close if you decide to do this and skip the templating.
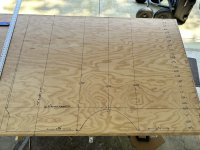
And after cutting. The 46-⅝" dimension is totally dependent on how far forward/back you typically keep your front seats so expect to adjust that minus up to 3 inches at max rearward.
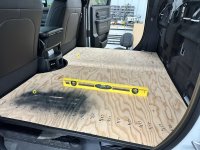
Here I am looking for level. Because of the thickness of the plywood I only required 2 6-¼" 1 inch dowels, on on each side to provide support and level. The supports end up in the floorboard on each side represented by the yellow dots in this photo. The tape on the edges is just an - avoid jagged edges and splinters - as you take this in/out of the truck for final fitment/upholstery.
I like the GooseGear kit except for the fact that its slippery and first priority is my dogs comfort and not having them step on awkward and uneven surfaces. While I could have done some hatches pretty easily to access the minimal cubbies underneath the platform it just wasn't a priority so here is my simple project.
Templating with the box my bushwhacker flares came in.

I am using ¾" Plywood for the base, I have done this before in other vehicles, I don't like wobbly or deflecting, just nice and sturdy so this is what I use. Here is a full 4x8 sheet for perspective on how much is used.

Here I have the sheet marked out with measurements that will get you real close if you decide to do this and skip the templating.

And after cutting. The 46-⅝" dimension is totally dependent on how far forward/back you typically keep your front seats so expect to adjust that minus up to 3 inches at max rearward.

Here I am looking for level. Because of the thickness of the plywood I only required 2 6-¼" 1 inch dowels, on on each side to provide support and level. The supports end up in the floorboard on each side represented by the yellow dots in this photo. The tape on the edges is just an - avoid jagged edges and splinters - as you take this in/out of the truck for final fitment/upholstery.

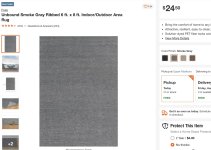
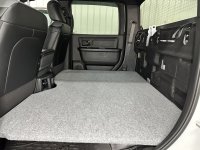
And here with indoor/outdoor carpet from Home Depot, really good stuff, easy clean, doesn't really collect hair like regular upholstery carpet and cheapish, one roll for the whole project including doing the back wall.
Templating for the back wall

Quick trip for a piece of ½" thick for the back wall, and why I love a long bed
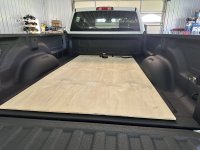


Templating for the back wall

Quick trip for a piece of ½" thick for the back wall, and why I love a long bed

Finished, I have tie downs that I am going to use but at the last second I used the straps that are already there behind the seat for now, hard to find a black flat washer when you need one.
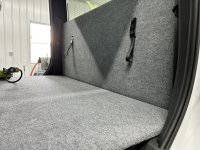
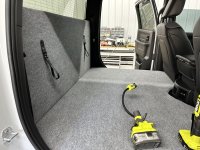
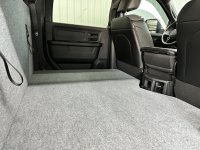
$90 for ¾" Plywood with some leftover, cheaper is available depending on grade you choose
$45 for ½" Plywood with some leftover, cheaper is available depending on grade you choose
$25 for the indoor/outdoor carpet, enough for floor and back wall with some leftover
$10 for the tie-downs along with 2 longer M8 bolts to secure the back wall
Happy dogs $Priceless
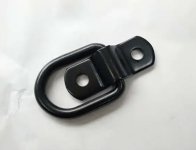
Here are the tie-downs I will replace the straps with when I find some washers.

oregonsteelhead
New Member
- Joined
- Jul 25, 2023
- Messages
- 8
- Reaction score
- 8
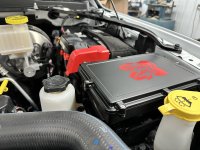
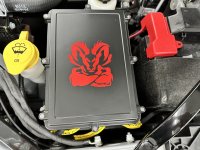
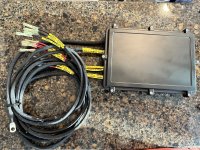
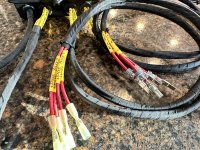
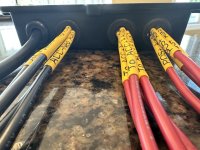
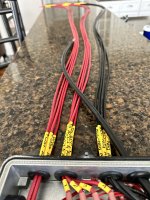
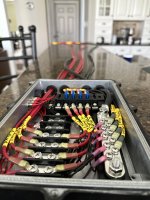
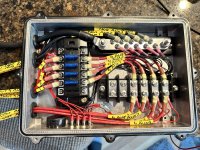
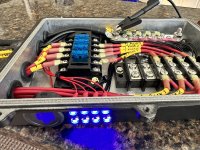
@44Dan44 I looked hard thinking there is no way this wasn't a kit, but I searched and could not find anything. Did you put this distribution box together?! Do you have a parts list?? Awesome work, your **** is insane and I love it!!
Users who are viewing this thread
Total: 3 (members: 0, guests: 3)

