Ram Heavy Duty Forum

Register a free account today to become a member! Once signed in, you'll be able to participate on this site by adding your own topics and posts, as well as connect with other members through your own private inbox!

What did you do TO your RAM today?

Great White North Eh

Squish Cat - And So
Joined
Nov 10, 2019
Messages
1,742
Reaction score
2,876
Installed MOLLE visor panels, black lug nuts, and a bath after hauling a load out to our blast site in Central Oregon.

Nose to nose photo is my first RAM 2007 2500 short bed, I sold it to my dad in 2008 after getting laid off and finally replaced it last year with Midnight. We joke that he has the young kid truck and I have the grandpa truck.
How big are the ****ter Sheets that come off them rolls ??? :eek:
 

jake2544

New Member
Joined
Dec 16, 2020
Messages
16
Reaction score
23
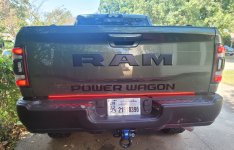
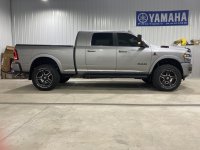
I Did the passive entry install on my 2500 Bighorn. When I traded my 1500 Laramie for the 6.7l Cummins 2500, the passive entry turned out to be the one thing I missed the most from my 1500. To be honest, I didn’t realize my 2500 did not have the passive entry until after taking delivery on my truck. I came out of Home Depot to my truck and grabbed the drivers door handle to unlock the door. It was at that moment that I realized I had f’ed up! hahaha. I had to actually take the key fob out of my pocked to unlock the door! Who does that anymore!!
I’m so glad I came across 
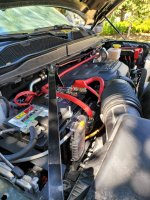
@Jimmy07 post on the forum regarding adding passive entry! I ordered all the parts and the wiring harness from @Jimmy07 and followed the directions to include this must have function to my 2500. Highly recommended if your truck doesn’t have passive entry.
Same, traded my 1500 Laramie for 2500 Bighorn and miss that option as well. What was the total cost ?
 

Alligator John

Well-Known Member
Joined
Jan 26, 2023
Messages
337
Reaction score
587
Today's project for the Power Wagon was a Putco tailgate light bar. I thought outside the box on this one thinking there has to be a better way to install this thing. What I did was use 60x10x5mm rare earth magnets. I stacked two magnets side by side for each mounting clip which equaled the width of the clip. They are stuck to the plastic clips with the double sided tape that comes with the kit. In the picture the magnets look like they are stacked on top of each other, but that is a reflection in the paint. The trim around the spare tire access hole is just a hair over 5mm thick. Thus why I chose that thickness so the bar can set over the hole. I did use 5 of the plastic mounting clips, but the putco bar only comes with 4. Just extra measure because I had some extra clips due to the first light bar I ordered being folded in half by USPS.

So no removing tailgate, no measuring to place bar. Instead the assembly with magnets attached just smacked into place once I held it within a few inches of the metal. The magnets could then be bumped into the best position from there. This was a plug and play harness, so all I had to do was lower the spare tire a little to access the plug at the back of the bumper to plug the wiring harness inline with it.

I did find there is a slight delay between the taillights and light bar. Maybe less than a second. There were some quick splice snap wire connectors in the kit, but not mentioned in the instructions what they are for. I figured out they are probably so the turn signal wires can be spliced with the wires to the bulbs to sync with the light bar. I will live with the delay and think it looks fine the way it is. I am not going to splice any wires on a new truck. My purpose for it is safety anyway or to be more noticed by the tailgater on a phone. So though advertised as synced with taillights know that there is that catch if you buy one. For the Ram at least. And yet to be seen, though I don't expect much, I am curious how much light I can get from the reverse light aspect of it. Magnets came from ebay and really cheap. So there it is. Fairly fast easy install using the magnets. If I have any problems with it in the future, I will bump this post up to share.
 

Attachments

  • 20230728_160205.jpg
    20230728_160205.jpg
    521.8 KB · Views: 64
  • 20230728_160225.jpg
    20230728_160225.jpg
    987.1 KB · Views: 64
Last edited:

Alligator John

Well-Known Member
Joined
Jan 26, 2023
Messages
337
Reaction score
587
Today's project was a Powertrax Pro MX bed cover. Supplied instructions did not match, so it was confusing when I started, but it went in easier than i expected. I velcroed one key fob under the corner of bed and 2nd fob for now I paired to two of my homelink buttons. View attachment 60186
How I paired the key fob to my homelink buttons.
 

Wineaux

Member
Joined
Nov 2, 2022
Messages
8
Reaction score
45
Location
Cupertino, CA
Which flatbed did you go with?
An EBY Aluminum Flatbed. 9ft long, only 495 lbs. We opted for the 8" tall aluminum sides. No tool boxes.
647698aae6f0036433f121bf_IMG_2497%2012X8.jpg
 

Alligator John

Well-Known Member
Joined
Jan 26, 2023
Messages
337
Reaction score
587
Mostly finished installing the aux battery. NH Overland mount, Battery Doctor, Blue Sea Fuse Box, Not visible mounted under Battery Doctor is an AGT double output RF wireless controller. I still need to do some final clean up routing of wires and zip tie them and maybe some wire loom. I will move my bed cover wiring from direct to battery to the new fuse box. All my accessories, lights, arb comp, etc. as I install them will be wired off the auxiliary battery.
 

Attachments

  • 20230804_153219.jpg
    20230804_153219.jpg
    648.6 KB · Views: 56

Users who are viewing this thread

Top