Chemesherpa
Active Member
- Joined
- Jul 21, 2021
- Messages
- 48
- Reaction score
- 100
Hello all,
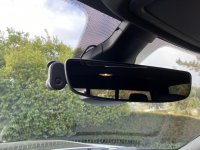
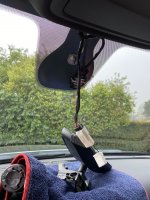
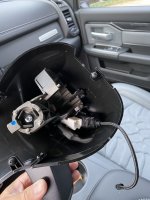
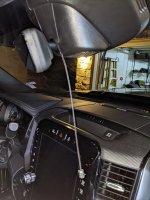
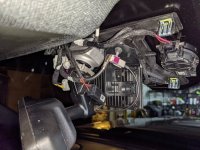
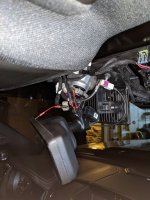
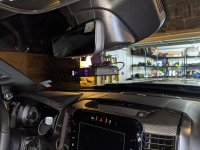
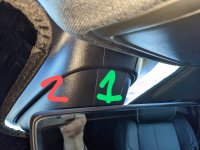
I wanted to make a separate thread specifically on how to remove this stupid plastic cover. I'm looking at doing a mirror tap but the removal of this thing is vaguely covered in many different threads as far as installing dash cameras and radar detectors using mirror taps, however I haven't found one that has a step by step direction on how to remove the plastic cover. Specifically what is attached in the pictures. I should mention this is a 2022 ram 2500 limited mega cab, with level 1 options so I have the driver assistant module behind the rear view mirror.
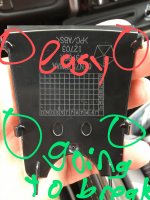
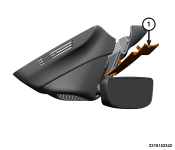
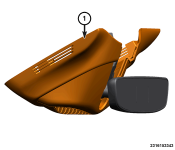
I have read in one post that the service manual just says "use a trim removal tool to remove" item 1, the small triangular piece directly behind the mirror. Then it says to use a trim stick to remove the larger plastic piece from the windshield.
Does anyone know of a video or a guide that shows arrows exactly where to put the trim removal tool or where up pry? I'm worried about breaking the 4 small plastic clips that retain what I have designated with a green 1. I was trying to see if I had something thin enough to slide in from the front to help push the plastic clips toward the center to release one at a time but it's an impossibly thin slit. My trim removal kit doesn't contain anything that thin and I'm almost thinking you'd need something as thin as a feeler gauge if you were to go at that route... That can't be right. I have also seen some people say that you are supposed to pull from the top in the header area, outward. Someone in another forum said they used a spring tool with a "t" handle and they placed it right where the 1 arrow is pointing to on the diagram of the small connector. Is this right? It seems like that would break the plastic clips if you just try to pull straight out... Shouldn't there be some release of tension on clips first?
I appreciate anyone who has experience doing this themselves or knows of where I might find better instructions.
I wanted to make a separate thread specifically on how to remove this stupid plastic cover. I'm looking at doing a mirror tap but the removal of this thing is vaguely covered in many different threads as far as installing dash cameras and radar detectors using mirror taps, however I haven't found one that has a step by step direction on how to remove the plastic cover. Specifically what is attached in the pictures. I should mention this is a 2022 ram 2500 limited mega cab, with level 1 options so I have the driver assistant module behind the rear view mirror.
I have read in one post that the service manual just says "use a trim removal tool to remove" item 1, the small triangular piece directly behind the mirror. Then it says to use a trim stick to remove the larger plastic piece from the windshield.
Does anyone know of a video or a guide that shows arrows exactly where to put the trim removal tool or where up pry? I'm worried about breaking the 4 small plastic clips that retain what I have designated with a green 1. I was trying to see if I had something thin enough to slide in from the front to help push the plastic clips toward the center to release one at a time but it's an impossibly thin slit. My trim removal kit doesn't contain anything that thin and I'm almost thinking you'd need something as thin as a feeler gauge if you were to go at that route... That can't be right. I have also seen some people say that you are supposed to pull from the top in the header area, outward. Someone in another forum said they used a spring tool with a "t" handle and they placed it right where the 1 arrow is pointing to on the diagram of the small connector. Is this right? It seems like that would break the plastic clips if you just try to pull straight out... Shouldn't there be some release of tension on clips first?
I appreciate anyone who has experience doing this themselves or knows of where I might find better instructions.
Attachments
Last edited: