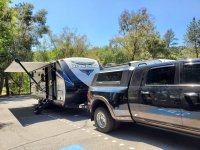
Ram Heavy Duty Forum

Register a free account today to become a member! Once signed in, you'll be able to participate on this site by adding your own topics and posts, as well as connect with other members through your own private inbox!

My Big Booty Dually Adventure Rig Build

SFAngus

Well-Known Member
Joined
Feb 27, 2021
Messages
186
Reaction score
266
Location
Marin County, California
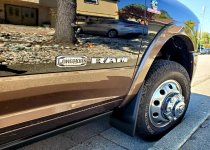
I finally got my front mudflaps and my window visors installed. I had been held up because I was waiting for the paint protection film and the window tint to be installed first.

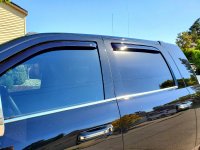
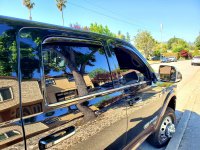
I went with the Weathertech mud flaps (Same as the rear) and I went with EGR window visors from autoanything.com. I was not familiar with EGR before, but they got good reviews and weren't cheap, so I hoped they would be good. So far, I'm impressed with the apparent quality, and I like how they look. Most importantly, they allow me to keep the windows cracked open when needed.
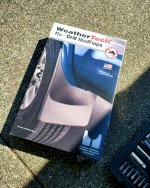
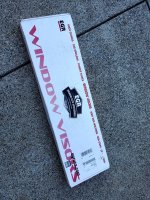
20210618_094538.jpg

20210618_092944.jpg

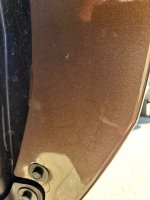
The front mudflaps came with these strange little pieces of plastic to apply to the paint as a protective film, but they didn't seem big enough to be effective. Luckily, I didn't need them, because the PPF that I had installed covers the relevant parts.
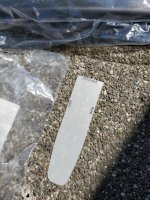
20210618_094610.jpg

Here's the PPF that's already in place:
20210618_094410.jpg

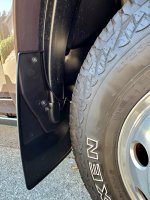
The front mudflaps fit very well, just like the rears:
20210618_095428.jpg

20210618_095417.jpg

All installed:

20210618_095611.jpg

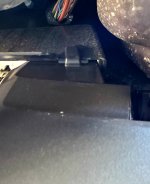
The window visors were super easy to install. The fronts attach with friction only, and the rears use a combination of adhesive tape and friction.

20210618_093833.jpg

20210618_093843.jpg
20210618_093944.jpg

That's all for now! I'm taking my girls on another camping trip tomorrow, so I'll have some photos of that soon.
 

CdnHO

Well-Known Member
Joined
Nov 17, 2020
Messages
1,465
Reaction score
1,657
Location
Ontario
I finally got my front mudflaps and my window visors installed. I had been held up because I was waiting for the paint protection film and the window tint to be installed first.

I went with the Weathertech mud flaps (Same as the rear) and I went with EGR window visors from autoanything.com. I was not familiar with EGR before, but they got good reviews and weren't cheap, so I hoped they would be good. So far, I'm impressed with the apparent quality, and I like how they look. Most importantly, they allow me to keep the windows cracked open when needed.

View attachment 18355

View attachment 18356

The front mudflaps came with these strange little pieces of plastic to apply to the paint as a protective film, but they didn't seem big enough to be effective. Luckily, I didn't need them, because the PPF that I had installed covers the relevant parts.

View attachment 18357

Here's the PPF that's already in place:

View attachment 18358

The front mudflaps fit very well, just like the rears:
View attachment 18359

View attachment 18360

All installed:

View attachment 18361

The window visors were super easy to install. The fronts attach with friction only, and the rears use a combination of adhesive tape and friction.
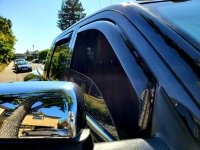
View attachment 18362

View attachment 18363
View attachment 18364

That's all for now! I'm taking my girls on another camping trip tomorrow, so I'll have some photos of that soon.
Safe trip and have a good time. C
 

SFAngus

Well-Known Member
Joined
Feb 27, 2021
Messages
186
Reaction score
266
Location
Marin County, California
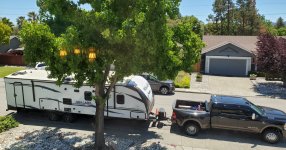
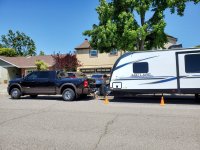
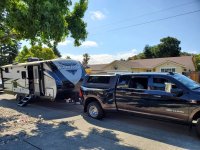
I took my two older daughters on another RV Camping trip this weekend. I rented a Mallard IDM312 for this trip. Got it all loaded up with the truck:

20210626_125523.jpg

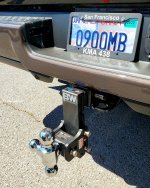
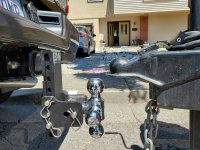
Finally got to put the B&W hitch to use this time, because the trailer didn't come with a hitch. This hitch is great, I love it. I was worried after buying it that I should have gotten the 9" drop, but I think the 7" is actually perfect.

20210626_112453.jpg

I put it in bed lowering mode to sneak under the tongue... it seemed to lower a little:

20210626_120431.jpg

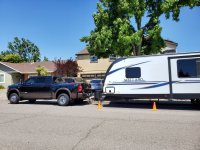
It's a little difficult to see the difference in the photos, but here is the trailer attached in bed lowering mode:

20210626_120708.jpg

And here it is raised back up... it leveled the trailer out nicely:

20210626_120742.jpg

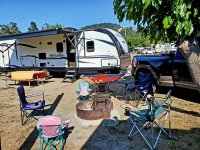
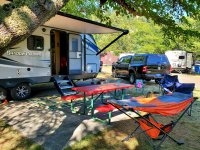
All set up at our campsite, at Casini Ranch:

20210627_152943.jpg
 

gimmie11s

Well-Known Member
Joined
Mar 30, 2021
Messages
2,378
Reaction score
3,503
At 65 I could tell that the duals were contacting the road only in the centers of the treads. That indicates over inflation. According to my scale results and load inflation tables I could have gone down to 35 psi. When scaled I had my 30K fifth wheel hitch installed, probably 200 pounds of stuff in the bed and a full 50 gallon fuel tank. Given the weight of that Airstream, I would think that 40 psi would be fine. However, keeping them at 45 psi could be a good compromise if you feel uncomfortable with 40. Personally I would try 40 and watch the wear pattern. I love the way it rides with 40 in back. I am sure this is in part due to the air suspension. Way nicer than my 2003 dually. In fact two passengers have commented on the nice ride. My 2012 Accord doesn't ride as good. I only tow my heavy fifth wheel trailer three times a year so that airing the tires as needed is no big deal.


Im running 45 psi in all 4 rears and the truck rides great. Although, my rear air bags have next to 0 air in them running around unloaded. The truck rides nice and 45 psi is enough to still hook up to my 14k lb 5'er and not worry about it.


I put it in bed lowering mode to sneak under the tongue... it seemed to lower a little:


It's a little difficult to see the difference in the photos, but here is the trailer attached in bed lowering mode:


Interesting. "bed lowering" doesnt work on my truck because unloaded, the bags already have near 0 air in them.
 

SFAngus

Well-Known Member
Joined
Feb 27, 2021
Messages
186
Reaction score
266
Location
Marin County, California
Im running 45 psi in all 4 rears and the truck rides great. Although, my rear air bags have next to 0 air in them running around unloaded. The truck rides nice and 45 psi is enough to still hook up to my 14k lb 5'er and not worry about it.


Interesting. "bed lowering" doesnt work on my truck because unloaded, the bags already have near 0 air in them.

Yeah, I was under the same impression with the bed lowering. Although my understanding is that it sometimes adds air periodically over time depending on conditions, and so by hitting the Bed Lowering setting, it might drop it a little bit? I definitely heard air coming out, and other noises from the rear end, but it could also be my imagination that it lowered.
 

SFAngus

Well-Known Member
Joined
Feb 27, 2021
Messages
186
Reaction score
266
Location
Marin County, California
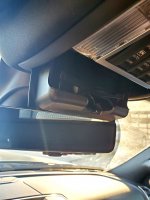
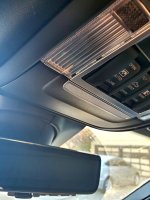
Ok, I feel pretty stupid... so, I was driving home today after about 6 hours in the truck and was staring absent minded at the cubby on top of the dash. I was debating if it's worth it to get one of the bulletpoint mounts for my radio mic, but that cubby is where I keep my sunglasses. I thought, you know, it's too bad they didn't put a sunglasses cubby overhead. Then I reached up and pushed the overhead console, and found my sunglasses cubby. I had no idea it was there!

20210629_191239.jpg

20210629_191253.jpg

So basically, what I'm saying is that it took me three months to figure out that my truck had this feature... I feel dumb.
 

Brutal_HO

The Mad Irishman
Staff member
Joined
Feb 1, 2020
Messages
12,143
Reaction score
21,692
Location
Douglas County, CO
Ok, I feel pretty stupid... so, I was driving home today after about 6 hours in the truck and was staring absent minded at the cubby on top of the dash. I was debating if it's worth it to get one of the bulletpoint mounts for my radio mic, but that cubby is where I keep my sunglasses. I thought, you know, it's too bad they didn't put a sunglasses cubby overhead. Then I reached up and pushed the overhead console, and found my sunglasses cubby. I had no idea it was there!

View attachment 18533


So basically, what I'm saying is that it took me three months to figure out that my truck had this feature... I feel dumb.

That's a seatbelt cutter and micro fixed blade knife cubby.
 

CdnHO

Well-Known Member
Joined
Nov 17, 2020
Messages
1,465
Reaction score
1,657
Location
Ontario
Ok, I feel pretty stupid... so, I was driving home today after about 6 hours in the truck and was staring absent minded at the cubby on top of the dash. I was debating if it's worth it to get one of the bulletpoint mounts for my radio mic, but that cubby is where I keep my sunglasses. I thought, you know, it's too bad they didn't put a sunglasses cubby overhead. Then I reached up and pushed the overhead console, and found my sunglasses cubby. I had no idea it was there!

View attachment 18533

View attachment 18534

So basically, what I'm saying is that it took me three months to figure out that my truck had this feature... I feel dumb.
Don't feel bad. It took me a month of wondering why Ram had eliminated such a useful item. A friend pointed out that "well hidden" feature after complaining to him. The sad part is that it is in the same place as my 2003 and never even thought to push the little panel. At least you found it on your own. LOL
 

Pronto

Well-Known Member
Joined
Nov 23, 2018
Messages
543
Reaction score
580
Location
Texas
Ok, I feel pretty stupid... so, I was driving home today after about 6 hours in the truck and was staring absent minded at the cubby on top of the dash. I was debating if it's worth it to get one of the bulletpoint mounts for my radio mic, but that cubby is where I keep my sunglasses. I thought, you know, it's too bad they didn't put a sunglasses cubby overhead. Then I reached up and pushed the overhead console, and found my sunglasses cubby. I had no idea it was there!

View attachment 18533

View attachment 18534

So basically, what I'm saying is that it took me three months to figure out that my truck had this feature... I feel dumb.
I knew about the overhead sunglasses holder from day 1 but I still use the dash cubby for my sunglasses.
 

SFAngus

Well-Known Member
Joined
Feb 27, 2021
Messages
186
Reaction score
266
Location
Marin County, California
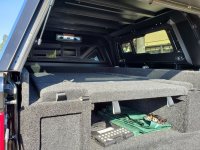
Alright- some exciting news! I finally got my RSi Smart Cap installed, along with the carpet kit for the bed.

I spent the day at Custom Truck in Redwood City, CA and they got everything done. I'm still waiting for the drop rack, which they said should be another 3-4 weeks.

Here's a few photos of the cap:

20210712_181055.jpg

20210712_181107.jpg

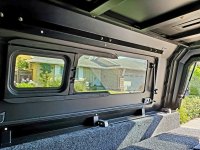
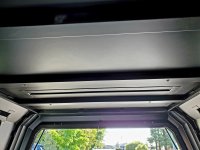
I absolutely love it. The high quality feel is readily apparent. The hardware latches feel strong and solid, especially compared to the ones on my ARE which always felt cheap and flimsy, like they were about to break.

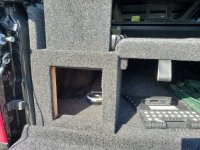
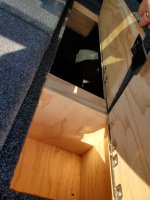
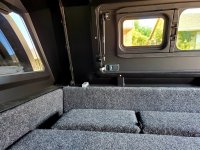
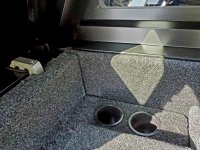
The carpet kit is the same version I had on my last Ram, which I was a big fan of. It is modular and can be used as a sleeping platform, or those panels can be removed for larger items. It also has storage around the sides which can be accessed via doors on top, or from the end for long items.

20210713_090347.jpg

20210713_090355.jpg
20210713_090316.jpg

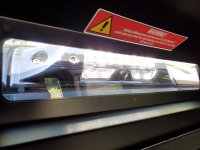
Here's some interior shots of the cap:

20210713_090236.jpg
20210713_090250.jpg
20210713_090246.jpg
20210713_090228.jpg
20210713_090224.jpg
 

SFAngus

Well-Known Member
Joined
Feb 27, 2021
Messages
186
Reaction score
266
Location
Marin County, California
Part 2, because I ran out of upload allotments...

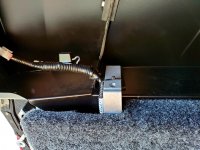
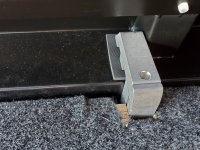
The shop did a great job of fitting everything together, and notching the carpet kit to accommodate the brackets for the cap. Everything is nice and snug.

20210713_090154.jpg

20210713_090217.jpg

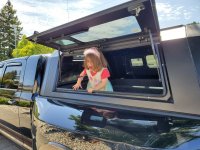
Kid tested, family approved:

20210719_113243.jpg

My next project now will be to relocate the rearview camera to the back of the cap, wire in a 12v power station into the carpet kit, and add 12v lights to the interior of the cap. I need to do some research to see if I should use the blunt cut wire at the tailgate, or if I should splice into an extra 7 pin harness, using the existing trailer outlet that's in the bed.
 

CdnHO

Well-Known Member
Joined
Nov 17, 2020
Messages
1,465
Reaction score
1,657
Location
Ontario
Part 2, because I ran out of upload allotments...

The shop did a great job of fitting everything together, and notching the carpet kit to accommodate the brackets for the cap. Everything is nice and snug.

View attachment 19437

View attachment 19438

Kid tested, family approved:

View attachment 19439

My next project now will be to relocate the rearview camera to the back of the cap, wire in a 12v power station into the carpet kit, and add 12v lights to the interior of the cap. I need to do some research to see if I should use the blunt cut wire at the tailgate, or if I should splice into an extra 7 pin harness, using the existing trailer outlet that's in the bed.
Cap looks great and very well made. Enjoy.
 

SFAngus

Well-Known Member
Joined
Feb 27, 2021
Messages
186
Reaction score
266
Location
Marin County, California
Two days after the cap was installed, I loaded up 2/3 of the kids for another RV camping trip.

This time we headed up to Garberville to explore the giant redwoods.

20210715_100553.jpg

20210715_172711.jpg

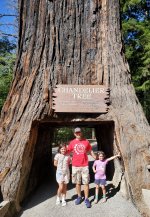
We stopped at the Chandelier tree, (one of the famous drive-through Redwood trees). No, my truck didn't fit. I barely fit walking through it. 20210716_164543.jpg

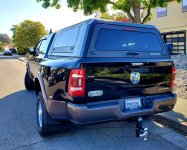
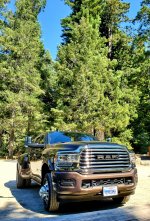
I had to settle for a photo of the truck in the parking lot.

20210716_163925.jpg

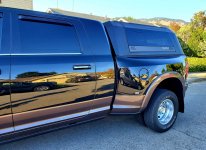
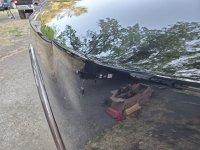
Unfortunately, during our trip someone damaged one of my dually fenders. I didn't notice it until we were back at camp, so I'm not sure exactly how it happened, but it looks like someone opened an RV door into it. (They didn't leave a note).

20210716_192911.jpg

So, now I'm looking into paintless dent removal, hoping that it can be fixed. It's going to be tricky though.


On our way back, we stopped at Lake Mendocino for lunch, in the 104° heat...

20210718_141022.jpg

That's all for now, more updates soon.
 

SFAngus

Well-Known Member
Joined
Feb 27, 2021
Messages
186
Reaction score
266
Location
Marin County, California
Great updates. We plan to get up to the redwoods very soon too.

Oh cool, PM me if you have any questions. We stayed at the KOA in Benbow as a base camp. We hit up most of the local stuff including the Bigfoot store, the grandfather tree, houses of confusion, Peg House for lunch, Chandelier tree, and then we did a day trip up to Eureka to see the Sequoia Park zoo, which has a really cool sky walk through the redwoods.
 

CdnHO

Well-Known Member
Joined
Nov 17, 2020
Messages
1,465
Reaction score
1,657
Location
Ontario
Two days after the cap was installed, I loaded up 2/3 of the kids for another RV camping trip.

This time we headed up to Garberville to explore the giant redwoods.

View attachment 19457

View attachment 19458

We stopped at the Chandelier tree, (one of the famous drive-through Redwood trees). No, my truck didn't fit. I barely fit walking through it. View attachment 19460

I had to settle for a photo of the truck in the parking lot.

View attachment 19459

Unfortunately, during our trip someone damaged one of my dually fenders. I didn't notice it until we were back at camp, so I'm not sure exactly how it happened, but it looks like someone opened an RV door into it. (They didn't leave a note).

View attachment 19461

So, now I'm looking into paintless dent removal, hoping that it can be fixed. It's going to be tricky though.


On our way back, we stopped at Lake Mendocino for lunch, in the 104° heat...

View attachment 19462

That's all for now, more updates soon.
Man, that sucks when someone opens their doors into your ride. Seems no matter where you park, someone will pick the spot next to you even if the lot is empty. Watched a guy do that once, banged his door into my dually fender. No damage but I asked him why with all the empty spots he chose the one next to my truck. He just shrugged and walked away. Most of the time it's someone driving a piece of junk.
 

CdnHO

Well-Known Member
Joined
Nov 17, 2020
Messages
1,465
Reaction score
1,657
Location
Ontario
Part 2, because I ran out of upload allotments...

The shop did a great job of fitting everything together, and notching the carpet kit to accommodate the brackets for the cap. Everything is nice and snug.

View attachment 19437

View attachment 19438

Kid tested, family approved:

View attachment 19439

My next project now will be to relocate the rearview camera to the back of the cap, wire in a 12v power station into the carpet kit, and add 12v lights to the interior of the cap. I need to do some research to see if I should use the blunt cut wire at the tailgate, or if I should splice into an extra 7 pin harness, using the existing trailer outlet that's in the bed.
Looks like your fender is dented in the second last photo. Might be just the light. Is that the same dent that you photographed on trip to the red woods?
 
Last edited:

Users who are viewing this thread

Top