Ram Heavy Duty Forum

Register a free account today to become a member! Once signed in, you'll be able to participate on this site by adding your own topics and posts, as well as connect with other members through your own private inbox!

4500 Camper/Jeep Hauler Build

gprguy

Well-Known Member
Joined
Apr 14, 2022
Messages
547
Reaction score
1,314
Location
Kitsap Peninsula, WA
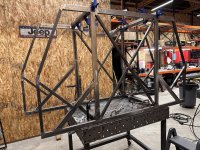
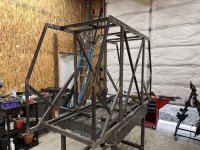
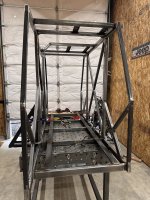
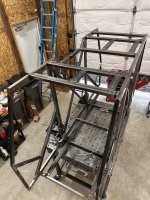
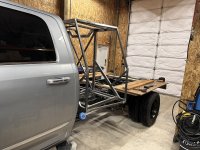
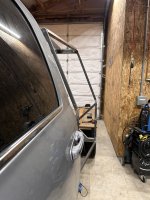
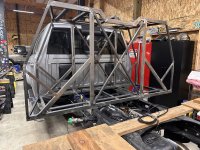
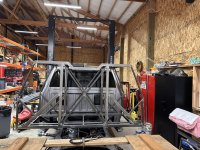
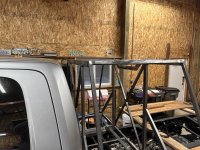
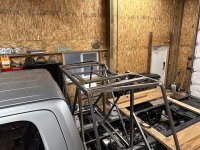
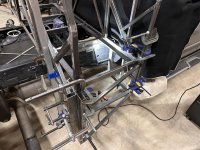
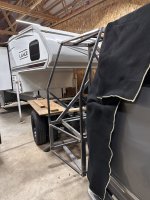
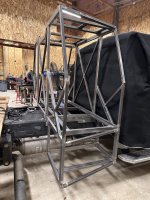
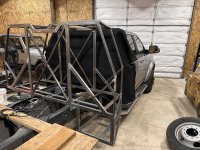
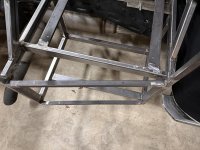
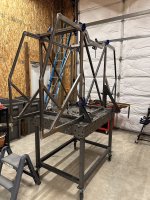
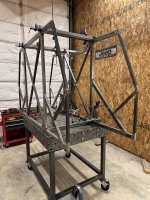
Getting somewhere.. Finish welded the front and rear walls over the last couple days, and today I put them together with a few cross bars. The cross bars are just tacked in, but now I can do some testing for fitting the slide and make sure my math works.

IMG_5703.jpeg

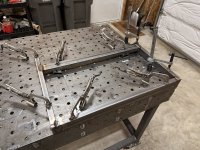
So many clamps...

IMG_5704.jpeg

IMG_5705.jpeg

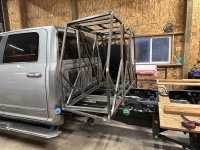
Next up is a lot of test fitting for the slide, and then I need to finish the crosspieces. After that, probably test fit it on the truck and figure what size to make the "saddlebags" for the air and hydraulic systems.
 

Brutal_HO

The Mad Irishman
Staff member
Joined
Feb 1, 2020
Messages
12,211
Reaction score
21,850
Location
Douglas County, CO
We could send dis guy to help.

Clamps.png
 

gprguy

Well-Known Member
Joined
Apr 14, 2022
Messages
547
Reaction score
1,314
Location
Kitsap Peninsula, WA
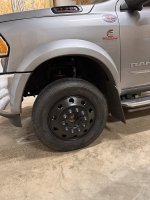
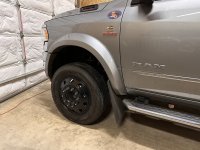
Got the tires mounted back on the wheels this week, and..

Oh yes.

IMG_5732.jpeg

(Please excuse the truck and garage being filthy, haven't been able to clean it since picking up the Comanche)

IMG_5731.jpeg

Have to keep removing chrome as I can, but it's headed in the right direction for sure.

IMG_5728.jpeg

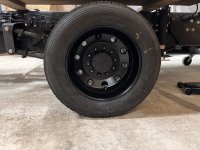
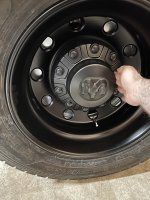
One thing I have yet to decide is whether to run the hub caps or not. Here's the rear one held in place (it's too cold out for me to risk popping them on).

IMG_5730.jpeg

They are much closer in shade/gloss in real life than in the photo. And I just saw the giant dusty hand print I forgot to wipe off before taking the picture. :rolleyes:

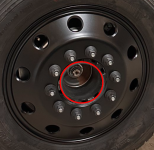
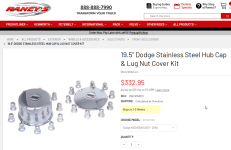
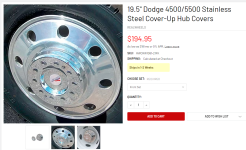
I haven't bought the front hub caps in black yet because they aren't easy to find, and also because on the 4500/5500 they stick out 4.5" per side which is ridiculous. I'm hoping to either come up with another solution or ditch them entirely.

That said if anyone needs the black 4500/5500 hubcap part numbers, front is 6ZF91RXFAA and rear is 6ZF92RXFAA.

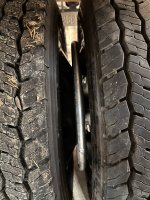
Centramatics are in there as well, all 4 corners. I may paint them black at some point but I'm going to try them as-is for now.

IMG_5729.jpeg

TPMS sensors too. Not sure when I will get to drive it next to see if they pair with the weather and working on the cabinet.

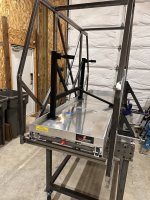
Speaking of - the sliding tray is set roughly in place. I need to get it lined up precisely, make a final decision on if the bike rack is on the forward or rearward side (the door shape is going to determine that), and then start building the angled bars to define the edge of the cabinet.

IMG_5726.jpeg

That's all for now, I hope this cold snap breaks soon so I can get motivated to be out there. I know it's a lot worse farther east in the country - hope everyone stays safe.

(BTW if anyone out there has a 4500/5500/F-450/F-550 I may have an extra set of rear centramatics for sale cheap - ended up with extra and the seller seems to not care.)
 

jsalbre

Well-Known Member
Joined
Oct 29, 2019
Messages
2,608
Reaction score
3,317
Location
ID
Got the tires mounted back on the wheels this week, and..

Oh yes.

View attachment 67941

(Please excuse the truck and garage being filthy, haven't been able to clean it since picking up the Comanche)

View attachment 67942

Have to keep removing chrome as I can, but it's headed in the right direction for sure.

View attachment 67943

One thing I have yet to decide is whether to run the hub caps or not. Here's the rear one held in place (it's too cold out for me to risk popping them on).

View attachment 67944

They are much closer in shade/gloss in real life than in the photo. And I just saw the giant dusty hand print I forgot to wipe off before taking the picture. :rolleyes:

I haven't bought the front hub caps in black yet because they aren't easy to find, and also because on the 4500/5500 they stick out 4.5" per side which is ridiculous. I'm hoping to either come up with another solution or ditch them entirely.

That said if anyone needs the black 4500/5500 hubcap part numbers, front is 6ZF91RXFAA and rear is 6ZF92RXFAA.

Centramatics are in there as well, all 4 corners. I may paint them black at some point but I'm going to try them as-is for now.

View attachment 67945

TPMS sensors too. Not sure when I will get to drive it next to see if they pair with the weather and working on the cabinet.

Speaking of - the sliding tray is set roughly in place. I need to get it lined up precisely, make a final decision on if the bike rack is on the forward or rearward side (the door shape is going to determine that), and then start building the angled bars to define the edge of the cabinet.

View attachment 67946

That's all for now, I hope this cold snap breaks soon so I can get motivated to be out there. I know it's a lot worse farther east in the country - hope everyone stays safe.

(BTW if anyone out there has a 4500/5500/F-450/F-550 I may have an extra set of rear centramatics for sale cheap - ended up with extra and the seller seems to not care.)
Looks great.

I’m personally more a fan of the no plastic hub caps. Just find some closed end lugs that fit and call it a day.
 

gprguy

Well-Known Member
Joined
Apr 14, 2022
Messages
547
Reaction score
1,314
Location
Kitsap Peninsula, WA
Looks great.

I’m personally more a fan of the no plastic hub caps. Just find some closed end lugs that fit and call it a day.
Thanks.

On the back, I tend to agree - it looks a lot better than I thought it would. Some stainless lug nuts would look pretty sweet.

The front, it's somehow just a bit unfinished looking. I may leave it as is, I have an idea to maybe make a low profile hubcap so the inside of the adapter and hub nut isn't so visible, but that'd be really low priority. I really don't like the stock front caps so that's not going to happen, they are comically big.
 

jsalbre

Well-Known Member
Joined
Oct 29, 2019
Messages
2,608
Reaction score
3,317
Location
ID
Thanks.

On the back, I tend to agree - it looks a lot better than I thought it would. Some stainless lug nuts would look pretty sweet.

The front, it's somehow just a bit unfinished looking. I may leave it as is, I have an idea to maybe make a low profile hubcap so the inside of the adapter and hub nut isn't so visible, but that'd be really low priority. I really don't like the stock front caps so that's not going to happen, they are comically big.
I agree on your thoughts for the front. I bet someone could 3D print something. The stock hubcaps are just so big and cheap looking.
 

gprguy

Well-Known Member
Joined
Apr 14, 2022
Messages
547
Reaction score
1,314
Location
Kitsap Peninsula, WA
Great finds. I was thinking of 3D printing something myself, but I will have to look into those options too. Thanks.
 

gprguy

Well-Known Member
Joined
Apr 14, 2022
Messages
547
Reaction score
1,314
Location
Kitsap Peninsula, WA
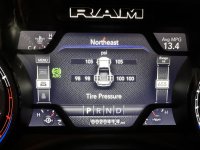
TPMS success!

IMG_5739.jpeg

I was getting a little discouraged with the rear inner sensors refusing to register, despite having driven around plenty. Today I had to go pick up some more metal for the cabinet and with all 6 sensors in place it detected them within 5 miles.

If anyone else with a chassis cab wants to add TPMS the sensor part numbers I used for 2022 are:

Fronts and inner rears: 68475571AD
Outer rears: 68475578AD (they will have an "OD" embossed on the sensor as well, likely indicates outer dual)

These are for the 19.5" dual wheels. Not sure if they would fit the steel rims.

Other than that, in AlfaOBD you set the usual VehConfig 3: Premium TPM System Present to Yes.

I'll probably crosspost this over to the modifications forum so people can find it in the future.

The centramatics seem to work nice too - no shakes or vibrations that I can tell.

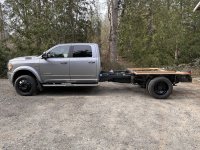
I also took the opportunity to get a side shot of the truck with the new wheels.

IMG_5736.jpeg

I like it. Need to get the cabinet frame knocked off so I can move forward.
 

buzzuti

Well-Known Member
Joined
Dec 19, 2021
Messages
295
Reaction score
600
Location
TEXAS
TPMS success!

View attachment 68097

I was getting a little discouraged with the rear inner sensors refusing to register, despite having driven around plenty. Today I had to go pick up some more metal for the cabinet and with all 6 sensors in place it detected them within 5 miles.

If anyone else with a chassis cab wants to add TPMS the sensor part numbers I used for 2022 are:

Fronts and inner rears: 68475571AD
Outer rears: 68475578AD (they will have an "OD" embossed on the sensor as well, likely indicates outer dual)

These are for the 19.5" dual wheels. Not sure if they would fit the steel rims.

Other than that, in AlfaOBD you set the usual VehConfig 3: Premium TPM System Present to Yes.

I'll probably crosspost this over to the modifications forum so people can find it in the future.

The centramatics seem to work nice too - no shakes or vibrations that I can tell.

I also took the opportunity to get a side shot of the truck with the new wheels.

View attachment 68098

I like it. Need to get the cabinet frame knocked off so I can move forward.
you're my hero! :D
Hate that I lost this feature transitioning from 3500 to 5500.

I will have to figur out if this all holds true on the 23'.
 
Last edited:

gprguy

Well-Known Member
Joined
Apr 14, 2022
Messages
547
Reaction score
1,314
Location
Kitsap Peninsula, WA
you're my hero! :D
Hate that I lost this feature transitioning from 3500 to 5500.

I will have to figur out if this all holds true on the 23'.
I will admit that I was overly excited when I was driving along yesterday and suddenly realized the orange tire light was out.

I would expect it is, there might be different sensor part numbers which could be figured out with TA. I don't have an active TA subscription at the moment, but I can add it to my to-do list for the next time I buy a 3 day pass.
 

gprguy

Well-Known Member
Joined
Apr 14, 2022
Messages
547
Reaction score
1,314
Location
Kitsap Peninsula, WA
Weather is finally getting back to seasonal temperatures out here and this weekend was the first in a while where I could get some significant work done.

Other than some angled pieces on the far outside edges, all of the cross braces should be in along with mounting rails for the bike slide along with a few other things. I started finish welding today and it's done as far as can be without unclamping/moving it.

IMG_5745.jpeg

IMG_5746.jpeg

IMG_5747.jpeg

I'm pretty happy with how the CHMSL notch came out. It's oversized, but the CHMSL will mount to the aluminum skin - I just needed the framework well out of the way.

Tomorrow I will probably unclamp it from the table and start working on the angled bits. Then it'll need to get flipped over, weld the underside followed by a bunch of grinding.

After that it may get mounted on the truck brackets for the first time. I need to get it on there to figure out the dimensions of the drop down compartments for the air and hydraulic controls.
 

gprguy

Well-Known Member
Joined
Apr 14, 2022
Messages
547
Reaction score
1,314
Location
Kitsap Peninsula, WA
Big milestone - the top compartment is finish welded and close to complete (just a few flanges and braces need to be added, ran out of steel again). The angled side bars were some of the trickiest parts, especially the top ones but it all came out great. And even better, it's on the truck now.

IMG_5754.jpeg

IMG_5755.jpeg

IMG_5756.jpeg

IMG_5757.jpeg

IMG_5758.jpeg

IMG_5759.jpeg

IMG_5760.jpeg

I am really happy with how it sits and the lines of it. I also weighed it before putting it on the truck and it came in at 190 lbs - just about what I guessed. It also should have enough room for a roughly 9' bed behind it - it is 104" from the back of the cabinet to the back of the frame rails, and the bed will likely be a little longer than that since the hitch sticks out so far.

Tomorrow I'll get it tacked down to the brackets, and then I need to start building the drop down boxes on each side. Starting to feel like real progress.
 

gprguy

Well-Known Member
Joined
Apr 14, 2022
Messages
547
Reaction score
1,314
Location
Kitsap Peninsula, WA
QQ: With the locker upfront, where will your CoG land with the camper?

Hopefully somewhat forward. Our Camper has a 48" CG (so dead center on the 8' section of floor that would normally be in a standard pickup bed). My original hope was to move the camper significantly forward compared to how it was on our 3500 for more hitch clearance and also shift some weight on to the front axle, but it looks like it will only be around 6-10" forward. Still an improvement. Moving the CG forward was one of the goals of moving to the 4500/5500 for us, and we have the HD front axle just to get that little extra edge.
 

buzzuti

Well-Known Member
Joined
Dec 19, 2021
Messages
295
Reaction score
600
Location
TEXAS
Hopefully somewhat forward. Our Camper has a 48" CG (so dead center on the 8' section of floor that would normally be in a standard pickup bed). My original hope was to move the camper significantly forward compared to how it was on our 3500 for more hitch clearance and also shift some weight on to the front axle, but it looks like it will only be around 6-10" forward. Still an improvement. Moving the CG forward was one of the goals of moving to the 4500/5500 for us, and we have the HD front axle just to get that little extra edge.

Nice!
It was kinda a softball question cause I knew you had put a ton of thought into it! :cool:

84" CA was the ticket for us as well and our AF 1150.
Our CG landed just in front of the rear axle, maybe 3-4" closer to cab.
 

gprguy

Well-Known Member
Joined
Apr 14, 2022
Messages
547
Reaction score
1,314
Location
Kitsap Peninsula, WA
I could get this thing done in no time if work would give it a rest..

Anyway, with the cabinet on the truck it's time to start building the lower parts. Starting on the passenger's side since that will be easier.

Thought I took more in progress shots, but apparently not. Fixture tables are so satisfying though..

IMG_5762.jpeg

Eleventy hundred clamps later and it's magically done and hanging off the upper cabinet:

IMG_5764.jpeg

And tacked in place for now.

IMG_5765.jpeg

IMG_5766.jpeg

IMG_5767.jpeg

IMG_5768.jpeg

This side will hold the hydraulic pump and tank, and something else I am sure as well - debating whether it will be one of the air tanks, or an air compressor, or maybe all of these things. I'm going to get the other side put together and see where everything fits before I add any brackets.

Next up - the driver's side, once I take apart something that is in my way.
 

Users who are viewing this thread

Top