
gator6
Well-Known Member
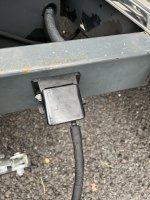
That's a big hole for a camera cable.
That was for the dryer vent. Another side project.
Sent from my iPhone using Tapatalk
That's a big hole for a camera cable.
That was for the dryer vent. Another side project.
Sent from my iPhone using Tapatalk
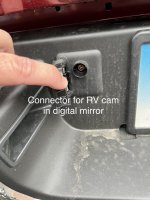
Well I consider myself very fortunate that despite screwing up on my order and NOT getting the rear camera kit for the trailer, a forum member had one for sale and it got to me last night. I tested it out and it’s a PERFECT integration with the digital mirror! I can’t wait to mount it on the trailer and get rid of the extra screen for the Voyager wireless kit.
I’m currently thinking of running the cable over the roof and then down behind the rock guards to the a-frame - some work to figure out the best way to de-uglify it. I’m concerned about fishing it through the trailer - I’m not the most gifted when it comes to technical skills. If anyone has done one of these inside an Airstream, would love to learn what you did - I still may do it all externally but if your experience was easier than I’m imagining in my head I might change my mind!
Really excited to have this for the rear view. Exactly what is needed!!
If my replacement extension works out today, I’ll have photos up for review.
Sent from my iPhone using Tapatalk

Isn’t it great how it integrates so perfectly with the digital rear view mirror! It looks like you are using cable ties to hold the cord to your trailer is that true? The black cable with the black trailer works. I am thinking of running some d-line “aluminum” colored cable chasers to match the Airstream. I really haven’t figured out a good and non-destructive way to run it inside the trailer.Progress report: the 6.5’ extension works! Mounting the camera and routing cable around the rear ramp and up the left side with what looks to be plenty of excess for maneuvering through turns.
Once this is done, we’ll move on to finishing the 360° setup!
Sent from my iPhone using Tapatalk
Isn’t it great how it integrates so perfectly with the digital rear view mirror! It looks like you are using cable ties to hold the cord to your trailer is that true? The black cable with the black trailer works. I am thinking of running some d-line “aluminum” colored cable chasers to match the Airstream. I really haven’t figured out a good and non-destructive way to run it inside the trailer.
On the mirror itself - it dawned on me today, I can probably position the physical mirror to keep an eye on my dog in the back seat so flicking the day/night switch will toggle me between him and the rear view from the trailer….glad the extension worked for you!
[mention]22limited [/mention] did a cleaner install than I did. Check him out his latest post in the other thread.
Sent from my iPhone using Tapatalk
Says user isn’t found. Can you link to his instal?
 r.tapatalk.com
It’s a pretty rugged design. I just swapped some dielectric grease on the connector before installing just in case. It does say in the installation instructions to mount it “above the waterline” so I’m assuming that’s for boaters, but not sure how’d they use it. Could be a warning for those wanting to go dragging their trailer through a flood.Related question, is this tow mode camera waterproof? The dealer doesn’t know and I can‘t find a reference on the forums. I have a boat trailer that I want to mount this on. I don’t actually have the truck or camera (ordered) so I don't have a manual either. Any help is appreciated.
I understand the camera can only be the part from MOPAR. No 3rd party camera options will work.That’s what I was afraid of. Anyone know of an aftermarket camera that would fit the connector (drop in replacement) and be waterproof?
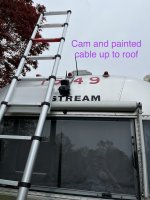


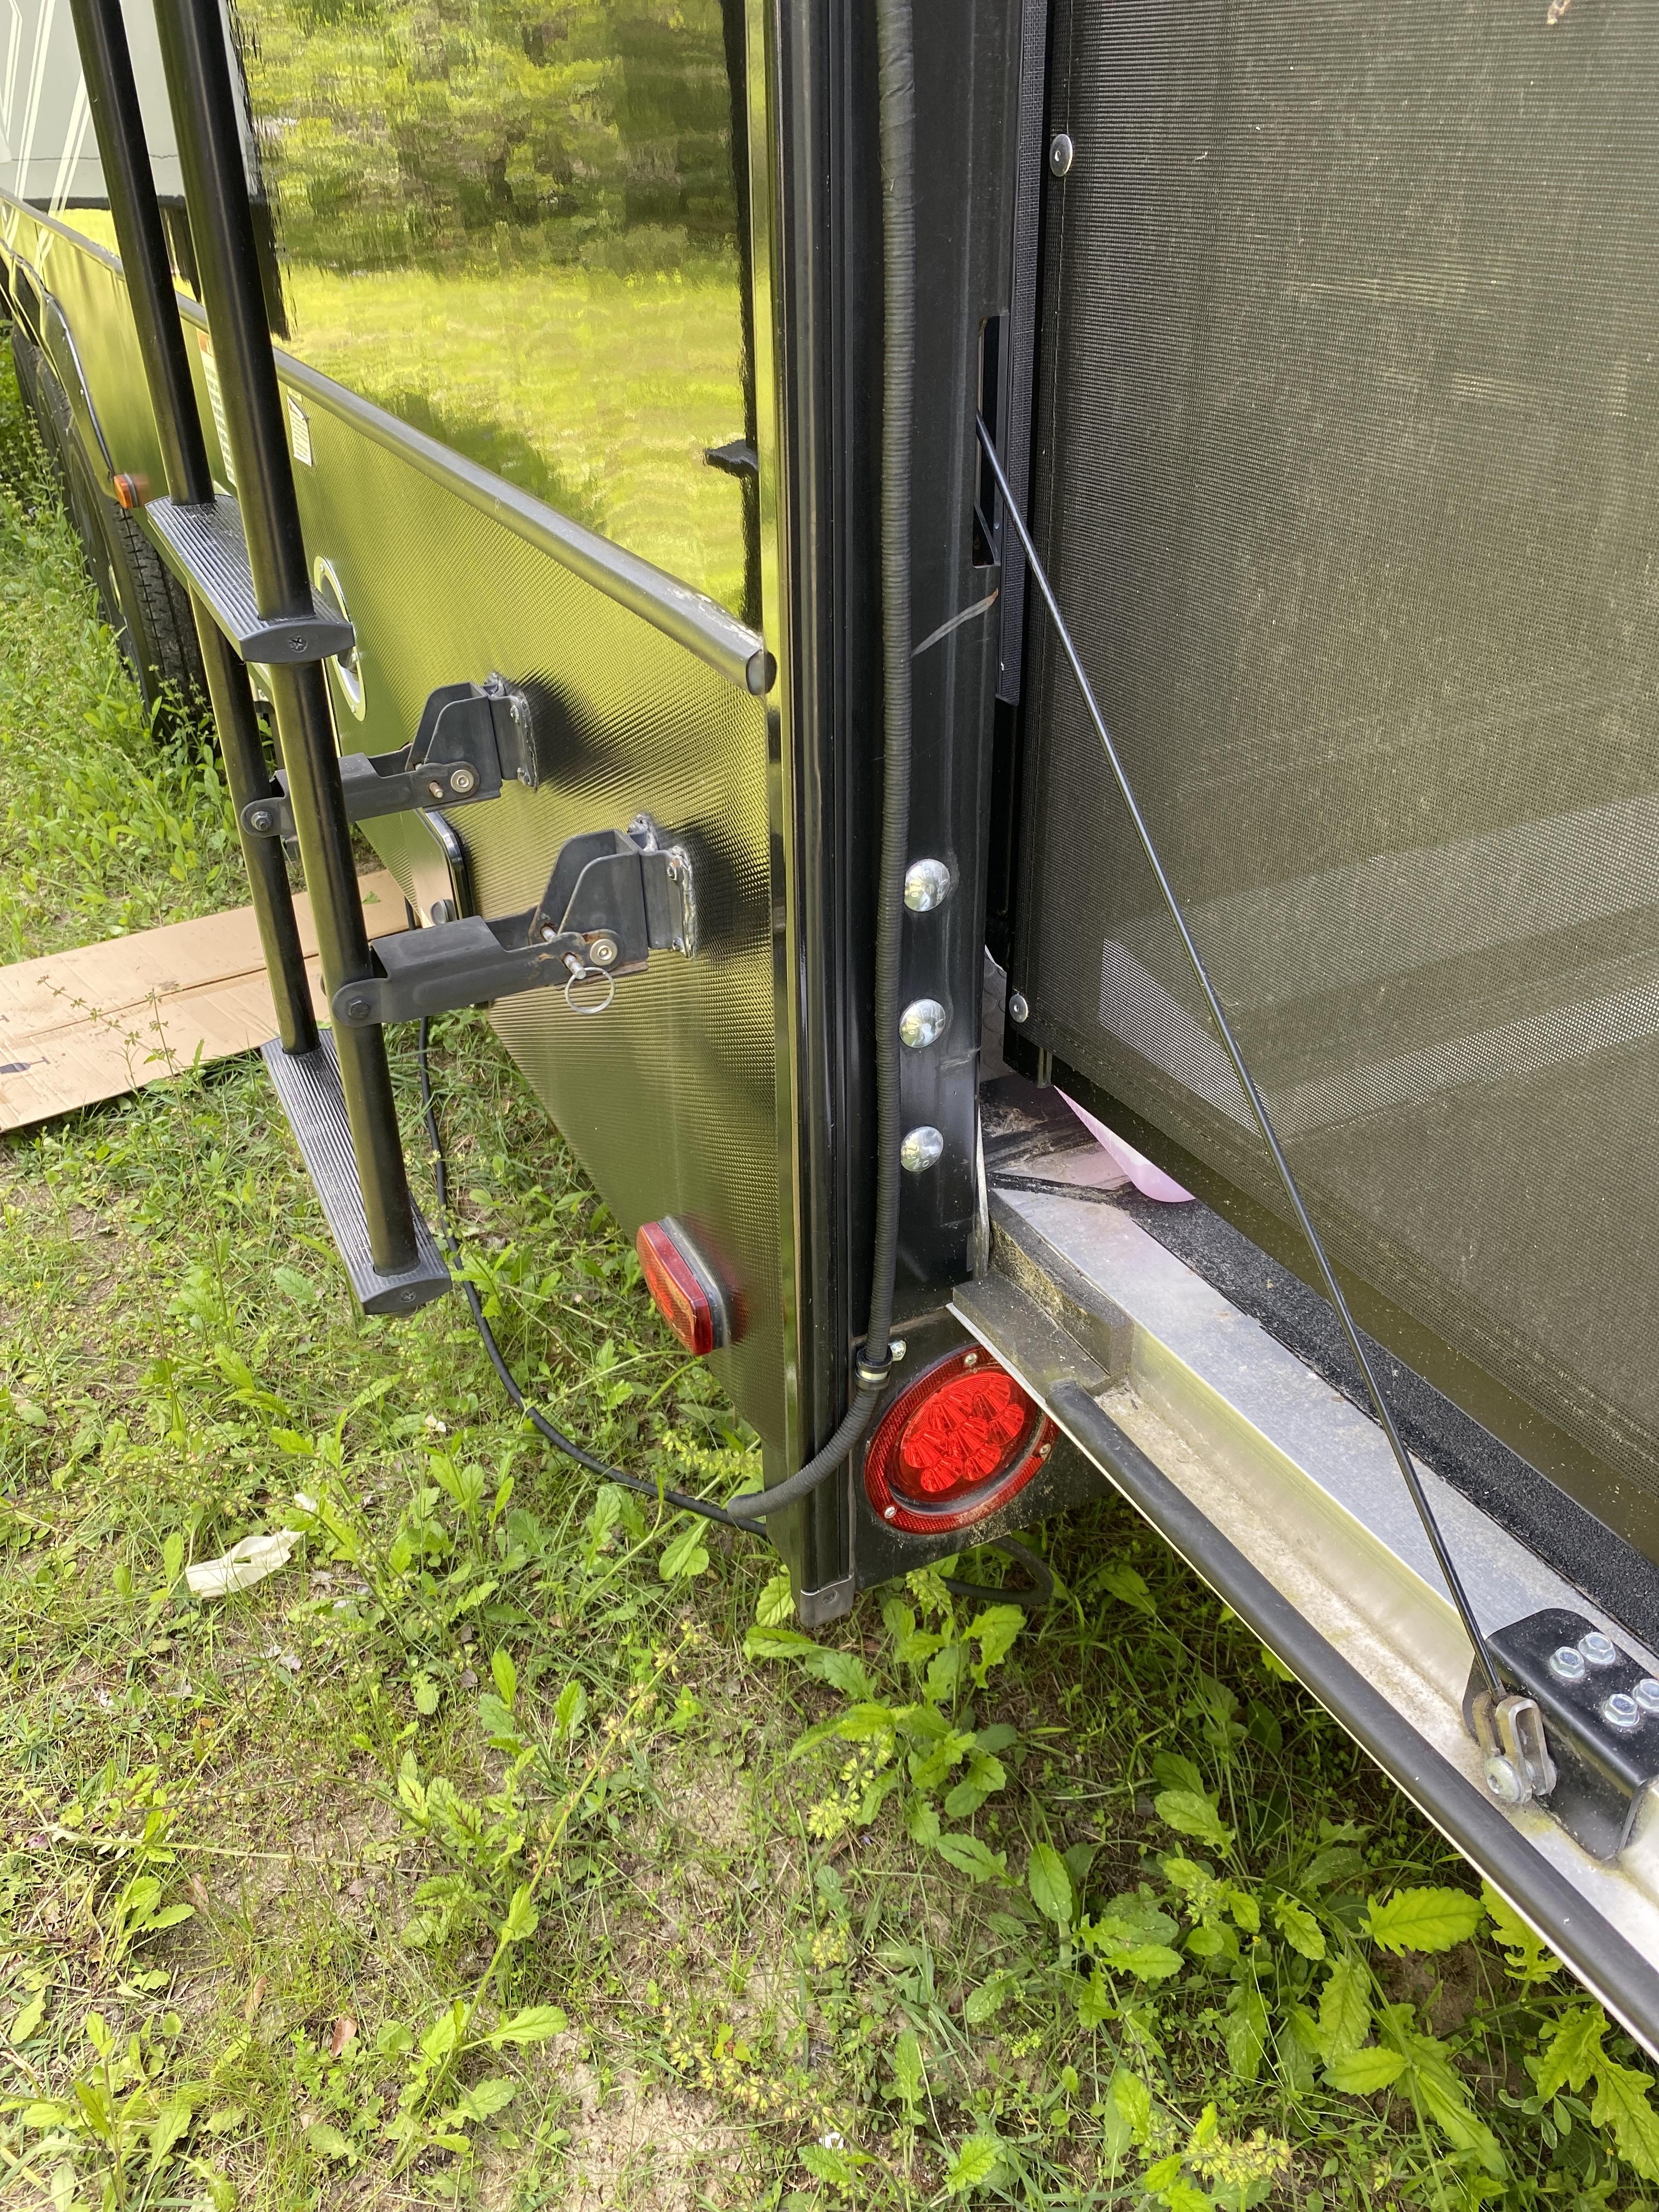
Camera kit (P)68527599AA Airstream Installation
So I had asked if anyone had installed one of these cameras on an Airstream and I don’t think anyone has yet (or if they have I haven’t seen it posted). So - a friend with WAY more skills than I have, worked with me to install it and I thought I’d share what we did. Check out the pics to see the installation and the rest below is details.
Remember - this is the camera that goes to the digital mirror - it has its own plug on the left side of the license plate and is not part of the 12-pin multi surround camera system. This is basically to use your rear view mirror as though you were looking out from the back of your trailer. It’s brilliant! In the past, I’ve used a Voyager Wireless cam that sends its signal to a screen I mounted on the windshield. Being able to eliminate yet another screen is a huge benefit. Let’s be honest, there’s a ton of visual real estate lost to that honking mirror assembly on a 2022 2500 RAM to begin with. And to have a wired signal which is SO crystal clear IN THE REAR VIEW MIRROR is a huge benefit too. The Voyager was always fine for the purpose - this is just 10 steps better.
Let’s talk about the installation, some choices made, and why I’m also leaving the Voyager on the trailer.
INSTALLATION OPTIONS - as I saw it I had 3 choices:
1. fish the wires through the trailer. Pro: would be cleanest look. Con: tearing apart trailer walls and cabinets to drill through aluminum ribs to hide the cable.
2. Place the camera lower on the body and drill through floor to run cable underneath zip tied to the belly pan. Pro: not as much wire fishing, cleaner look. Con: lower placement of the cam on the body of the trailer and potential interference with unseen wiring, plumbing, or LP lines at that end of the trailer and floor.
3. Run the cable over the top of the trailer. Pro: literally the path of least resistance. Con: not the prettiest option.
I chose 3.
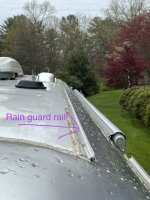
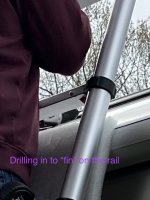
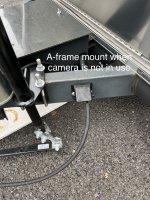
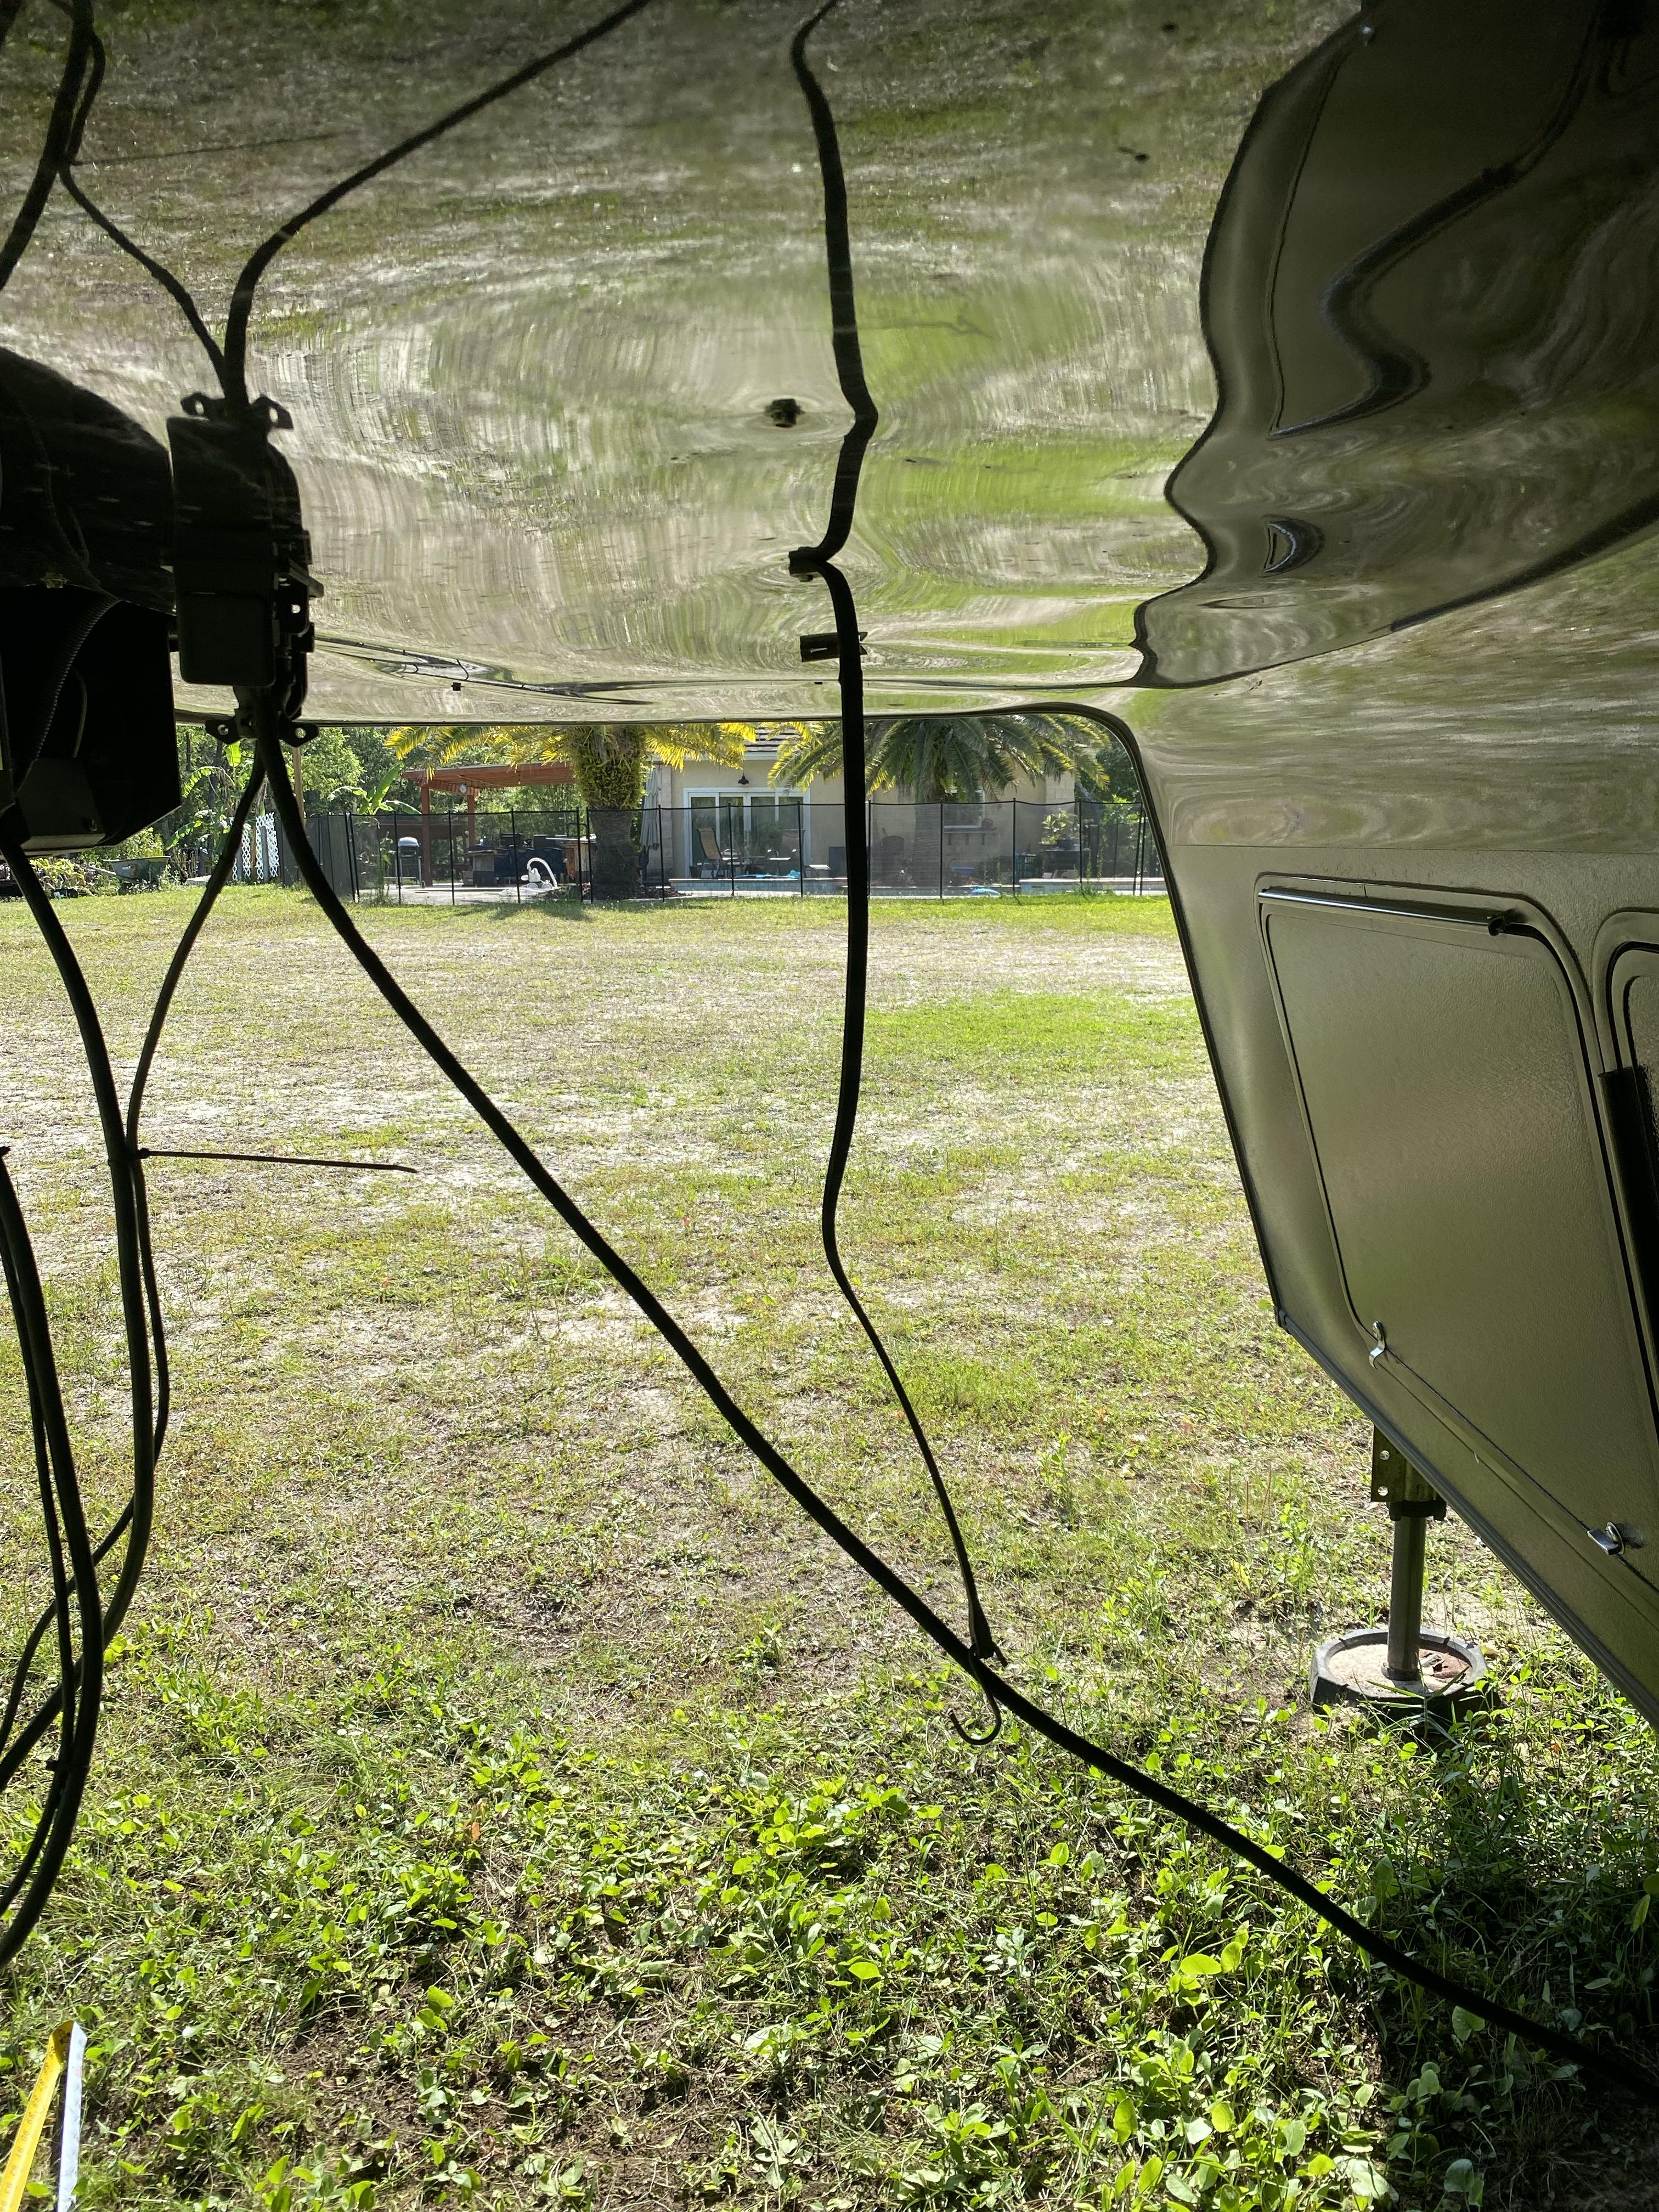
The plan was pretty simple. Install the camera under the existing Voyager camera using butyl tape behind the 3 screws to seal it up, run the cable up over the roof (we used a few self-stick UV resistant cable tie mounts with zip ties), run it along a rain barrier, drop it down the street side then underneath to the A-frame.
If you have an Airstream you likely have this rain guard that runs along the street side of the trailer. You can see in the pic it is like a semi open circle with a “fin” on top. If the opening in that rain guard was just a bit bigger, I would have run the cable inside it. But the cable is about 1/2” and the opening in that guard is maybe 3/8” or smaller. So close - but no cigar.
So instead, we used 5’ segments of white 3/4” Pex tubing we sat along the rain guard to fish the cable through. A few points on this:
1. my friend with the skills drilled small holes in the “fin” of the rain guard at the beginning, middle, and end of each Pex tube. That was to use zip ties to hold the tube to the guard.
2. In the spaces to the left and right of the middle of each tube, we added 4-5” of 3M VHB 2-sided tape to further strengthen the connection to the guard rail.
3. We did a test run of the locations of the cable first, and then marked wherever cable would be exposed - those areas I sprayed with a fast drying Krylon silver/gray paint to minimize the contrast as much as possible.
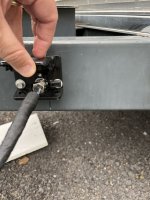
When we brought it down street side to go under the body and up to the a-frame, we used gray D-line cable channels with spaces to allow the camera cable to clear the belt lines. I talked with the D-line company who assured me many people have used these strips on their RVs for external use and they hold up really well. I have considered possibly adding 2 rivets to each of those channel runners but will see how they hold up.
Last, the kit comes with a plastic mount you attach to your a-frame so when the cable is not in use you can store it and protect it from dirt and rain.
As for why I kept the Voyager camera on board - first, it can be a backup if something goes wrong with the Mopar, second, if I ever sell this trailer to someone who doesn’t use a 2022 RAM for towing, they have a camera option, and third, the Voyager would leave ugly holes to fill and it gets its power from a clearance light I didn’t want to fish through etc. Path of least resistance and all…
All in it was about 3.5 hours of work as we hadn’t really documented a plan to start with. The integration with the digital mirror is truly stellar! We head out Thursday for a long weekend trip and if there’s anything to report then I’ll let you know. Hope this has been helpful!
PS - thanks to owdiss78 who had the extra camera to sell for a fair price! Great to have made that connection in this forum!
Could you run it up through your front compartment and fish it through the horizontal where I assume your bed is? Maybe then you can pop out at the pinboxSo my digital rearview camera was mounted along the outside of the ramp edge, then zip tied the length up the trailer just outside the trailer rails, then to simply to the truck. I mounted the connector protector up against the 360° harness mount.
A user here completed a cleaner install using two extensions (I used one, 6.5’), and had moved his connection from the bumper to the bed…it looks great!
The only issue I’m running into with my setup is sagging. For the moment, I have countered this with a simple bungee attached to the trailer using one of the large sheet metal screws. I’m thinking I may clean this up in the future, maybe with an old weak spring. For now I’m going to change out that bottom hook for either a carabiner or a zip tie just to keep the cord in place.
Sent from my iPhone using Tapatalk
Could you run it up through your front compartment and fish it through the horizontal where I assume your bed is? Maybe then you can pop out at the pinbox