So I mounted the backing plate, then used a new sharp razor to cut out the center hole. Went easier than I thought.
View attachment 75817View attachment 75818
Used some lock time on the screws and mounted the front plate with the backer plate on the inside. Wasn't that hard to get the washers and nuts on the backside. Just the roof was hot and kept burning me.
View attachment 75819
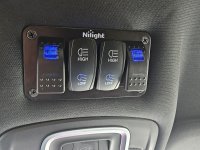
Wired up the switches and mounted them.
View attachment 75820
Factory optioned off road lights.
") View attachment 75821
View attachment 75821
Hooked up the last couple of wires to the battery, installed the fuses, and we have lights.