Ram Heavy Duty Forum

Register a free account today to become a member! Once signed in, you'll be able to participate on this site by adding your own topics and posts, as well as connect with other members through your own private inbox!

4500 Camper/Jeep Hauler Build

gprguy

Well-Known Member
Joined
Apr 14, 2022
Messages
546
Reaction score
1,308
Location
Kitsap Peninsula, WA
Probably overdue for an update - the theme lately seems to be slowly but surely. The bike mount is coming together, I hope to have it done enough by the weekend that I can move on to the box.

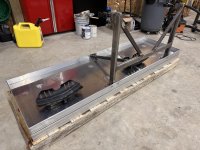
I think I'm on maybe revision 3 of trying to mount the e-bikes. Part of the problem is we have folding bikes and there just isn't a mount out there that I've seen for a folded bike. In the end I decided I need a way to secure the rear wheel and a way to clamp the seat post. I may make a little pocket for the stand/loop that it sits on while folded but that can happen later. I'll probably add some straps later too.

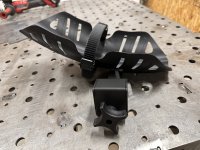
So for the wheel mounts I started out with these from Swagman, I've had good luck with their stuff in the past.
IMG_5556.jpeg

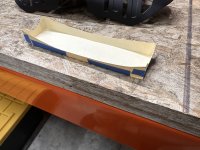
All I care about is the "tray" and ratchet strap, the rest is to mount to one of their racks and it's gotta go. Coulda sworn I took a picture of the mount hacked/ground off, but apparently not. Next up, I need a way to mount them down to the sliding tray. Arts and crafts time:
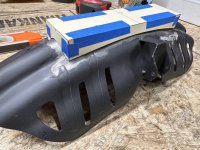
IMG_5563.jpeg

IMG_5564.jpeg

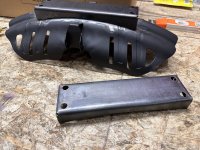
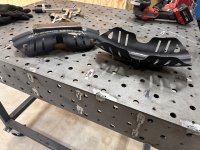
That should do.. Transfer it to steel, cut it out, bend it up:
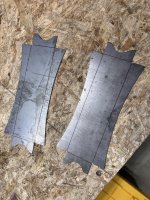
IMG_5565.jpeg

IMG_5567.jpeg

Tack it into place and it's looking pretty good to me.
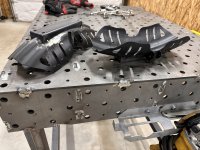
IMG_5568.jpeg

Tomorrow I'll finish welding them, get some rivnuts installed, and they should be good to go other than getting them re-coated. Then I'll be able to start on the uprights for the seat post clamps.

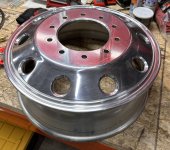
In parallel I've managed to find a couple of used wheels. My truck came with the steel rear inners and no spare, so I decided to find some aluminum rims to use as the inners and I'll keep the steel ones as spares. The 4500/5500 aluminum rims are a bit tricky to find. The older model years look to have used genuine Alcoas with 8 holes, whereas the trucks these days use a knockoff with 10 holes that are chamfered. Finding wheels that are for sure 10 hole and not the older style takes some looking, a lot of the junkyard and takeoffs are the old 8 hole design.

New they are nearly a grand a piece, but I found them at https://factorywheelwarehouse.com/g...ram-4500-ram-5500-factory-oem-wheels-and-rims for a little over $300 shipped. They are used but I am very happy with the quality. They measured out as round and true and I only have a couple small scuffs to fix before they go to powder coat.
IMG_5555.jpeg

I also ordered some TPMS sensors, hopefully that will work as expected on the 4500/5500.
 

gprguy

Well-Known Member
Joined
Apr 14, 2022
Messages
546
Reaction score
1,308
Location
Kitsap Peninsula, WA
Yep. I don't think I can get them nearly as small unfolded. Could of sworn I took a picture of them on the slide, but apparently not..

My wheels shipped from Anaheim California, and they got up here to the PNW lightning quick. Nicely packed as well. I don't know if that's their only warehouse though.
 

gprguy

Well-Known Member
Joined
Apr 14, 2022
Messages
546
Reaction score
1,308
Location
Kitsap Peninsula, WA
Finished up the wheel cradles today. I'll probably get them powder coated when I take my wheels in.

IMG_5569.jpeg

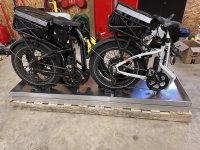
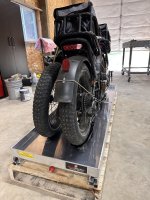
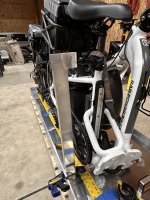
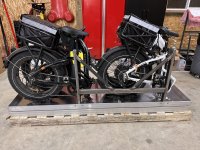
I took a few pictures of the bikes sitting roughly where they will go, with the cradles under the rear tires. Now comes the tedious hours of fiddling with the bikes until I decide I have them right where I want them. The cradle for the white one is perfect, but I can already see the cradle for the black one is going to be a bit of a pain where the bolts go in relation to some of the crossbars under the tray..

IMG_5570.jpeg

IMG_5571.jpeg

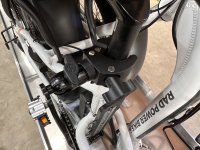
Here's a closeup of the clamp I'm planning to use to hold the seat posts. They are small but 100% metal, should be plenty strong.

IMG_5572.jpeg

I'm hoping to drop of the wheels next week at the powder coaters, so I need to get those finished up next. I stripped the clear coat today, one needs a little sanding before I take them in. The TPMS sensors should be here this weekend so once I test fit those they'll be ready to get coated.
 

gprguy

Well-Known Member
Joined
Apr 14, 2022
Messages
546
Reaction score
1,308
Location
Kitsap Peninsula, WA
The last few days have been a bit of two steps forward, one step back, but it's all for the best in the end.

The "new" wheels are ready for powder coat, the TPMS sensors arrived and fit great. I'll post up details about those part numbers after the wheels are done and tires are on and I can verify the truck recognizes them, it was a bit of a puzzle to figure out. So many TPMS sensor part numbers and it's not always obvious why..

All I am waiting for before taking them in is for some of the black badges I ordered to show up so I can try to color match the wheels.

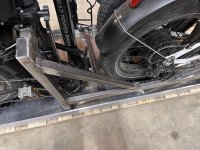
Meanwhile I started on the bike rack. I built one upright and while I like the concept in general, I wasn't happy with it.

IMG_5577.jpeg

The plan is two uprights like this (one for each bike), a crossbar between the two uprights and then an angled brace in the middle down to the other side of the tray.

By the time I got this far into this one upright I realized aluminum wasn't the right material for this particular job. I expect these to suffer a fair amount of rattling and flexing and the amount of extra gussets and fishplates I was going to need was going to get out of hand fast. In the end I decided to switch to steel and I think I'll be able to simplify it significantly plus have a lot more confidence that it won't crack going down the road. I have to pick up some steel this week to get back on this but hopefully I can knock it out over the holiday week.
 

Bigboom338

Member
Joined
Aug 23, 2023
Messages
43
Reaction score
71
Location
South Dakota
What did you get for a TPMS system? I am thinking I should get one. Did you buy a big enough system to do your trailer also?
 

gprguy

Well-Known Member
Joined
Apr 14, 2022
Messages
546
Reaction score
1,308
Location
Kitsap Peninsula, WA
Factory - for the truck, the receiving hardware is apparently built in even on the chassis cabs, you just have to enable it with AlfaOBD and then add the tire sensors. Tech Authority has part numbers listed for the chassis cab for tire sensors, I picked those up and we'll see if it all works once I get these new wheels/tires together. I figure if the rear inners work as a test then I'll do the other 4. I did test enabling the truck TPMS a few months ago and it complained about no sensors, so that's a positive sign.

For trailer I added the factory TTPMS system since my truck was optioned without it. I've already verified that all works as it should with my utility trailer, and I'll add sensors to my big cargo trailer next year. It's a pretty normal install, same as the regular trucks except you need a chassis cab specific pigtail (which is called out in that thread with the parts list). I picked up sensor packs off of eBay, they are the same as the ones used in the normal trucks.

I'm fully aware the TPMS/TTPMS won't be as proactive or possibly accurate as say a TST systems (which I used to have), but one of the goals of this truck was to eliminate the dashboard clutter of TPMS displays, backup camera displays, fuel transfer displays.. I'm willing to go with hopefully good enough to clean up the dashboard.
 

gprguy

Well-Known Member
Joined
Apr 14, 2022
Messages
546
Reaction score
1,308
Location
Kitsap Peninsula, WA
The good news is both are pretty easy to add. TPMS you just need wheel sensors (theoretically, I will prove that out soon) and TTPMS you need the trailer tire sensors, a module and pigtail that plugs into the harness at the back of your frame, and another module and pigtail that go behind the factory headliner. Installing that module behind the headliner was the only annoying part and that wasn't all that bad. I even installed my trailer sensors myself with the bead breaker I carry in my Jeep. Truck sensors I will have the tire store do so they can rebalance them. Oh and you need AlfaOBD and a security jumper of course for either.
 

AH64ID

Moderator
Staff member
Joined
Oct 5, 2021
Messages
3,337
Reaction score
3,130
I'm fully aware the TPMS/TTPMS won't be as proactive or possibly accurate as say a TST systems (which I used to have), but one of the goals of this truck was to eliminate the dashboard clutter of TPMS displays, backup camera displays, fuel transfer displays.. I'm willing to go with hopefully good enough to clean up the dashboard.

I think the factory system is better. I’ve ran both a Tire Minder and the OEM system on my 5th wheel and prefer the OEM system.

The tire minder is nice for seldom used trailers as I can move sensors around, but for my main trailer it’s nice to have the sensors on the inside.

I would like to find some shorter valve stems for the OEM sensors thou.

One thing about the valve stem cap sensors is that if you lose the sensor you may not get a warning for up to 60 minutes. Some may think a lost sensor is a rarity, but my dad has had 3 flats with lost sensors in the last 3 years. Two at once, long story, but there were zero in cab indications for any of those flats/missing wheels and sensors… so that’s a plus for the OEM system as only one of those flats wouldn’t have given instant notification.
 

gprguy

Well-Known Member
Joined
Apr 14, 2022
Messages
546
Reaction score
1,308
Location
Kitsap Peninsula, WA
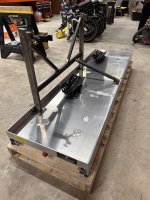
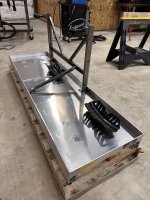
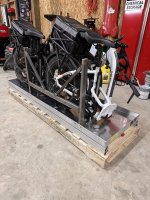
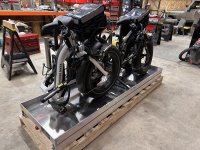
Finished up the bike rack yesterday, I'm pleased with the results and am glad I decided to start over in steel.

IMG_5593.jpeg

IMG_5594.jpeg

IMG_5595.jpeg

Not pictured are the wheel straps for those wheel trays, they'll go back on after powder coating.

IMG_5596.jpeg

IMG_5597.jpeg

IMG_5598.jpeg

IMG_5599.jpeg

I also plan to make a little tray for the stands the frames sit on when they are folded, and I'll add some kind of rubber flooring to the tray as well. I'll also need to improve the straps that hold the bikes folded in half, but that can wait. They're solid even without the wheel straps installed.

Once my badges I want to color match the wheels to arrive, these can go off to powder coating with the wheels.

Next up will be on to more important things - need to remove the air control system from the truck so I can start building the backpack box that this goes inside.
 

gprguy

Well-Known Member
Joined
Apr 14, 2022
Messages
546
Reaction score
1,308
Location
Kitsap Peninsula, WA
Busy week here with random stuff, but I did find some time to work on the truck. I removed the air control system and tanks along with the temporary shelf, so the truck is just sitting on manual fill for the air bags. Technically drivable but there's a lot of loose hoses and wiring that would need to be tied up first. It's funny, the truck looks noticeably longer again without the air tanks and all of that behind the cab.

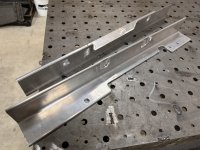
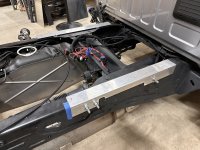
With all that done it was some time to make the brackets for the backpack cabinet to sit on. I probably slightly over engineered these but I had some fun cutting and clearancing these on the mill. There are some crossmember rivets right in this general area I had to work around. These are 1/4" thick aluminum for a nice solid base.

IMG_5607.jpeg

Installed on the truck:

IMG_5608.jpeg

These are slightly rough cut and a little long, once I have the cabinet built I'll finish them up before welding the cabinet to it.

Now the fun part starts, the cabinet structure. I am hoping to get started on that this weekend, but I need to finish deciding how I am going to do the corner trim and maybe make some test pieces. Not entirely sure how nice of a bend my brake can pull off on a longer piece, but there is one way to find out..

In other news my badges are finally on the way and should be here next week. Once they show up I'll get the wheels and bike rack off to powdercoat. Really looking forward to seeing the results of that little side project.
 

pizzatots

Active Member
Joined
Dec 11, 2021
Messages
248
Reaction score
223
Great build - have been following from the start!

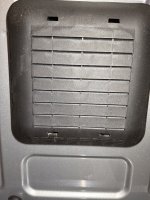
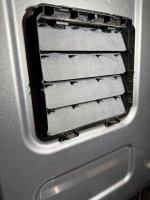
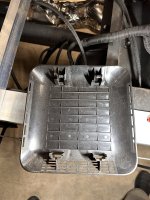
Random question - how are those cab vent covers attached? do they screw in, or are they just clipped on? wondering if these would be a good idea for the non chassis cab trucks to help with water intrusion.
 

gprguy

Well-Known Member
Joined
Apr 14, 2022
Messages
546
Reaction score
1,308
Location
Kitsap Peninsula, WA
Thanks! Good question, I hadn’t really given them a second thought. I assumed it was something new for all 4.5 gens but it would make sense to be chassis cab specific.

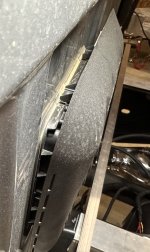
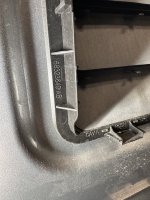
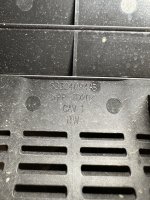
They do look to clip on to the normal vents. They definitely wiggle independent of the vent with the rubber flaps. I poked at it a little but I can’t easily access the tabs to unclip them, and it’s cold here so I don’t want to push my luck. Here’s a couple photos though.

IMG_5609.jpeg

IMG_5610.jpeg
 

Brutal_HO

The Mad Irishman
Staff member
Joined
Feb 1, 2020
Messages
12,208
Reaction score
21,847
Location
Douglas County, CO
Thanks! Good question, I hadn’t really given them a second thought. I assumed it was something new for all 4.5 gens but it would make sense to be chassis cab specific.

They do look to clip on to the normal vents. They definitely wiggle independent of the vent with the rubber flaps. I poked at it a little but I can’t easily access the tabs to unclip them, and it’s cold here so I don’t want to push my luck. Here’s a couple photos though.
Good thing they labeled TOP, some idjut might not put it back on correctly.
 

gprguy

Well-Known Member
Joined
Apr 14, 2022
Messages
546
Reaction score
1,308
Location
Kitsap Peninsula, WA
Starting to get somewhere..

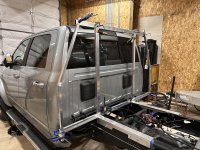
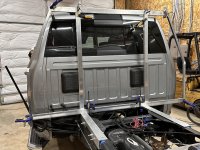
The backpack is taking shape. At this point the two uprights are welded to the bottom crossbar, but most of the rest is clamped together while I figured out the angles.

IMG_5621.jpeg

IMG_5622.jpeg

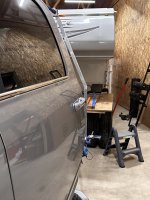
I am happy with the profile so far, although I did waste a solid hour today trying to figure out why things wouldn't center up. Turns out the cab is shifted 1/4" to one side. Yeah... Still deciding what to do about that, but odds are it'll just be what it will be as I'm not building the bed off center from the frame rails.

IMG_5623.jpeg

IMG_5624.jpeg

Next up will probably be finishing those cuts, getting everything welded together on the table and add some cross bracing.

Meanwhile, I've always wanted a night edition Ram. Never managed to get one for one reason or another, and this time around it's because there's no such thing as a night edition chassis cab. No big deal for the most part, the trim parts are all pretty generic and I can just use normal night edition stuff. Except for the hood badge.. I've never seen a 4500/5500 badge that wasn't at least partially chrome. So I figured I'd have to custom paint my chrome 4500 badges, or plasti-dip them, or something. Boy was I happy when I found out these existed.

IMG_5619.jpeg

Turns out on some of the low volume paint colors they do black badging, even on the 4500/5500's. These will save me a ton of work. If it's helpful for anyone in the future, the 4500 black badge part numbers are 68362224AC for the left, 68362225AB (or AC) for the right. I don't know the 5500 part numbers but they exist too.

Now that I have these I can get the new wheels in for powder coating later this week, and the bike rack too. More to come soon I hope.
 

Users who are viewing this thread

Top