Yep. They closed the gate 7AM on Thursday.NICE! Is the road closed now?
OA
Yep. They closed the gate 7AM on Thursday.NICE! Is the road closed now?
Thanks. Bummer, I was hoping to get up there before it closed. Oh well, next year.Yep. They closed the gate 7AM on Thursday.
OA

 .
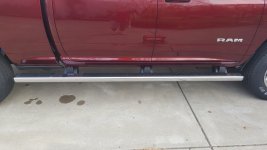
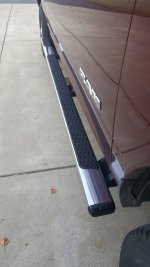
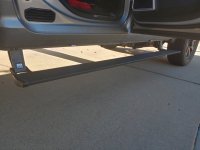
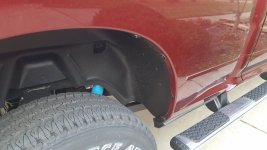
.Added a set of Mopar running boards. I was originally going to go with a set of Westin R5 M-Series wheel to wheel but I prefer the more full-length step tread on these.
Of course, the Mopar boards bolt right on whereas the Westin wheel to wheel does require you to drill a couple 1/2" holes to attach an extra bracket at the rear of the step. These
are also a bit better constructed IMO (enclosed underside versus open underside that you add stiffener bars) and at $675 they were about $200 less than the Westin. All in
all, I am quite pleased with them and they definitely make life easier getting in and out of the truck. My wife was very happy to see them get put on.
I did look at getting the chrome version of the style you see on the Night Edition trucks but the dealership said those do not come in a kit yet and that it would cost $1300+
for the boards and all the connecting hardware. I was not willing to pay that price.
Got lots of those here too. haha. No Subarus where i just moved to, just lots of trucks and piney woods.That’s a Deer wacker!! Not sure if it would hold up to the big black buggers in my neighborhood though. I think I would rather smack a Subaru
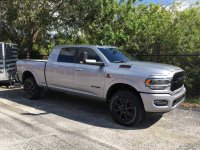
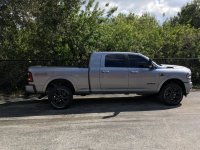
Love the pictures. One thing, how in the world were you able to keep the truck looking so dam clean ?Plowed my way through a part of Cascade Lakes highway to the trailhead the day before they closed the gates for the season for a short hike/snowshoe. The PW made short work of it.
OA


I was the only one out there that morning so I was never behind someone spraying me up the mountain. The hydro blue is good at hiding dirt as well. It just loses its luster more than anything.Love the pictures. One thing, how in the world were you able to keep the truck looking so dam clean ?
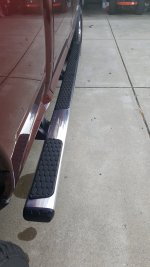
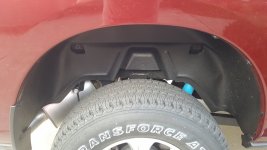
That's what I like about the Amps vs the factory steps. They tuck up higher. Not as tucked up as much as my 3rd Gen but still pretty hidden. They are also less picky about mud or dirt in the joints.Installed AMP power steps on Saturday. Installation guide said 3-5 hours but between lunch and bourbon it took us 9 hours.
These really tuck up nicely under the body and almost can't tell they're on the truck. Overall pretty happy with them.
Finished up a couple of additions I've been slowly working on in the evenings before the dark and cold set in.
Amp Power Steps. I didn't order the mopar steps with plans to add RBP, but my wife got tired of waiting, so I went with these instead.
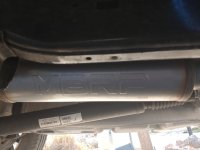
MBRP cat-back exhaust. It is definitely much louder than the videos online led me to believe. Don't get me wrong, it sounds good, but had I known, I'd have saved some coin and gone with Mufflex like I had on my 2016.