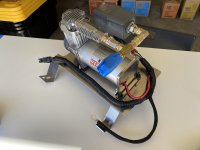
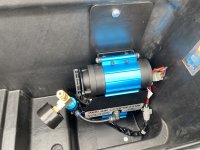
Finally got this done, had it installed today. The ARB twin sits in the Rambox, passenger side, towards the cab. It's mounted to a bracket to keep it from moving around. My shop is in the process of fabricating another bracket to hold the T-valve, but in the meantime it's secured with zip ties. I'm happy with the amount of space it occupies, it's great.
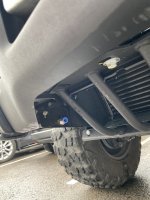
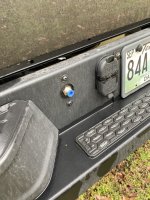
Air lines run to the front and rear bumper where outlet connectors are mounted, nice and clean. As desired, all 4 tires can be connected and simultaneously aired down or up.
As a test, I aired down to about 25psi, then back up to 40. Airing down is very fast, and airing up was rather quick as well. I didn't time it (I was more interested in testing the function, not speed), but I would guess it aired down in under 3 minutes and back up in about 5-6 minutes. I'm running 40x15.50r20 tires, by the way.
Aside from how the system works, I'm very pleased to know that I can air up and down without having to have the doors open or monitor things from outside - the digital dash gauge is all I need, so I can air up and down from the comfort on being in the cab, without the sound of the compressor.