Looks fun and good installed. Just ordered one this morning.... Outside missing some hardware and a template the directions were pretty spot on? Any chance you want to take a picture the engine bay where you installed the new parts?
If you have some automotive mechanical experience, the instructions were okay. IMO they were on the vague side and not specific for the Power Wagon. One step is to remove the lower grille via 7 retainers accessed from under the truck, which would be fine for a non-PW truck...but we have a winch and some of those retainers aren't really accessible. Read the instructions before you start so you have a good idea of what's going on, you'll notice several steps missing (like reassembly of headlight and grill)...
Don't try to cut steps with fender and headlight removal, we tried but quickly realized that the headlight has to come out. The new lower air box is basically molded around the headlight.
I can get more pics, do you have anything specific you're looking for? If you're wondering if it could be mated to a CAI (like S&B) it can't without some serious fab work.
@TrailWhale, you my friend are a brave, brave man! I am sure that first hole was a little stressful to drill. But like all your upgrades, it looks awesome! And congrats, I think you're the first one I've seen do it!
Before the first hole, it's center punching the holes! That's where it's no turning back lol
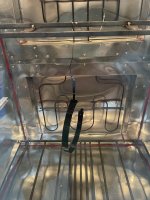
@TrailWhale It could be just the picture looks deceiving, but boy does that fender area look tight. I'm worried that it's going to restrict a lot of airflow. Notice anything different in the truck with it on?
I don't see any worries with airflow, it's pretty girthy. I'll keep an eye on MPG and see if there is anything to report back with.
I will say I removed a S&B cold air intake so I could install the snorkel (they're not compatible) and I feel like the throttle response is slightly more sluggish than with the CAI. I also have a Pedal Commander, so it's an easy fix.


.jpg")