diesel_driver_3500
Active Member
- Joined
- Apr 3, 2021
- Messages
- 119
- Reaction score
- 118
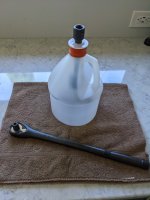
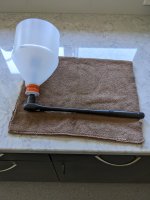
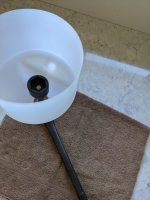
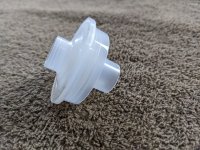
I commented in another thread that I would post pictures of the "tool" I made to make changing the rear fuel filter a truly no mess task. @Brutal_HO if this is posted in the wrong place, please move it to the appropriate section.
In the past, I have designed and manufactured custom billet parts for BMW race bikes. They were sold world wide, and I enjoyed the whole process and experience.
My plan for this tool was to build a crude prototype, refine it, and then manufacture and sell it to distributers and through retail outlets. Manufacturing costs would be minimal, with the largest expense being the cost of molds for injection molding of the catch tank. The socket extension would need to be included to eliminate the chance of leaks, but the cost of the tank itself would be minimal, and the complete tool wouldn't be too expensive. Then I changed my mind and decided to give back to all the forum members, and show everyone how to make it themselves.
I threw this together one morning, and it performed better than I had imagined. Laying under my truck and changing the filter in my new 2021 for the first time, I was rewarded with an absolute "no mess" filter change. I had been dreading the filter change after reading all the horror stories of fuel running down your arms and driveshaft, and the mess in general. Without exaggeration, you could wear a suit and tie when changing the filter with this. It works that well.
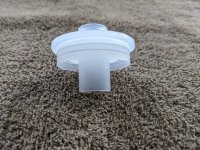
Here are a few pictures, and I'll explain the parts I used in my next post.
In the past, I have designed and manufactured custom billet parts for BMW race bikes. They were sold world wide, and I enjoyed the whole process and experience.
My plan for this tool was to build a crude prototype, refine it, and then manufacture and sell it to distributers and through retail outlets. Manufacturing costs would be minimal, with the largest expense being the cost of molds for injection molding of the catch tank. The socket extension would need to be included to eliminate the chance of leaks, but the cost of the tank itself would be minimal, and the complete tool wouldn't be too expensive. Then I changed my mind and decided to give back to all the forum members, and show everyone how to make it themselves.
I threw this together one morning, and it performed better than I had imagined. Laying under my truck and changing the filter in my new 2021 for the first time, I was rewarded with an absolute "no mess" filter change. I had been dreading the filter change after reading all the horror stories of fuel running down your arms and driveshaft, and the mess in general. Without exaggeration, you could wear a suit and tie when changing the filter with this. It works that well.
Here are a few pictures, and I'll explain the parts I used in my next post.