Rockcrawlindude
a rock crawlin’ dude
What is that?
What is that?
Thank you for posting this! I find this kit fascinating for 2 reasons....
It was a post by @Brutal_HO discussing this electrical component where I first heard about it so all thanks to him!Thank you for posting this! I find this kit fascinating for 2 reasons....
1st being, as I understand at least, it keeps the front axel disconnect from engaging when shifting into 4low. So essentially I would have something like my 87' 4runner with manual hubs that I use to hit the trails with, where I'm always using 2low by leaving the front hubs "free". That thing needs it though with it's anemic 22re 4cyl at altitude! I could definitely see the use case, but with the Ram it would be more for when I was towing.
2nd being that my guess is it keeps the front axel disconnect from engaging by interrupting the signal from the 4wd engagement switch on the t-case (manual floor shift). I just had to replace this switch on our '17 3500 because it kept giving the "4wd shift in progress" message over bumpy roads without me touching the 4wd lever. If the new switch ever starts to wear out like the original one did, I might consider this kit to interrupt the signal from the 4wd switch all together so the truck doesn't think I'm trying to shift into 4wd when I'm not. I would then just leave the 2Lo switch on all the time until I actually needed 4wd, essentially treating it like my manual hubs on my old truck. Is my understanding of this kit correct?
Awesome! That makes perfect sense. I will be doing this eventually I'm sure. Good point on the tight spots too. And good luck with the rest of your build!It was a post by @Brutal_HO discussing this electrical component where I first heard about it so all thanks to him!
And you are correct - this keeps the axle disconnect from engaging and in doing so fools the front axle into remaining open since all torque being delivered through the front driveshaft will be directed vie the open differential to the axle shaft on the side with the least resistance. That, of course, the is axle stub that is not connected to the axle disconnect. I was actually considering possibly installing an Atlas transfer case since with their twin stick set up you can mechanically disconnect the front axle while driving the rear in two low but this is a much more cost effective option for me and it only costs $150 and takes around thirty minutes to install.
On other vehicles I have used two low usually when navigating tight technical sections of trails. Many times with the front end being locked it is very difficult to steer at extreme angles in four low. This is a great option for those times and definitely when maneuvering a big trailer in tight spaces.
It was a post by @Brutal_HO discussing this electrical component where I first heard about it so all thanks to him!
And you are correct - this keeps the axle disconnect from engaging and in doing so fools the front axle into remaining open since all torque being delivered through the front driveshaft will be directed vie the open differential to the axle shaft on the side with the least resistance. That, of course, the is axle stub that is not connected to the axle disconnect. I was actually considering possibly installing an Atlas transfer case since with their twin stick set up you can mechanically disconnect the front axle while driving the rear in two low but this is a much more cost effective option for me and it only costs $150 and takes around thirty minutes to install.
On other vehicles I have used two low usually when navigating tight technical sections of trails. Many times with the front end being locked it is very difficult to steer at extreme angles in four low. This is a great option for those times and definitely when maneuvering a big trailer in tight spaces.
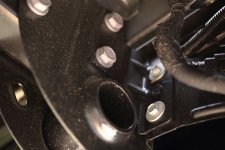
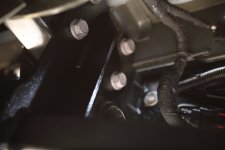
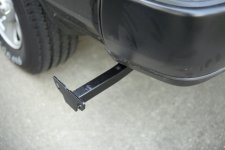
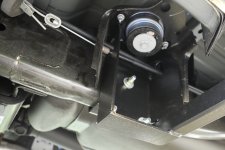
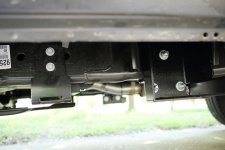
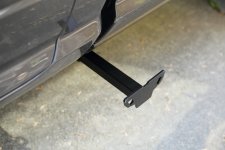
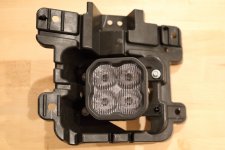
Sturdy looking mounting point. Do you have any concern snagging them off highway, sticking out from the body so far?
How far does your camper overhang? You could shorten those things up a good bit, I bet.
If the camper isn’t much wider than the truck, it would add clearance and be visually more appealing to shorten them up as far as possible. I don’t know how much adjustability is built into the arms but you Could cut the end plates off and shorten up the tube and weld the end plates back on. the shorter they are, the less leverage on the mounts, too.That's the one concern that I have really spent much time mulling over. Yes, I will lose a few inches of ground clearance and they will be four inches wider on each side although I do feel a 3" lift and plus moving up to 37" tires will offset some of that. I really do not plan on hitting the toughest trails or obstacles - if there is a go around I will not hesitate to use it. I have found through the years that if we pick reasonable trails, take our time, move slowly and are not afraid to use a winch most damage can be eliminated.
There is not much overhang since the overall width of the camper is 80" and I believe our trucks are 79" at their widest point - I could be wrong though. The 80" seems to be related to some sort of legal code for passenger vehicles or something. And you are correct, I have already slipped that tube back in a few more inches and once I mount the camper I will take an even closer look. I want to make sure that there is no possibility of any contact between the tie-downs and the side of the bed though. I will also need to make sure there is no possibility of the camper sliding a few inches to the side and pulling one of the tie-downs into contact with the side of the bed.

What is a Cummings diesel?They say pictures are worth a thousand words so let's begin with one...
View attachment 9741
Here is a list of the options I selected along with a brief explanation for each:
BASE VEHICLE & TRIM:
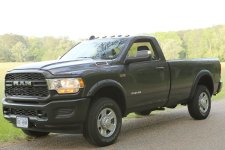
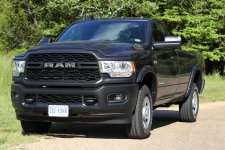
2021 - My initial goal was to find a swell deal on a 2020 close to the end of the year. If I had been able to find one with the exact options I wanted and it was within a reasonable distance odds are I would be in it right now. Although the options I wanted could be found there were many other options I did not want which prevented me from closing a deal. There are not many standard cabs out there and it seems like most had the Chrome Appearance Group ($1,095) which I had no desire for. After much searching I shifted my focus to ordering a 2021 and seeing how good of a deal I would be able to find. Obviously, I found a really good deal and the rest is history.
RAM - I had been considering a new Wrangler or Gladiator for a few years but as a consumer I simply did not see the value in either of those options. Sitting in a $55-60k Rubicon left me with the feeling that I was being robbed. In contrast, while sitting in a $45-50k RAM 2500 or 3500 I felt like the deal was fair. The straw that broke my back was when a Jeep dealer would "try" to see if they could save you $500 or so dollars while the RAM dealer was willing to knock off thousands without even asking.
3500 - Originally my research led me to believe a 2500 with air bags would be perfect for my needs but there were many times where I read of 2500 owners stating they were a few hundred pounds over GVWR or they wished they had purchased a 3500. After talking with two dealers they stated that a 2500 regular cab 4x4 could not be ordered with the Automatic-Level Rear Air Suspension ($1,705). That was the fork in the road which led me to selecting a 3500. Owners of 3500s spoke of the rough ride with an empty bed but I was going to have a camper permanently installed so for my purposes the 3500 seemed like the best choice. If I do require air bags I will be happy to install Air-Lift or Firestone manual bags since my load will be constant.
Tradesman - I like to keep it simple and the Tradesman provided that in spades. If I wanted to add a few nice items that was easy enough to do but most important to me was not being forced to purchase exorbitantly priced packages with a long list of unnecessary, complex and fragile components. Yes, a 12" screen would be great but I rarely listen to the radio and like to turn a single knob to turn down the fan. There exists a great disconnect with new technology that, although it appears to be flashy, it is actually slowing us down. In this Tradesman, if I want to turn the fan higher I reach for one knob and turn it a bit, same with the temperature, radio volume, etc. The big touch screens force more interaction to accomplish the same task. Do the manufacturers perform time and motion studies and work towards simplifying tasks while driving for safety purposes or are they simply interested in selling very expensive and impossible to repair options?
Regular Cab - Now this was an easy-tough decision. It seems like most opt for a crew cab and 6.5' box and are quite happy with their choice. A close friend with that set-up removed his back seat and has quite a bit of storage space there. With a camper on the back I was left considering a 6.5' or 8' box option. Wheelbase was a key metric for my needs so a crew-cab with 8' box (169.5" WB) was not an option. It would be either regular and 8' box (140" WB) or crew and 6.5' box (149.5" WB). Since this will be a full time rig I opted for the 8' box which included a regular cab for my requirements. My thoughts centered around the fact that I do not plan to have anyone accompany me on a regular basis and I do not plan to be driving all the time. The majority of my time will be at camp and since the weather can turn nasty for a few days here and there the additional living room inside the camper would be welcome. I still believe the crew cab and 6.5' box is a very good option and ideal for most although I wanted to try something slightly different and enjoy the shortest wheelbase.
4x4 - This was possibly the easiest of all decisions. When exploring trails by default I remain in two wheel drive - this provides me with a very good measure of traction available and continuously refines my driving skills when traveling though difficult areas. If I run into problems I now have four wheel drive as an option to help correct. I have been quite surprised over the past few decades regarding the places I have been able to safely travel in two wheel drive that I never would have even considered if I had not had four wheel drive as a backup.
8' box - much of this was already covered when discussing my regular cab choice but I will say that a regular cab with an 8' box invokes an image of a classic truck. Tying that together with the base Tradesman and a selection of simple controls is a winning combination for me.
6.4L V8 Heavy Duty HEMI MDS Engine - As the standard engine this would satisfy my requirements. After talking with a number of owners regarding the 6.7L I6 Cummings Diesel Turbo Diesel option it was obvious that since I was not going to be towing a 10k plus trailer full time I would be fine with the 6.4L HEMI. Also, the entire Tier IV emissions for the modern diesels represent complexity and expensive dealer only components that I simply do not wish to involve myself with. The 6.4L is a mature engine that is very common and can be easily worked on most anywhere I travel. A great example would be the naturally aspirated low-pressure port fuel injection system - this can be examined and fixed in the parking lot while the turbo high-pressure direct injection system used in the diesel is much more complex requiring diesel engine specialists. I ran the numbers and even on mileage alone the break even for the diesel being used for a light duty application such as mine is 250-500k miles. As much as I would love to say I have a Cummings diesel under the hood it simply did not make sense for my requirements.

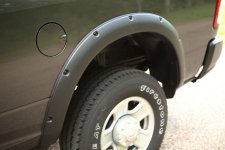
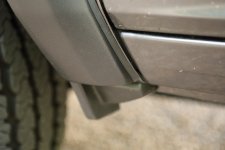
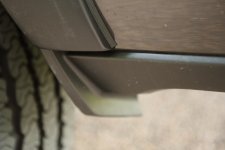
That’s almost where it goes. Never mind my pre-wiring for my topper.Today I ordered MOPAR trailer wiring harness and mud flaps. Since much of my time involves driving on dirt and gravel roads I consider good mud flaps a necessity for a multitude of reasons.
View attachment 15882
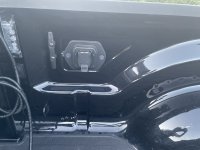
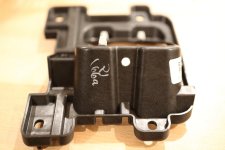
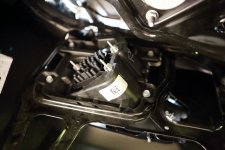
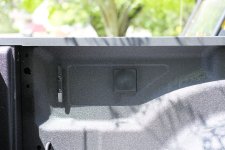
My goal is to install the fifth wheel / gooseneck harness into this existing square that is already in my bed and connect it to the power and ground for the running lights on my camper. Here is a picture of the existing square:
View attachment 15883
