Ram Heavy Duty Forum

Register a free account today to become a member! Once signed in, you'll be able to participate on this site by adding your own topics and posts, as well as connect with other members through your own private inbox!

2021 RAM 3500 Tradesman | AEV Prospector | FWC Grandby

ramblinChet

Drinks Alone
Joined
Dec 24, 2020
Messages
477
Reaction score
1,956
Love the last shot! Can you share how you captured that? Thanks.
Here are the details:

My father spend his life as a professional medical photographer and I have always enjoyed photography as a hobby. My father was very pragmatic and used the best tool for each specific job; he shot roll film and digital using Hasselblad, Zeiss, Mamiya, Nikon, Canon, Olympus, etc. He was very scientific performing much research and experimentation over the decades while also networking with other professionals and continuously educating himself. I am fortunate to have inherited many of his traits although compared to him, I am an amateur photographer and have zero skills in videography.

Nearly one year ago I set a goal to take better pictures to more accurately document my travels. I began researching all available options and despite have a wonderful semi-professional Canon DSLR with an assortment of L-Series lenses, I decided to begin with a camera phone. Although money is rarely an object, I don't waste money on technology or options I have no need for. The aforementioned process was identical when selecting and building my most recent adventure vehicle - consider all options, down-select based upon core requirements, review process with others, complete purchase, enjoy.

My decision was to go with a Google Pixel 7, not the Pro variant. There is an objective web site DXO MARK which performs a variety of tests to cameras, cellular phones, lenses, etc. My plan is to purchase a Joby flexible tripod this week so I have more options regarding camera placement. In the photo above, which was pulled from a video below, I set the phone on level ground and propped it up using a fist-sized rock. Many are held-up believing they need this or that before anything can happen. On the contrary, you just need to stop with the excuses and begin doing what you have always wanted to do no matter what that may be.

Here are my most recent short clips - my goal is to gradually work up to 10-15 minute videos over the next year although I have much to learn.


Last edited:

ramblinChet

Drinks Alone
Joined
Dec 24, 2020
Messages
477
Reaction score
1,956
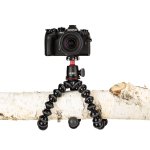
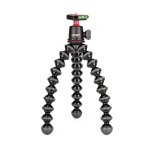
Following some research I stopped into a nearby Best Buy to purchase a Joby GorillaPod 3k Kit. I purchased from Best Buy since they are one of the companies which permits discreet overnight parking on their property. They are on sale now for $40 and appear to be being replaced with an updated version so I took advantage of yesterday's technology at a discount.

As advertised:

Flexible ABS tripod and optional ball head with 3kg carrying capacity for all the tools of the modern content creator.
  • Flexible legs & ball head secure mirrorless cameras anywhere
  • Precise: 360° panning bed, 90° tilt & bubble level
  • Strong: Holds devices weighing up to 3 kg (6.6 lbs)
  • Rubberized ring and foot grips for stability in terrain
  • Durable medical-grade ABS plastic and TPE for secure joints
job01.jpg

job02.jpg

job03.jpg
 

ramblinChet

Drinks Alone
Joined
Dec 24, 2020
Messages
477
Reaction score
1,956
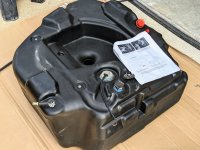
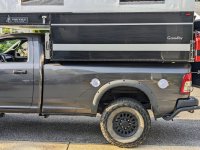
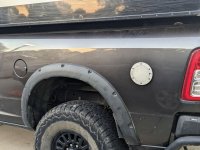
Today we installed a Titan auxiliary 30-gallon diesel fuel tank into my AEV Prospector with a 6.4L HEMI engine. Yes, you heard that correctly - I am installing a diesel fuel tank into my gas powered adventure vehicle so I am able to carry 30-gallons of diesel fuel. This auxiliary tank mounts in place of the spare tire and since I am running 37" tires I am unable to carry a spare under the bed so this space is available.
image000000(380).jpg

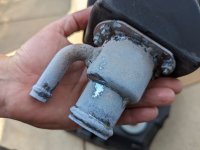
The exterior of the filler neck is in poor condition so I will call Titan and request a replacement. Unfortunately, this was the first of several disappointments with this installation.
image000000(379).jpg

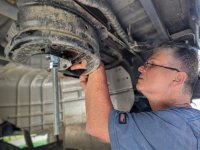
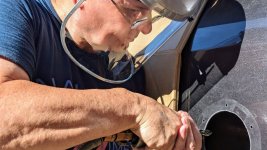
This is Ed - he is one of my closest friends and one of the most amazing mechanical engineers I have ever worked with. We have know each other for two-decades plus and worked together at NASA Langley Research Center and Siemens VDO for many years. Back in the 1980s, he paid his way through school working full time performing small engine repair. He has built insane hot rods, experimental aircraft, spacecraft, and precision tooling. Ed is a rare breed of engineer that is as good with his hands as he is with his head.
image000000(378).jpg

Since the instructions did not provide a template regarding where the diesel cap should be installed, we spent several hours placing a circular paper cutout in different areas. We even placed an identical cutout on the slightly smaller stock gas cap since comparing a light white circle against a dark one of a slightly different diameter that was closer to the curve of the wheel well created optical illusions. After many measurements, moves, and views from multiple angles, we nearly agreed on this placement. Just prior to cutting we moved our reference up 1/16" and then to the rear 11/16", and repeated the process. We ended up with a mounting spot that we both considered ideal.
image000000(381).jpg

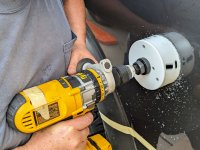
Here is where we "crossed the Rubicon." I felt confident we had selected the perfect area to place the diesel cap and was excited to be cutting a 6.50" hole in the side of my rig. If you are familiar with the Titan instructions, it calls for a 6.75" hole and yes, we had the correct hole saw, but decided to play it safe and work our way up to the final hole diameter. It's easy to clean up a bit here and there - it's impossible to easily put a little bit back. This was a good decision since the body panel flexed to a slight degree while being cut. Keep in mind there is a slight radius on the side of the bed and this hole is being cut into a curved surface that distorts.
image000000(382).jpg

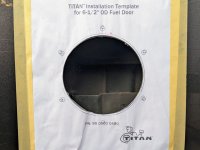
We centered, indexed, and taped the Titan supplied template to mark bolt holes and see how much more trim work we had ahead. Since we were not in a rush, we also decided to place the exterior trim ring over top to verify hole alignment. I was disappointed to see that the hole alignment in the template was off by approximately 1/8" for each of the five mounting holes. We had already center punched the holes but were fortunate to check one more time using an alternate method. Titan supplied a flawed template.
image000000(383).jpg

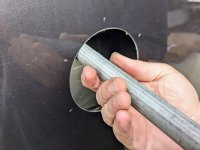
With the hole drilled we cleaned up the edges with a fine curved file. Note the template center punched holes 1/8" inboard of the correct ones which were now center drilled. Having the correct tools and taking a few additional minutes is very valuable to a proper installation. Like we have all been told - it's all about the small details.
image000000(384).jpg

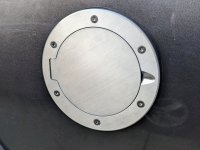
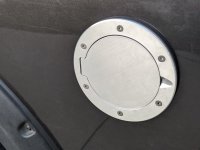
Here is the diesel fill cap installed and looking good. As you know, I am 95% function and 05% form but for only a few dollars I am planning to remove this cap and knock the edge off the shiny appearance. My options are to either have it anodized black or if that proves to be too expensive, I will prepare the surface, prime it, and then apply a dark paint.
image000000(385).jpg

Here is how the nearly finished installation looks so far. My plan is to pull the tank down to install longer rubber filler hoses since the ones supplied by Titan are about 3" too short laterally and vertically. I am not sure if Titan included the wrong pieces although I plan to discuss this with them also. It will be interesting to pull up to a fuel station in the future and fill the front tank with 32-gallons of gasoline and the rear with 30-gallons of diesel.
image000000(386).jpg
 
Last edited:

ramblinChet

Drinks Alone
Joined
Dec 24, 2020
Messages
477
Reaction score
1,956
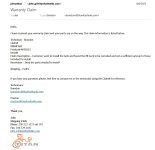
I called Titan on Monday and discussed the problems I had with a technician named Brandon and Tuesday morning I had already received confirmation that my parts were on the way. Another important fact is that Brandon spent easily twenty or so minutes with me on the phone, answered every question I had, and in general, provided me with the best customer service experience I have had in a long time. Parts have been shipped and are scheduled to arrive this upcoming Monday.

titan warranty.jpg
 

ramblinChet

Drinks Alone
Joined
Dec 24, 2020
Messages
477
Reaction score
1,956
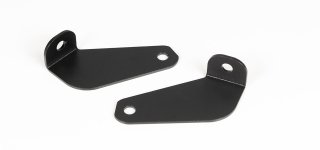
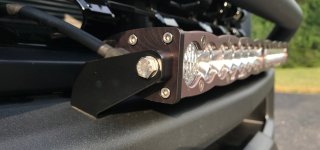
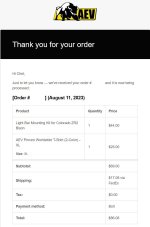
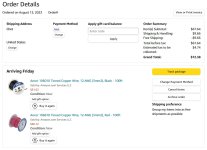
Ordered Colorado ZR2 Bison light bar brackets from AEV Conversions although it looks like they may work for me. Hopefully next week I am finally able to mount my Diode Dynamics Stage Series 30" white combo light bar on the nose of my adventure vehicle.
auto-draft-32.jpg

Note how the upper surface of the bumper rolls forward and slightly down - most normal brackets are designed for a flat surface. My AEV Premium Front Bumper shares a similar profile. Also, I want the light bar to be projected forward an inch or two so it does not interfere with operation of the clutch on the Warn 16.5ti heavyweight winch.
auto-draft-31.jpg


Copy of receipt for reference.
AEV 03.jpg
 

Rockcrawlindude

a rock crawlin’ dude
Joined
Jan 1, 2021
Messages
6,341
Reaction score
16,453
Location
Georgia USA
Ordered Colorado ZR2 Bison light bar brackets from AEV Conversions although it looks like they may work for me. Hopefully next week I am finally able to mount my Diode Dynamics Stage Series 30" white combo light bar on the nose of my adventure vehicle.
View attachment 60923

Note how the upper surface of the bumper rolls forward and slightly down - most normal brackets are designed for a flat surface. My AEV Premium Front Bumper shares a similar profile. Also, I want the light bar to be projected forward an inch or two so it does not interfere with operation of the clutch on the Warn 16.5ti heavyweight winch.
View attachment 60924


Copy of receipt for reference.
View attachment 60925
$69
Nice.
 

ramblinChet

Drinks Alone
Joined
Dec 24, 2020
Messages
477
Reaction score
1,956
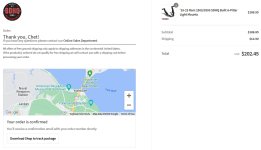
Since I am preparing to install lights it was necessary to order supplies:
Previously I purchased five rolls of Tesa Triple A 51036 flag-resistant PET cloth tape so I already have some available. A close friend who is an EE has tools, crimps, fittings, and heatshrink available. It will be so nice to finally have auxiliary lighting available since I frequently explore trails after dark, especially during the winter.

ancor 01.jpg

ancor 02.jpg

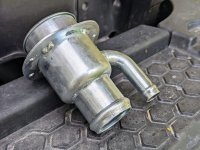
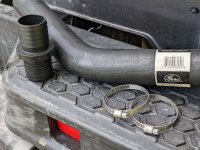
On Saturday, the parts from Titan Fuel Tanks arrived a day early and are all in good condition - thanks again for your help Brandon! Here is the replacement filler neck. If you scroll up to our initial installation you can see the significant difference in surface finish between this and the initial one sent.
image000000(394).jpg

I requested an additional hose since the three hoses that come with the kit are five or so inches too short for my application and off center slightly. Brandon included the section of hose I requested and as discussed, also included another fitting and clamps. It is nice to receive everything needed and this job should be completed sometime this week.
image000000(395).jpg
 
Last edited:

ramblinChet

Drinks Alone
Joined
Dec 24, 2020
Messages
477
Reaction score
1,956
This afternoon was spent opening up the hole for the diesel filling door to its final dimension. A die grinder with a carbide bur and manual deburring tool was used and time was taken to slowly open the up to the final dimension. Several coats of protective paint was applied to all holes and the dimension matched the cap perfectly.
image000000(398).jpg

Here is the final installation of the cap. Loctite 222MS (purple) was applied to all fasteners before being torqued to 45 pound-inches.
image000000(399).jpg

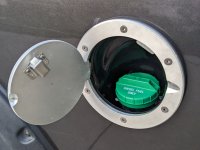
There she is - my beautiful diesel filling cap on my AEV Prospector with a 6.4 liter Hemi engine. I also finished up routing the hoses underneath and was very happy with how everything turned out. They are very clean and orderly with none being under tension.
image000000(400).jpg

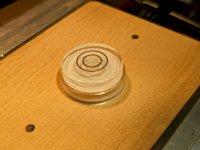
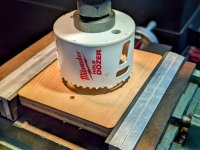
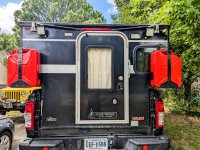
Here is a piece of my interior from my Four Wheel Camper - it is a small rectangular piece of wood that mounts to the outside of the battery box in the rear. I though this would be a perfect place to mount the Victron Energy BMV-712 Smart head unit. This component was salvaged from one of my previous adventure vehicles. Here is the door in a machinist's vise with a level to verify the work was in the proper plane prior to cutting. These small details save time and money over the long term and directly impacts work quality in a positive way.
image000000(401).jpg

Again, taking time and having the proper tools is the correct way to do things every single time. I am not going to become philosophical here but now is the time for American men to "get up, dust off, reload, re-calibrate, re-engage, and go out on the attack." The future of humanity depends on you doing the best you possibly can.
image000000(403).jpg

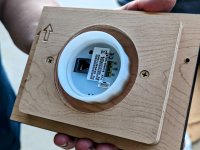
Here is the attachment sleeve passing through the back of the interior piece. I still must install the shunt along with a few other cables but that is just busy work that I will accomplish someday soon. The BMV-712 is a really nice unit which provides a wealth of information. Once the system is up and running I will post additional photographs and associated information.
image000000(402).jpg

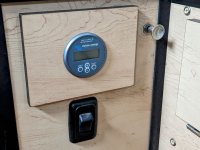
Installed but not yet connected to power.
image000000(404).jpg


Last edited:

jsalbre

Well-Known Member
Joined
Oct 29, 2019
Messages
2,572
Reaction score
3,283
Location
ID
This afternoon was spent opening up the hole for the diesel filling door to its final dimension. A die grinder with a carbide bur and manual deburring tool was used and time was taken to slowly open the up to the final dimension. Several coats of protective paint was applied to all holes and the dimension matched the cap perfectly.
View attachment 61210

Here is the final installation of the cap. Loctite 222MS (purple) was applied to all fasteners before being torqued to 45 pound-inches.
View attachment 61211

There she is - my beautiful diesel filling cap on my AEV Prospector with a 6.4 liter Hemi engine. I also finished up routing the hoses underneath and was very happy with how everything turned out. They are very clean and orderly with none being under tension.
View attachment 61212

Here is a piece of my interior from my Four Wheel Camper - it is a small rectangular piece of wood that mounts to the outside of the battery box in the rear. I though this would be a perfect place to mount the Victron Energy BMV-712 Smart head unit. This component was salvaged from one of my previous adventure vehicles. Here is the door in a machinist's vise with a level to verify the work was in the proper plane prior to cutting. These small details save time and money over the long term and directly impacts work quality in a positive way.
View attachment 61213

Again, taking time and having the proper tools is the correct way to do things every single time. I am not going to become philosophical here but now is the time for American men to "get up, dust off, reload, re-calibrate, re-engage, and go out on the attack." The future of humanity depends on you doing the best you possibly can.
View attachment 61214

Here is the attachment sleeve passing through the back of the interior piece. I still must install the shunt along with a few other cables but that is just busy work that I will accomplish someday soon. The BMV-712 is a really nice unit which provides a wealth of information. Once the system is up and running I will post additional photographs and associated information.
View attachment 61215
Nice choice. Victron makes the best equipment and they’re what I use in every install I do.
 

ramblinChet

Drinks Alone
Joined
Dec 24, 2020
Messages
477
Reaction score
1,956
Much of my exploring takes place at night so I have been meaning to install ditch lights for some time. They will be most valuable to me when maneuvering around a switch-back while crawling up a mountain side on a rough dirt and gravel road. It's not a comfortable feeling when you alone in the middle of a forest and are turning hard into blackness on a narrow trail with no guardrails in a vehicle so large you are unable to see what is on either side of you. These SDHQ A-pillar light mounts seem to be some of the best available that will not conflict with the installation of my AEV Snorkel.
SDHQ.jpg

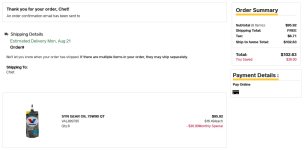
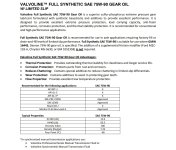
Since I will be installing my AEV front and rear differential covers next week, this is the perfect time to also change the differential fluid - I am also just over 50k miles. I really struggled with deviating from the factory recommended fluid but after receiving conflicting information from different dealers, I spent time researching and speaking with Valvoline regarding their 75W-90 full synthetic gear oil. The front AAM 9.25 requires 4.8 pints (2.4 quarts) whereas the rear AAM 11.50 requires 8.8 pints (4.4 quarts) for a total of 6.8 quarts. I ordered one extra quart just in case.
valvoline.jpg


The Valvoline is 75W-90 while the Mopar requirement is 75W-85. During my research I discovered that Valvoline produces a 75W-85 gear oil although it is for the European market. Since this meets both API GL5 and SAE J2360, I am confident it will be just fine. Another one of the key reasons I selected this fluid is because if I required an immediately replacement in an unknown location, I believe the Valvoline would be easier to locate compared to the Mopar.

valvoline tech.jpg
 
Last edited:

ramblinChet

Drinks Alone
Joined
Dec 24, 2020
Messages
477
Reaction score
1,956
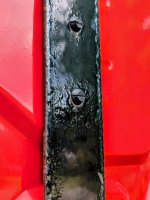
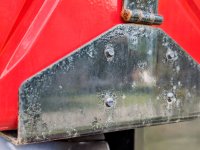
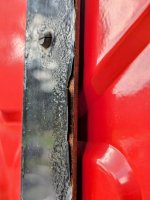
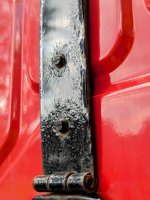
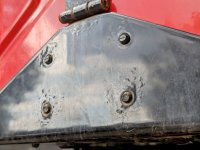
Unfortunately, the finish on the Wavian Heavy-Duty 5.3 Gallon Jerry Can Holders installed last September is not holding up well. I noticed months ago surface irregularities and they have continued to progress. I spoke with Wavian and they asked for pictures so here are the ones I emailed to them. When talking on the phone they seemed like nice folks so I am expecting we should be able to work something out.

The actual cans still look like new inside and out.

image000000(408).jpg

image000000(406).jpg

image000000(405).jpg

image000000(410).jpg

image000000(409).jpg

image000000(407).jpg
 

ramblinChet

Drinks Alone
Joined
Dec 24, 2020
Messages
477
Reaction score
1,956
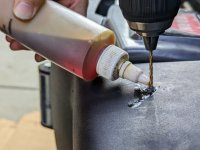
This evening we took advantage of a few hours to install the Diode Dynamics Stage Series 30-inch white combo light bar. The process began with an 1/8" pilot hole followed by three larger drill sizes and then the final finish hole. It takes slightly longer although this provides you with the opportunity to verify alignment of the progressively larger holes and if necessary, you are able to influence and hole prior to the finish hole being drilled. Of course, the majority of the time invested in this exercise was directly related to layout and agreement on final positioning.
image000000(411).jpg

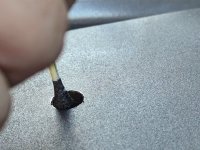
For every hole drilled into any piece of metal it is always a good idea to de-burr the hole, clean, and coat with at a minimum, two coasts of protective paint. Since this is usually close to the end I take time between coats to begin cleaning up and organizing the work area.
image000000(412).jpg

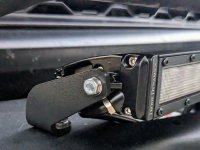
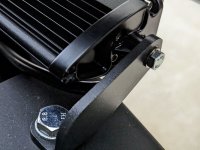
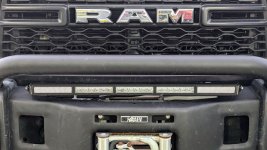
The AEV Colorado ZR2 Bison light bar mounting kit worked perfectly for installing lights on the AEV HD Ram premium front bumper. I shifted the brackets back an inch so the low tube provides some protection for the light bar. Keep in mind you can only move the brackets back so far before the rear of your light bar begins to interfere with where the remote control plugs into the top of the winch control pack.
image000000(413).jpg

The AEV light bar brackets are beautiful and solid. The fasteners that came with the light bar were on the weak side and since it was necessary to stop by the local hardware store to pick up the main mounting bolts, washers, and nuts; I spent the extra $2 to pick up stainless steel bolts and washers to clamp the brackets to the light bar. A few additional dollars well spent.
image000000(414).jpg

It was necessary to remove the low tube above the bumper to drill the holes so here is everything back together. The last piece of the puzzle will be wiring the light bar into the OEM auxiliary switches sometime next week. Since the front light bar is the farthest forward it will occupy switch position number one. Maybe ditch lights number two and rear bumper lights number three - that sounds logical.
image000000(415).jpg
 

ramblinChet

Drinks Alone
Joined
Dec 24, 2020
Messages
477
Reaction score
1,956
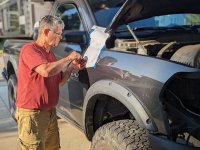
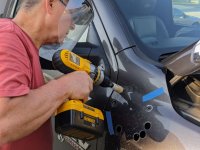
Much of this weekend was spent installing my AEV Snorkel, OEM projector LED headlights, and custom harness built by Jimmy07. Here is my good buddy Ed using a Starrett automatic center punch to reference where we will be drilling pilot holes on the template supplied by AEV.
image000000(416).jpg

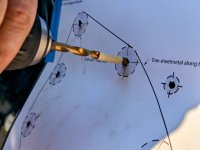
As expected, we progressively worked up from 1/8" pilot holes to two 1/2" and nine 1" holes. We spent nearly an hour moving the paper slightly, checking, etc. All the holes were placed perfectly.
image000000(417).jpg

The blue strips of tape were used to cover the 1/2" holes to we did not mistakenly drill one out to 1" - that would have been catastrophic. When you are deep into a job and so close to the work a seemingly small mistake can create an unrecoverable error. Taking a few minutes to reference the template and placing tape over the holes you do not want to drill is a simple and effective solution. Probably the most challenging part of working on the fender was balancing pressure and rotational speed while the fender wanted to flex.
image000000(418).jpg

Here is Ed cutting lines between the finish holes.

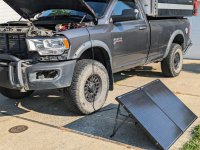
Has anyone had their battery go bad after only three years and 50k miles? On Saturday when we finished work I attempted to start my truck and the battery was dead. We jumped it and I was able to move it and let it idle for a bit pushing 14.0-14.1 Vdc. Sunday morning we tried to start her again and it was no joy. Since we were going to grab breakfast I figured I would let my Renogy Solar Suitcase try to charge the main battery and see if I was able to get her started. Surprisingly, it worked!
image000000(420).jpg

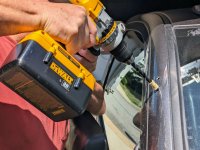
Drilling holes in the a-pillar where two 1/2" rubber expansion well nuts will be used to hold the upper section of the snorkel body in place. The instructions called for 1/2" holes and although we progressively worked up, our finish hole was 31/64", or approximately 0.016" under. We placed some black RTV on the rubber expansion plugs and they fit very snugly into the holes.
image000000(422).jpg

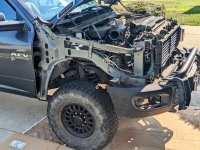
The AEV snorkel installation is not for the faint-of-heart. My recommendation is that if you are having an AEV Prospector built, pay the additional $420 and have the snorkel installed by AEV. Unfortunately, when my truck was manufactured in mid-2021, the snorkel was still many months away from being produced. Some of the most challenging parts of the installation centered around the removal of the trim piece under the front grill without disconnecting the front bumper and the installation of the new AEV airbox which is a combination of metal and plastic. Overall, it is a pretty impressive kit for the money although there is always room for improvement. Was it perfect, no. But for the money I consider it a great value.
image000000(421).jpg
 

Rockcrawlindude

a rock crawlin’ dude
Joined
Jan 1, 2021
Messages
6,341
Reaction score
16,453
Location
Georgia USA
Much of this weekend was spent installing my AEV Snorkel, OEM projector LED headlights, and custom harness built by Jimmy07. Here is my good buddy Ed using a Starrett automatic center punch to reference where we will be drilling pilot holes on the template supplied by AEV.
View attachment 61387

As expected, we progressively worked up from 1/8" pilot holes to two 1/2" and nine 1" holes. We spent nearly an hour moving the paper slightly, checking, etc. All the holes were placed perfectly.
View attachment 61388

The blue strips of tape were used to cover the 1/2" holes to we did not mistakenly drill one out to 1" - that would have been catastrophic. When you are deep into a job and so close to the work a seemingly small mistake can create an unrecoverable error. Taking a few minutes to reference the template and placing tape over the holes you do not want to drill is a simple and effective solution. Probably the most challenging part of working on the fender was balancing pressure and rotational speed while the fender wanted to flex.
View attachment 61389

Here is Ed cutting lines between the finish holes.

Has anyone had their battery go bad after only three years and 50k miles? On Saturday when we finished work I attempted to start my truck and the battery was dead. We jumped it and I was able to move it and let it idle for a bit pushing 14.0-14.1 Vdc. Sunday morning we tried to start her again and it was no joy. Since we were going to grab breakfast I figured I would let my Renogy Solar Suitcase try to charge the main battery and see if I was able to get her started. Surprisingly, it worked!
View attachment 61390

Drilling holes in the a-pillar where two 1/2" rubber expansion well nuts will be used to hold the upper section of the snorkel body in place. The instructions called for 1/2" holes and although we progressively worked up, our finish hole was 31/64", or approximately 0.016" under. We placed some black RTV on the rubber expansion plugs and they fit very snugly into the holes.
View attachment 61391

The AEV snorkel installation is not for the faint-of-heart. My recommendation is that if you are having an AEV Prospector built, pay the additional $420 and have the snorkel installed by AEV. Unfortunately, when my truck was manufactured in mid-2021, the snorkel was still many months away from being produced. Some of the most challenging parts of the installation centered around the removal of the trim piece under the front grill without disconnecting the front bumper and the installation of the new AEV airbox which is a combination of metal and plastic. Overall, it is a pretty impressive kit for the money although there is always room for improvement. Was it perfect, no. But for the money I consider it a great value.
View attachment 61392
Rig is looking awesome. Great work.

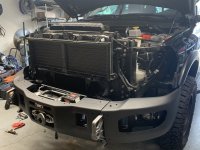
When I have to remove my grille, I remove the upper tube from the bumper I feel like that makes it a bit easier.

IMG_0511.jpeg
 
Last edited:

Redfour5

Well-Known Member
Joined
Nov 25, 2021
Messages
366
Reaction score
262
It's interesting to scan through this thread since the beginning in 2020. I'm still shaking my head at the prices back then vs now on the same basic truck. I do like the AEV bumper systems. I was going to go that way but the wife wanted AEV matrix as she likes the more aggressive look. Price was in the same ball park. The AEV system particularly from the front is a more subtle mean looking. But, AND, if you have a wife that supports buying nice big after market products in the first place, you don't argue...
 

Users who are viewing this thread

Top