
That really is the best color offered - unfortunately I was told it was for fleet vehicles only when I ordered my 3500 DRW.After picking up my 3500 BigHorn from the dealer in Phoenix, drove just under 400 miles for its first fill up. Drove to Ventura to assist my niece with a vintage Bronco, then headed north towards home. Clocked just over 900 miles, and the mileage and power (HO Cummins) kept improving. Flawless operation of everything.
Ram Heavy Duty Forum
You are using an out of date browser. It may not display this or other websites correctly.
You should upgrade or use an alternative browser.
You should upgrade or use an alternative browser.
What did you do TO your RAM today?
- Thread starter LamboTexas
- Start date
Aaandroger
Well-Known Member
- Messages
- 155
- Reaction score
- 279
- Points
- 63
Started to return my truck back to stock.
In about an hour, I removed the Carli front diff guard, replaced the factor55 ultra hook with the stock winch hook, and replaced the BD fog light kit with the stock lights.
Tonight, I'll pull the radios and bullet proof mount; and, if I have enough day light, I'll pull the decked system out and remove the BD reverse lights.
Last weekend, I removed the goose gear rear seat delete and reinstalled the stock bench seat; and removed the tuffy in-floor locking lid and reinstalled the stock floor box lids.
Reinstalling the rear seat took a little longer than expected to line up the seat brackets, subwoofer, and fold flat floor.
updating/upgrading to a newer model?Started to return my truck back to stock.
In about an hour, I removed the Carli front diff guard, replaced the factor55 ultra hook with the stock winch hook, and replaced the BD fog light kit with the stock lights.
Tonight, I'll pull the radios and bullet proof mount; and, if I have enough day light, I'll pull the decked system out and remove the BD reverse lights.
Last weekend, I removed the goose gear rear seat delete and reinstalled the stock bench seat; and removed the tuffy in-floor locking lid and reinstalled the stock floor box lids.
Reinstalling the rear seat took a little longer than expected to line up the seat brackets, subwoofer, and fold flat floor.
Aaandroger
Well-Known Member
- Messages
- 155
- Reaction score
- 279
- Points
- 63
No, Sir. Actually downgrading back to an SUV. I don't have time to use the truck for it's purpose--even the truck bed is mostly unused.updating/upgrading to a newer model?
It's just a really expensive commuter at this point. I figured that I would let someone else enjoy it.
Alligator John
Well-Known Member
- Messages
- 355
- Reaction score
- 623
- Points
- 93
Installing this little gem today. Pedalmax Terrain. I tested it before mounting the switch. So drove to a side street, got on the gas with the dial set at 0 for a baseline. Turned it to 100 and got on it again. Oh wow, I can tell a big difference without the throttle control despite some online reviews not. The pedal reaction is way way quicker. Of course at that moment I hit the pedal the first time maxed out to 100, the truck jumps, takes off, and only then I see the cop off to the side. I still have no front plate and no inspection sticker because I am waiting until I get window tint done tomorrow. No stop. He just looked at me and smiled as I drove past him. I guess he could tell I was testing out a new truck. The Pedalmax is not something I am going to use much and I want to be able to easily remove it if I want. There is a bracket under the edge of the dash to the right of the steering wheel. The control knob is going to be velcroed to the side of that bracket just under the edge of the dash. So I can just unplug it, clip the zip ties, and pull the switch off if I need to remove it. Another expensive little toy I don't really need for the truck, but hey you only live once.
The Terrain version can be turned down the other direction too to dumb down the throttle controller. Supposedly for off road crawling or to set it so your teenager can't hot rod the truck when they are driving it. I am curious if i could leave it slightly turned down around town and force some better gas mileage. It has been hard for me to not jackrabbit this power wagon.
The Terrain version can be turned down the other direction too to dumb down the throttle controller. Supposedly for off road crawling or to set it so your teenager can't hot rod the truck when they are driving it. I am curious if i could leave it slightly turned down around town and force some better gas mileage. It has been hard for me to not jackrabbit this power wagon.
Attachments

southern_yank
Active Member
- Messages
- 167
- Reaction score
- 233
- Points
- 43
Took her out for a stomp around the woods. Trying out the new interior setup for functionality. Got to make sure the wife is comfy and wasn't going to be disposed by the tablet mount.
I did notice a GPS delay on Gaia on the tablet vs. my phone being mounted on top of the dash. Not sure if there is anything I can do to mitigate that?
Tested out and aligned the ditch lights to where I wanted them. - not terrible for some no-name cubes I had laying around. Good flood type beam covers the areas I wanted to light up.
Still need to get the scene lighting for left and right, front fogs (yellow BD kit), front spot and flood, rear chase/dust lighting in yellow. Starting to think the wiring is going to cost as much as the lighting itself!
Alligator John
Well-Known Member
- Messages
- 355
- Reaction score
- 623
- Points
- 93
That is going to look nice with the pods mounted. I really liked that style of mount with the lights more to the sides. I just could not bring myself to cut anything to make them fit, so I went with the SDHQ mounts.Dang, my delivery drivers are awesome today!
Just got my ditch light brackets from Baja right after my last post.
Install is super easy on these things. Admittedly, I feel like a chump because this is type of stuff I design and manufacture, but I've been too busy to actually get them drawn up and fabricated. Oh well, anyone on the fence about the brackets, just buy them.
Lights to go on this evening or tomorrow morning sometime. View attachment 61103
View attachment 61104
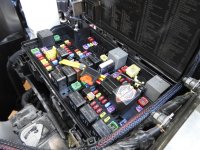
Oh, yea had a nice waterfall when opening the hood too....
View attachment 61105
southern_yank
Active Member
- Messages
- 167
- Reaction score
- 233
- Points
- 43
Thanks! I'm not a huge fan of cutting factory things either, but I am less of a fan of loosening body bolts that can and will cause a misalignment of body panels. I am not a body shop guy. I've tried my hand at it over the years, and made do, but at this point in my life, I'd rather not spend hours trying to realign a hood. My OCD will see a 1/32" difference, and I just don't think I can live with that existential dread! LOLThat is going to look nice with the pods mounted. I really liked that style of mount with the lights more to the sides. I just could not bring myself to cut anything to make them fit, so I went with the SDHQ mounts.
Besides, the trim parts that were notched, I think retail at the dealership for about $10 each. So if or when I go back to stock, I'll just get new parts.
Alligator John
Well-Known Member
- Messages
- 355
- Reaction score
- 623
- Points
- 93
When I put the SDHQ mounts on the hood brackets, I first liberally outlined the hood brackets with a chalk marker. That way if the hood moved on me when installing the mounts I could easily line it back up. I left the chalk for now so I can make sure the mounts don't allow it to move later.
Alligator John
Well-Known Member
- Messages
- 355
- Reaction score
- 623
- Points
- 93
Along with the Pedalmax that allows me to turn off the throttle control, I also installed a nanny kill switch today. This will allow me to switch off the traction control, electronic stability control and antilock brakes at will. Thus like driving a 1970s pickup again when I want. The nanny kill switch is mounted to a bracket under the edge of the dash and on the opposite side you can just make out the red end of the knob for the pedalmax.
Attachments

Last edited:
southern_yank
Active Member
- Messages
- 167
- Reaction score
- 233
- Points
- 43
I like that, and even more the fact of leaving the marks there to look at it over time. Great idea! Have you noticed any shifting since your installation? Now I'm thanking having a second set of cubes forward facing in more of a spot beam to project light further downrange wouldn't be a terrible idea.When I put the SDHQ mounts on the hood brackets, I first liberally outlined the hood brackets with a chalk marker. That way if the hood moved on me when installing the mounts I could easily line it back up. I left the chalk for now so I can make sure the mounts don't allow it to move later.
southern_yank
Active Member
- Messages
- 167
- Reaction score
- 233
- Points
- 43
I need this in my life. I'm assuming you wired it to essentially disconnect one of the power feeds to the ABS system? I've seen similar (and used on one of my older cars) where the signal from a wheel speed sensor was interrupted by a switch. caused the ABS and traction to disable entirely.Along with the Pedalmax that allows me to turn off the throttle control, I also installed a nanny kill switch today. This will allow me to switch off the traction control, electronic stability control and antilock brakes at will. Thus like driving a 1970s pickup again when I want. The nanny kill switch is mounted to a bracket under the end of the dash and on the opposite side you can just make out the red end of the knob for the pedalmax.
Alligator John
Well-Known Member
- Messages
- 355
- Reaction score
- 623
- Points
- 93
It is plugged into F11 and F91. I don't know what does what. I just followed the install directions. There is a long running thread on the Power Wagon Registry online forum with more information on it and also has the contact information to email about buying one.I need this in my life. I'm assuming you wired it to essentially disconnect one of the power feeds to the ABS system? I've seen similar (and used on one of my older cars) where the signal from a wheel speed sensor was interrupted by a switch. caused the ABS and traction to disable entirely.
Alligator John
Well-Known Member
- Messages
- 355
- Reaction score
- 623
- Points
- 93
No they have not shifted. The hood brackets are probably tighter now than they were when new. when I installed the mounts one bracket moved about 1/8th inch, but I just pushed it back into the correct marked location as I tightened it up. the other side never moved during installation. If there had been a second person to hold the hood when I installed them, it probably would have helped as well, but I was by myself.I like that, and even more the fact of leaving the marks there to look at it over time. Great idea! Have you noticed any shifting since your installation? Now I'm thanking having a second set of cubes forward facing in more of a spot beam to project light further downrange wouldn't be a terrible idea.
Rockcrawlindude
a rock crawlin’ dude
I received my @NHOverland firewall grommet today but I’m waiting on some more parts for a project.
Alligator John
Well-Known Member
- Messages
- 355
- Reaction score
- 623
- Points
- 93
Ceramic window tint. Had the front windows done to match the rear. I think it was 70 percent on the windshield, mostly just wanted to block some of the uv off of that leather dash. And the brow.
I have a few more things to do, but my list of add on stuff is getting short finally. I am not going to do anything with tires and suspension until the factory tires need to be replaced.
I have a few more things to do, but my list of add on stuff is getting short finally. I am not going to do anything with tires and suspension until the factory tires need to be replaced.
Attachments

southern_yank
Active Member
- Messages
- 167
- Reaction score
- 233
- Points
- 43
Good looking rig! Always loved that color. How's the view through the 70% at night? Can you visibly see a tint from the outside? Still on the fence about doing my windshield because I travel through a lot of states where that is a major no-no. Don't have any problems with LEO, just don't want to take them away from more important tasksCeramic window tint. Had the front windows done to match the rear. I think it was 70 percent on the windshield, mostly just wanted to block some of the uv off of that leather dash. And the brow.
I have a few more things to do, but my list of add on stuff is getting short finally. I am not going to do anything with tires and suspension until the factory tires need to be replaced.
Sent from my SM-S908U using Tapatalk
Alligator John
Well-Known Member
- Messages
- 355
- Reaction score
- 623
- Points
- 93
I can hardly tell. When I first walked up I thought they might have only done the brow. The side windows and brow do make it seem dark looking in from front, but that would be no different if the windshield was not tinted. No problem for me last night. This is what blocking 30% of light looks like.
Attachments


southern_yank
Active Member
- Messages
- 167
- Reaction score
- 233
- Points
- 43
I think it actually makes the colors a bit more distinct? Don't know the word for it. Almost a bit more clear with the film.I can hardly tell. When I first walked up I thought they might have only done the brow. The side windows and brow do make it seem dark looking in from front, but that would be no different if the windshield was not tinted. No problem for me last night. This is what blocking 30% of light looks like.
It's decided, I'm going to call for an appointment Monday to get the windshield done. Thanks for the pictures!
Sent from my SM-S908U using Tapatalk
Alligator John
Well-Known Member
- Messages
- 355
- Reaction score
- 623
- Points
- 93
Of course from this day forward, my windshield is not tinted. That is just a clear ceramic uv blocking window covering that my dealer applied. ")