Texasram1
Well-Known Member
- Messages
- 505
- Reaction score
- 519
- Points
- 93
What exactly are these?I also installed the Boost Auto switchback tinted mirror lights. Look really good!
What exactly are these?I also installed the Boost Auto switchback tinted mirror lights. Look really good!
The take away the “eye sores” on the mirrors! My last truck, same truck but crew cab w/ Cummins, I removed them and painted them with lens paint. It looked good, but I figured I would upgrade to the switchback.What exactly are these?

 boostautoparts.com
I like the idea of the smoked lenses, but not a fan of the white running light as that would not match my clearance lightsThe take away the “eye sores” on the mirrors! My last truck, same truck but crew cab w/ Cummins, I removed them and painted them with lens paint. It looked good, but I figured I would upgrade to the switchback.
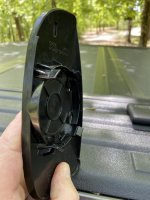
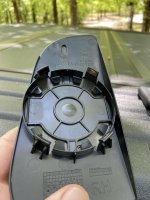
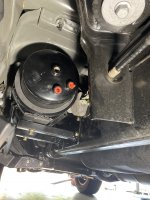
Although, they are pain getting out. Somewhat delicate. I ended breaking my actuator (the little motor that moves the small mirror) while installing them, on my passenger side, but was able to find an exact match on EBay for $15. You have to remove the mirror to get to screw, for light removal.
2009-2024 Dodge Ram LED Switchback Tow Mirror Marker Lights
Switchback tow mirror lights for Ram trucks. White running light, amber turn signal. Compatible with Fourth and Fifth Gen Dodge Rams.
They make another set that are basically just like the ones you have in now, just tinted. It makes a huge difference IMO. About $70 for the pair.I like the idea of the smoked lenses, but not a fan of the white running light as that would not match my clearance lights
Found them. Looks like they protrude a bit above the main mirror housing?They make another set that are basically just like the ones you have in now, just tinted. It makes a huge difference IMO. About $70 for the pair.
They do. And when I pulled them out of the box, it surprised me because I didn’t notice it when I ordered them. But, it’s barely noticeable on truck and I think they look good. Here’s a pic:Found them. Looks like they protrude a bit above the main mirror housing?
I’ll try this first. Thanks!Also, if the hump turns you off , you can always remove and paint them like I did. It was fairly easy. I ended up putting more coats than instructions said. It was like a plasti-dip paint, so if you don’t like, you can just peel it off!
Here’s a link to video of how to remove. You just have to be careful when removing the lower glass section. The glass has a circle on the backside, with tabs that connects it to the actuator/motor. Where I screwed up, was I pulled part of the actuator out with the mirror. There’s 2 small plastic worm gears that move the mirror, I broke 1 of them. So, just make sure you’re pulling only the mirror out, and not the assembly attached. The 2nd one came out no problem. Both of the ones on my 2020 came out super easy.I’ll try this first. Thanks!