I'm almost finished with this mod. I'm just waiting on the factory usb harness, but confirmed that it does work with a temporary usb jumper cable.
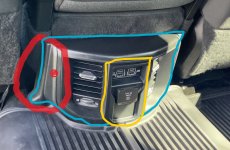
Here's what I had before:
View attachment 15118
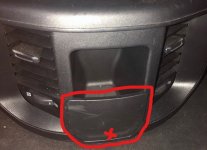
Here's after:
View attachment 15119
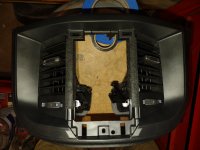
For the new face plate I ordered part no: 6QT85TX7AC - Console End Cap - $142.24. Mine came with the usb and 115VAC outlet. Otherwise the part number for the USB only outlet is 68402777AF.
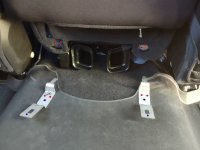
Drivers seat harness to rear USB panel: 68468100AA - WIRING. Seat. Left - $86.70. XY360 connector and female usb under drivers seat to arm rest USB, rear USB and 115VAC connections for the rear outlets.
USB factory cable: 68096423AC - $24.86
Other items:
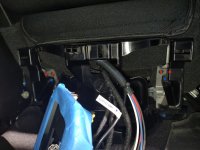
The main power line from the truck did not exist at the XY360A connector under the drivers seat. On my truck however, it was fused and existed on the PDC side of the XY125 connector under that dash. In my case, I salvaged a male pin and female pin from the old driver's seat connector and ran a new 19 awg wire between the two. It is Pin 46, red wire on the XY125 connector to Pin 1 on the XY360 connector.
The usb cable will connect to an open USB port on the hub in the center console to the new harness drivers seat harness. The power line from the XY125 connector will connect to the XY360 connector under the drivers seat as well. I did remove the center armrest/seat for easier access and cable routing.
Best of luck.
Did the console End cap come with the vents or did you reuse your old ones? Looks like its a separate part in the diagrams I've seen.
.