Ram Heavy Duty Forum

Register a free account today to become a member! Once signed in, you'll be able to participate on this site by adding your own topics and posts, as well as connect with other members through your own private inbox!

Chase light with rambox and bed cover

GODZ_MFG

Active Member
Joined
Jun 10, 2022
Messages
63
Reaction score
117
Location
Castle Rock, CO
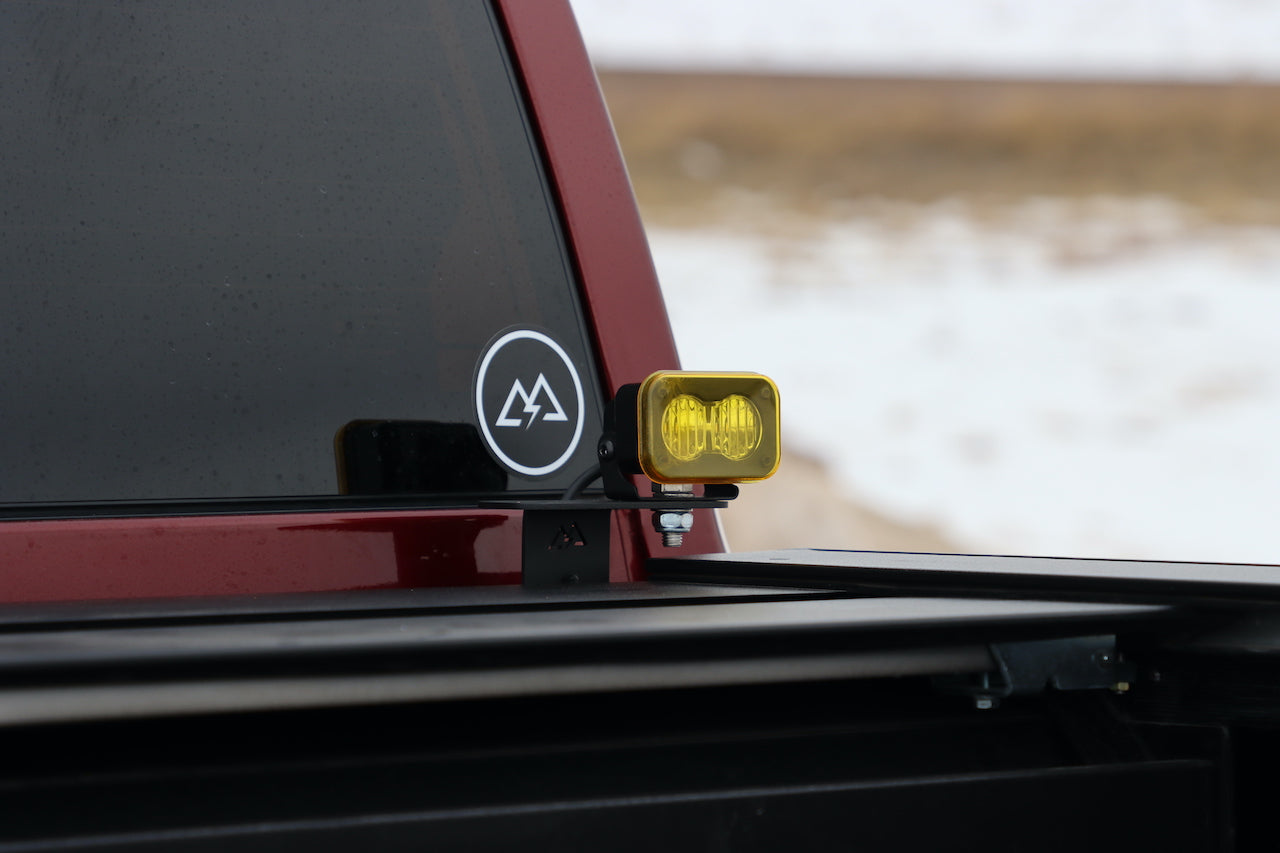
A slot could totally be done however, even if we used something like a high density polyurethane washer on both sides of the bracket for you to have it tight enough to not rotate while driving, but loose enough to slide, you would probably wear down the powder coat overtime and ultimately this would then require semi-constant adjustment since you are essentially wearing the material away overtime as you slide it. Additionally, a slot this long in a material this thin would be a weak point. If you accidentally tweaked the light one way or another you would risk bending the upper metal where the slot is located, causing the light to sit funky.

That being said, I think what you could do would be a ‘swinging bracket’. What I’m thinking is you would use the hole on the top of the bracket (pictured above) as a pivot point and then you could put a 2 1/2 or 3 inch arm on that pivot point. Then you could swing the light 2 1/2 or 3 inches one way or another, essentially giving you 6 inches of travel. on the outer edge of the swing bracket you would mount your light with a high density polyurethane washer so you could not only swing the arm but also rotate the light.

As for the bracket picture above, it’s sitting in the proper orientation relative to the first picture by the OP, think of that first flat part is sitting on top of the bed rail so it can’t sink too far down. Also when it sits on that flat part it wouldn’t allow the bracket to ‘tip’ over from driver side to passenger side.
 

JustMeAndMy3500

New Member
Joined
Dec 10, 2023
Messages
15
Reaction score
13
Hey, Godz is here, nice. I received your twin under-hood light brackets just today for my 2020 3500. Great design, well made. Looks like I have a weekend project.
Thanks
 

Alligator John

Well-Known Member
Joined
Jan 26, 2023
Messages
337
Reaction score
586
My bracket will be fixed. I'm cutting and shaping my own bracket from another non automotive bracket that has most of the exact dimensions I was looking for. The body bolt is a tapered bolt through a U nut clip and though long I think I can remove it. I can use vise grips or pliers on the body of the bolt once it is loose if I have to. It is going to be replaced with a hex head bolt so I can get a box end wrench on it in that narrow space. I have the thicker 3m padded outdoor double stick tape that will be placed on the mounting surface between mount and the bed. Adhesive promoter will be used too. I am banking on the bolt with the tape holding it tight without any side to side tilt of the bracket. The lights from rough country came folded down with the internal screws so tight I could not budge them to tilt up and down. RC support was fast with a return email to let me know I needed to pop the plastic end caps off the mounts to access the screws and loosen them. All the screws in the light I think will need some locktight to fix them in place once I am happy with the adjustment so repeat turning and tilting of the lights do not loosen the screws.
 

Alligator John

Well-Known Member
Joined
Jan 26, 2023
Messages
337
Reaction score
586

Not sponsoring or have affiliation. I've order a bracket for another application. Just sending you in a direction that may help.
I was aware of these and it was the closest to what I am wanting to do. But I have ramboxes and a power retrax cover. I have zero leaks with my bed cover. I did have at those corners at first, but pulled my retrax and added appropriate weather stripping under the bed cover rails there. So I want nothing running under that cover to cause water to get in, not to mention it would have to be far inside the bed because of the rambox. Nor do I want to drill holes for rivits in my bed. My mount will look very similar. Same wide mounting surface at the top, same first 90 degree bend. But that will be the only bend. the mount down from that bend I have at 1.6" or slightly wider and straight down a little farther than my single mounting bolt. The top surface at the 90 degree bend will be cut to size to match the mounting base of the light I am using, but will look almost identical in shape to the godz mount shape because the light I am using has a narrow wide base with two mounting bolts. KISS, super simple design. I already made a prototype out of rigid cardboard to make sure the dimensions I decided on will work and that the swivel lights will have enough room to turn to the side without being too close to the cab.
 
Last edited:

Mikerob14

Member
Joined
Jul 30, 2022
Messages
85
Reaction score
63
If you have pics that you can PM me, that would be awesome. Really looking forward to see how this is progressing. I like the non drilling method you’re going with.
 

Alligator John

Well-Known Member
Joined
Jan 26, 2023
Messages
337
Reaction score
586
Here you go Mike. Tell me if you think this will work? The ends with the two holes will be cut off with a cutoff saw and new corners rounded with a bench grinder, then a bench sander. Two holes drilled to mount the swivel lights and one hole in the center that will be covered by the swivel ight base. The center hole will be in case I ever want to swap the lights out for a conventional single bolt pod light. A single mounting hole drilled in the bottom section for mounting where my body bolt is. Note the hole already in it looks like it might be pretty close to where i need it, but I have not checked it. That bottom section is 10 inches long so will be cut much shorter. I will use a piece from it to make a backing plate rather than just a washer so I can clamp that mount down as tight as possible with the single bolt. Provided I can still get a bolt and nut to fit by using a backing plate. Hex head bolt and nut so I can use simple combination wrenches in the tight space. And of course the double side tape I mentioned earlier. The bracket I am making this from is powder coated steel. 1/5th of an inch thick. Base is 1.6 inches wide. After the top ends are cut and shaped, plan is to paint it with self etching primer, then spray bedliner. Base bracket is a floating shelf bracket off Amazon at $13 bucks for a box of 6. So I have lots of them for trial and error and if for some reason it don't work out, I'm only out thirteen bucks. Last picture shows how the light will be able to be rotated and tilted to use as a work light to the sides of the truck.

20240216_182638.jpg20240216_183026.jpg20240216_183218.jpg
 
Last edited:

Mikerob14

Member
Joined
Jul 30, 2022
Messages
85
Reaction score
63
Yeah. Looks like the concept is all there. How high you think it’s gonna sit over the boxes? My thought on it is too high, it looks goofy. Too low, and the functionality of it is limited, rendering the project moot. But I like the simplicity all around.
 

Alligator John

Well-Known Member
Joined
Jan 26, 2023
Messages
337
Reaction score
586
No idea. I will just have to hold them in place at night first and pick what height I think I want, then drill the hole. I am leaning more on going lower rather than higher. It is a tall light, so the base lower than the godz or aegis chase light bracket would have been, but higher than a billet sdhq chase light mount in an open bed would be.
 

Mikerob14

Member
Joined
Jul 30, 2022
Messages
85
Reaction score
63
I agree on that. Not too high. The light does tend to sit higher anyways by itself.
 

Users who are viewing this thread

Top