
BighornHDRam
Well-Known Member
- Messages
- 433
- Reaction score
- 376
- Points
- 63
I could not find any links on this so here is one for you guys with Bighorn and Tradesman trims with incandescent interior light bulbs.
I got tired of not being able to see anything in my center console with the horrible incandescent lights so I decided to do something about it. I ordered 4 LASFIT L-T10 2 for the overhead console and 2 for the footwell lights and a 2 pack of LASFIT L-44MM for the dome light but you only need 1. These work with no canbus issues
Dome light took about 3 minutes to install, climb in on the driver side back seat and with a small screw driver there is a small tab opening on the left side to slide it into and pry the tab out and then it will come out and hinge open towards the passenger side. I had to pinch down the tabs a bit to get a tight fit around the ends of the L-44MM,
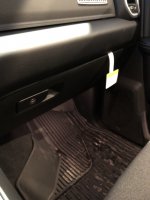
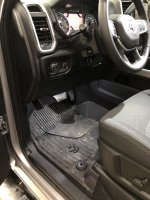
Footwell lights took about 4 minutes a piece as you lay on you backside and pull off the white dust cap and remove the OEM bulb with a pair of needle nose pliers very carefully clamping down on it while pulling it out, then just install the new one into the slot.
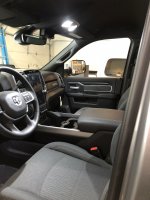
The overhead console you open the the sunglass pocket and there are 2 8mm bolts you remove, then beside them are 2 tabs that you push and the console starts to pull down from the front windshield and at the back of the console there are 2 tabs that go into the headliner. As it was hanging I removed the 2 sets of wires connecting it to the truck and moved it to the bench.
After removing you have to gently pry with a very small screw driver and remove the whitish cover plate over the light and you have to work around the edges and it will pop off (be gentle), then from the backside of the console you can push the incandescent light bulb out of the metal tabs that hold it and the chrome piece may fall out as well but you can put that back in before you install the new LASFIT L-T10. If the Chrome piece has fallen out reinstall, install new bulb, install whitish cover plate and repeat for other bulb. Reinstall overhead console and enjoy.
I got tired of not being able to see anything in my center console with the horrible incandescent lights so I decided to do something about it. I ordered 4 LASFIT L-T10 2 for the overhead console and 2 for the footwell lights and a 2 pack of LASFIT L-44MM for the dome light but you only need 1. These work with no canbus issues
Dome light took about 3 minutes to install, climb in on the driver side back seat and with a small screw driver there is a small tab opening on the left side to slide it into and pry the tab out and then it will come out and hinge open towards the passenger side. I had to pinch down the tabs a bit to get a tight fit around the ends of the L-44MM,
Footwell lights took about 4 minutes a piece as you lay on you backside and pull off the white dust cap and remove the OEM bulb with a pair of needle nose pliers very carefully clamping down on it while pulling it out, then just install the new one into the slot.
The overhead console you open the the sunglass pocket and there are 2 8mm bolts you remove, then beside them are 2 tabs that you push and the console starts to pull down from the front windshield and at the back of the console there are 2 tabs that go into the headliner. As it was hanging I removed the 2 sets of wires connecting it to the truck and moved it to the bench.
After removing you have to gently pry with a very small screw driver and remove the whitish cover plate over the light and you have to work around the edges and it will pop off (be gentle), then from the backside of the console you can push the incandescent light bulb out of the metal tabs that hold it and the chrome piece may fall out as well but you can put that back in before you install the new LASFIT L-T10. If the Chrome piece has fallen out reinstall, install new bulb, install whitish cover plate and repeat for other bulb. Reinstall overhead console and enjoy.
Attachments
-
 LASFIT L-44MM.JPG749.8 KB · Views: 176
 -
 LASFIT L-T10.JPG638.2 KB · Views: 185
 -
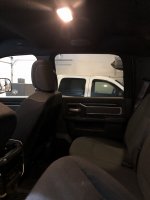 BEFORE 1.JPG445.2 KB · Views: 177
 -
 BEFORE 2.JPG403.3 KB · Views: 164
 -
 BEFORE 4.JPG557.7 KB · Views: 159
 -
 BEFORE 3.JPG668 KB · Views: 165
 -
 AFTER 1.JPG479.6 KB · Views: 167
 -
 AFTER 2.JPG539.9 KB · Views: 165
 -
 AFTER 3.JPG686.6 KB · Views: 160
 -
 AFTER 4.JPG691.9 KB · Views: 175
