Just finished installing my bug deflector on my new 2021 RAM 2500. It only took me 3 tries to get my hood to close. HA!
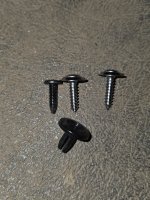
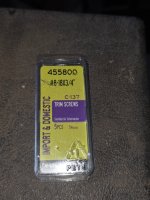
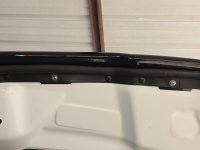
This is what worked for me and the installation was a breeze and it looks great on the truck. I went to my local AutoZone store and bought a package of #8-18x3/4 body trim screws part #455800, it may take 2 packs since they only come 5 screws to a package and you need 6 screws for install. These screws work way better then the plastic ones provided in the installation kit and they really suck the lower inside lip of the bug guard up to the underside of hood. Using the included plastic grommets and continue following the installation directions. Basically, just substituting metal screws for the plastic ones.
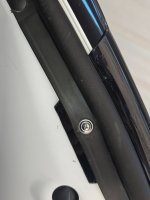
Here is what I did to get my to my hood to close. All I did was remove the latch hook bracket on the upper side of hood, 2 1/2" bolts, then I added 2 space washer on each bolt between the bracket and underside of hood. This will lower the hook enough for the latch to engage. A slight adjustment on the hood stops, just a bit lower, and you are back on the road.
I hope this helps save anyone the aggravations of what I went through the first 2 attempts of install. Matching AVS window louvers and bug guard, lookin' good!
This is what worked for me and the installation was a breeze and it looks great on the truck. I went to my local AutoZone store and bought a package of #8-18x3/4 body trim screws part #455800, it may take 2 packs since they only come 5 screws to a package and you need 6 screws for install. These screws work way better then the plastic ones provided in the installation kit and they really suck the lower inside lip of the bug guard up to the underside of hood. Using the included plastic grommets and continue following the installation directions. Basically, just substituting metal screws for the plastic ones.
Here is what I did to get my to my hood to close. All I did was remove the latch hook bracket on the upper side of hood, 2 1/2" bolts, then I added 2 space washer on each bolt between the bracket and underside of hood. This will lower the hook enough for the latch to engage. A slight adjustment on the hood stops, just a bit lower, and you are back on the road.
I hope this helps save anyone the aggravations of what I went through the first 2 attempts of install. Matching AVS window louvers and bug guard, lookin' good!