Ram Heavy Duty Forum

Register a free account today to become a member! Once signed in, you'll be able to participate on this site by adding your own topics and posts, as well as connect with other members through your own private inbox!

4500 Camper/Jeep Hauler Build

gprguy

Well-Known Member
Joined
Apr 14, 2022
Messages
541
Reaction score
1,267
Location
Kitsap Peninsula, WA
Sikaflex is great - it's amazing what modern adhesives can do.

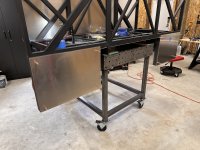
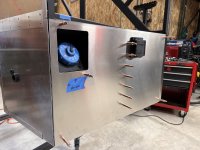
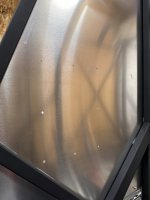
Got the big panel on today.

IMG_6028.jpeg

Those extra clamped pieces are just to make sure the edges without rivets (yet) glue up well.

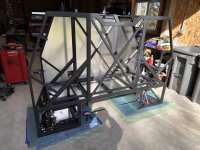
Then it was time to stand it up. Hopefully tomorrow I'll get it up on the fabrication table so I can finish the bottom rear/side panels and the associated trim.

IMG_6029.jpeg

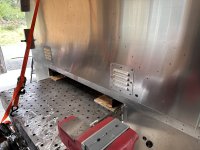
The only glitch was my rivet gun wouldn't pull the big rivets for the vents, I'll do those tomorrow.

IMG_6030.jpeg

IMG_6031.jpeg

Moving along..
 

gprguy

Well-Known Member
Joined
Apr 14, 2022
Messages
541
Reaction score
1,267
Location
Kitsap Peninsula, WA
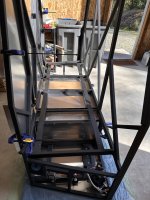
Spent most of the day cleaning and rearranging the shop, moving vehicles around so I could get the big truck over in the lift for what's coming soon (wiring, plumbing). Also lifted the box up on to the fab table.

IMG_6034.jpeg

Also finished up the vents, they came out well enough considering they'll pretty much never be seen.

IMG_6036.jpeg

It'll probably be a few days before I get to work on it again but next up is the lower panels on the back and sides, followed by associated trim.
 

buzzuti

Well-Known Member
Joined
Dec 19, 2021
Messages
295
Reaction score
600
Location
TEXAS
@gprguy have you put any thought into tires yet? Any plans there?

Sitting at that crappy crossroads right now.
Fully loaded, my rear axle sits in at 11,080 lbs with the camper, full water and fuel.
Thought on Super Singles, but have height constraints of course with the CM flatbed we have. We sit at 13'2" as it is.
(upgrading our AC we will save 4-5" on a lower profile AC, so have that going for us)

41" MPTs or GY GSA275's would add too much height for me.
Founders MT has a great 305/70r19.5, which is a 36" tire, 4.4" more height than stock 225/70s. Capacity of 6610 lbs each, which means 13220 lbs on the rear, basically a 2100 lbs buffer for me.
Though I am sure I will have more stuff and more weight as we travel more...

So, all of that brings me back to staying with the Dually config most likely, and maybe going to a Toyo M608 at 265/70/19.5

Really, a wider tire is my goal, the 225/70's are serious pizza cutters and can be a chore to drive.

Curious to hear your thoughts and what direction you will go here.
 

gprguy

Well-Known Member
Joined
Apr 14, 2022
Messages
541
Reaction score
1,267
Location
Kitsap Peninsula, WA
@gprguy have you put any thought into tires yet? Any plans there?
I have, but the short term plan is run what I've got and wear them down for a while (Hankook DH35). In general I plan to stay with duals, I have no interest in super single rears with the heavy towing. If someone would come out with a super front that matches the height of a good set of duals for the rear (like big dump trucks, wreckers, cement mixers run - but for 19.5's) I'd be all over that.

My original truck was ordered with the off-road tires (Michelin XDS2) and 4.44 gears. The truck I ended up with has the Hankooks and 4.10s. It cruises amazing, but I need to get some towing time before I decide if I can go up to a 245 or something. I doubt I'll want to go to a 265.

When I wear these out I'll figure out if I want to go a size larger and probably do either the XDS2 or maybe the Toyo M608.

I'm also hoping I can carry two spares, and staying with the smaller tires helps with finding space to do that.

General update - last few days have been busy with other stuff, but we went wheeling again while the weather was beautiful.
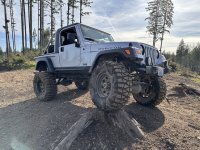
IMG_6096.jpeg

I made two more easy panels.

IMG_6107.jpeg

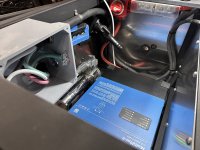
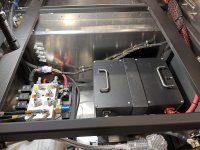
And then decided before I box things in entirely, I should do a little bit of wiring/plumbing while I have better access. So I've started on that. Here's the start of the disconnect and fuse for the big battery to the inverter.

IMG_6106.jpeg

Still working on finishing mounting that, ran out of rivnuts. I also lined the battery tray and strap with some self adhesive rubber strips.
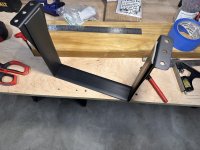
IMG_6108.jpeg

And test fit the battery. It'll come out again, but I am hoping to power up the inverter and test things out before the box goes on the truck.
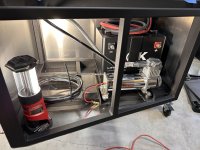
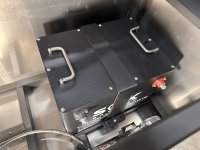
IMG_6109.jpeg

IMG_6110.jpeg

Just need to finish some wiring and once my shunt arrives I can power it up.

Beyond that, just ordering a lot of odds and ends like air and hydraulic fittings. The more of this stuff I can get at least through the skin of the box before it gets dropped on the frame the easier it will be.
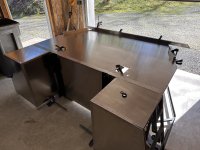
 

gprguy

Well-Known Member
Joined
Apr 14, 2022
Messages
541
Reaction score
1,267
Location
Kitsap Peninsula, WA
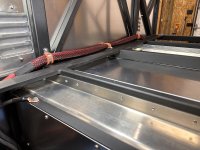
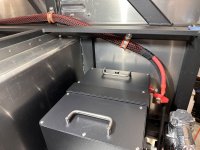
More wiring and plumbing today. Finished up the disconnect and fuse for the inverter's DC side, as well as as the case ground.

IMG_6113.jpeg

IMG_6114.jpeg

Still working on the run over to the battery. I also finished up the cross-box air line that connects the passenger side compressor to the dryer.

IMG_6115.jpeg

IMG_6116.jpeg

More to come tomorrow, hopefully.
 

buzzuti

Well-Known Member
Joined
Dec 19, 2021
Messages
295
Reaction score
600
Location
TEXAS
More wiring and plumbing today. Finished up the disconnect and fuse for the inverter's DC side, as well as as the case ground.

View attachment 71420

View attachment 71421

Still working on the run over to the battery. I also finished up the cross-box air line that connects the passenger side compressor to the dryer.

View attachment 71422

View attachment 71423

More to come tomorrow, hopefully.

Nice!
This is how I start my day!
Visiting the GPRGuy build.

Just sitting here with my notepad and popcorn!
 

gprguy

Well-Known Member
Joined
Apr 14, 2022
Messages
541
Reaction score
1,267
Location
Kitsap Peninsula, WA
Spent a bit of the afternoon cleaning up all my wiring tools and getting a new sheet of aluminum out of the pile - that's the plan for tomorrow.

Before that I "finished" up the battery cables for the inverter. Technically the negative cable is just temporarily hooked up until my shunt gets here next week.

IMG_6118.jpeg

IMG_6119.jpeg

Works for me. I am trying to balance what fits across the front vs. the rear of the cabinet, and trying to keep in mind that there will be 4 hydraulic lines and 2 air lines going across the back side. I'll probably add the leveling system harness across the front since it's a pre-made harness and I can tie it along the big cable harness. Won't look as clean as it is now but everything's got to go somewhere.
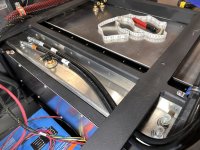
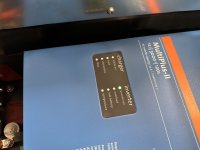
Anyway, the temporary connection let me power up the Multiplus which was a nice milestone.

IMG_6117.jpeg

I was able to program it but that's about all for now with no shore power hooked up yet and no AC-out either. So far no signs of life from the bluetooth BMS on the SOK battery, but I think it may be in a sleep mode until it sees some charge current.
 

AH64ID

Moderator
Staff member
Joined
Oct 5, 2021
Messages
3,243
Reaction score
3,034
@gprguy have you ran the M608Z’s?

I ran a set of 245’s on my 05 SRW for several years, good traction, strong, stable, smooth, quiet, and they wore like hot butter in a pan. Even with 5 of them in the rotation mix they wore crazy fast.

You’d likely do better with a DRW spreading the torque out, but I wasn’t impressed with their life.
 

gprguy

Well-Known Member
Joined
Apr 14, 2022
Messages
541
Reaction score
1,267
Location
Kitsap Peninsula, WA
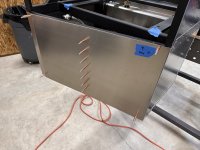
Spent a good chunk of yesterday going down a rabbit hole that didn't work out - I was trying to incorporate the flange for the door frame into the lower panels, but long story short my brake isn't up to pulling off bends that close together in .063 aluminum. So a bunch of time was spent thinking and I hope I came up with a better, simpler plan.

End result is the lower outside panels are done. The passenger side was pretty simple.

IMG_6122.jpeg

The driver's side less so - had to cut out for the shore power plug which wasn't bad, but I also had to cut a reasonably good looking hole for the DEF filler when I couldn't see it. I ended up making a template out of a piece of scrap, getting that more or less right, and then transferring it over to the real piece. Came out decent enough for now.

IMG_6129.jpeg

IMG_6130.jpeg

In the end the DEF cutout doesn't have to be perfect, I have a plan to build a trim ring but it's very low priority - I'd be surprised if I get to it before next winter. This will do for now.

Next up is building all the trim to finish off these panels. Probably won't get to start that till late this week due to some other commitments.
 

gprguy

Well-Known Member
Joined
Apr 14, 2022
Messages
541
Reaction score
1,267
Location
Kitsap Peninsula, WA
It hasn't been the best of weeks - slipped and fell while on a business trip and whacked my ribs on the way down. Seems I got off lucky, just a muscle thing or maybe a hairline at worst, but it's not going to speed things up. Anyway, enough whining - I have managed to be productive over the last few days now that I feel like moving again.

First up, my shunt came in so I could finish the negative cable to the battery.

IMG_6144.jpeg

IMG_6145.jpeg

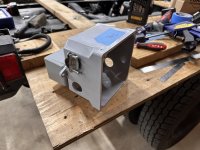
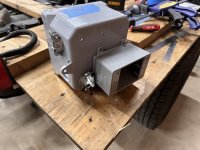
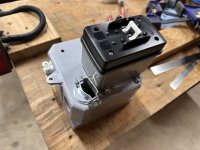
Next I wanted to get the shore power plotted out since that also involves very thick semi-flexible cables. I have a blue sea 50a dual pole breaker with its appropriate enclosure, but I am going to need a lot more room than that to join wires together. After a bunch of head scratching I came up with this contraption.

IMG_6150.jpeg

IMG_6151.jpeg

IMG_6152.jpeg

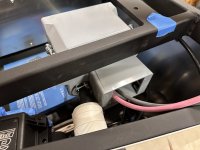
Installed it goes like this, hidden under the slide but with the breaker still easily reachable.

IMG_6153.jpeg

The shore power connector lines up with one of the entrances to the bigger junction box.

IMG_6156.jpeg

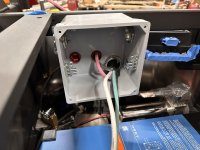
And the inside gives me plenty of room to work. The two red plastic chafe guards go into the circuit breaker box attached to the back.

IMG_6157.jpeg

There will be a second leg/outlet later, but I don't need to mess with that yet. For now I just routed the one leg over to the AC-IN on the Multiplus.

IMG_6158.jpeg

I had to make a few temporary connections while I order some connectors I am out of, but right now it's working - the battery is charging and the battery's bluetooth BMS woke up just as it should.

Next up may be getting the bulkhead connections for both air and hydraulic lines laid out and installed.
 

gprguy

Well-Known Member
Joined
Apr 14, 2022
Messages
541
Reaction score
1,267
Location
Kitsap Peninsula, WA
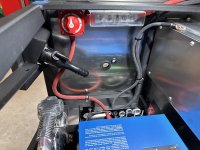
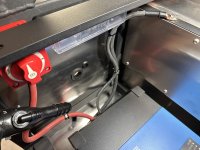
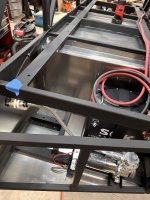
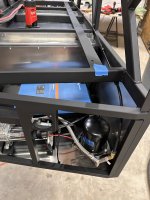
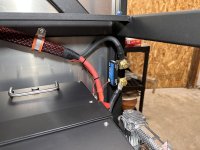
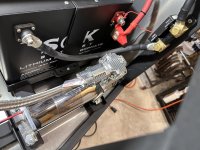
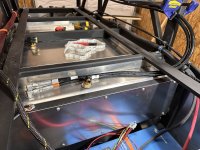
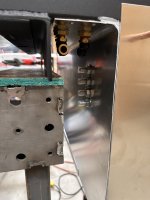
Looking at the photos it doesn't seem like a lot has changed this week but I did get plenty done. Mostly wiring and plumbing, trying to find places to run cables and hoses that won't box me into a corner in the future. At this point I have all of the air and hydraulic bulkhead fittings installed, along with a couple of hydraulic hoses mocked up. The others are on order along with more clamps and ties from McMaster.

IMG_6174.jpeg

IMG_6175.jpeg

IMG_6176.jpeg

IMG_6177.jpeg

The hydraulic pump is also in "for good" along with its power cables mostly run. Next up the plan is to get the control displays for the leveling system and the victron mounted so I can finish up the control wiring to the hydraulic pump. After that it might be back to aluminum trim while I wait for orders to arrive.
 

gprguy

Well-Known Member
Joined
Apr 14, 2022
Messages
541
Reaction score
1,267
Location
Kitsap Peninsula, WA
Any Plans for Testing the Hydraulic Hose fittings.
Nothing specific other than seeing if anything leaks when I try lifting the truck for the first time. All the hoses are "professionally" crimped, I didn't make any of them.

If I'm missing something I'm all ears, this is my first foray into hydraulics other than tractors and my well worn forklift.
 

G Mcpherson

Well-Known Member
Joined
Dec 20, 2020
Messages
362
Reaction score
346
Location
Yacolt, Wa
I would do at least a Pressure test on the JIC Connections. Use some Soapy water on each joint with a spray bottle. Easier to access before getting to a tight spot.
 

gprguy

Well-Known Member
Joined
Apr 14, 2022
Messages
541
Reaction score
1,267
Location
Kitsap Peninsula, WA
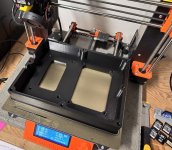
And now, for something completely different - 3D printing.

IMG_6169.jpeg

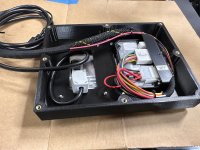
I needed a way to mount both the control panel for the hydraulic jacks as well as whatever I ended up using for monitoring the Victron system (I decided on a Touch 50 GX in the end). Originally I was going to bend up an aluminum box until I realized this would be the perfect project for a 3D printed enclosure.

IMG_6172.jpeg

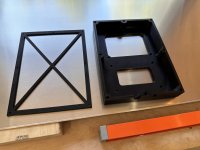
I printed out a few versions of the enclosure along with a drilling jig (the thing on the left). I don't think this will be the final version of the enclosure, I may print a better version with a textured front and maybe out of PETG or ABS once the printers I have access to that can do those things are up and running again. For now this will do.

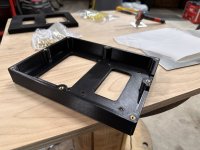
IMG_6179.jpeg

The radiused internal corners and cable ways are so satisfying even though they are unnecessary. It was a quick job to model this up in Fusion 360 and then learn about slicers.

IMG_6183.jpeg

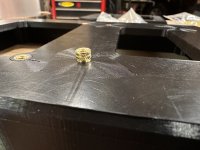
The holes are all designed to accept these melt in brass inserts which were very easy to install using a soldering iron with the special tip (seen below). You can also see the imperfections in the surface above - not really a big deal, but the textured build plate will hide all of that once I can use it.

IMG_6184.jpeg

IMG_6185.jpeg

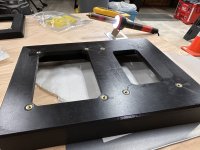
Brass inserts all installed, looking good.

IMG_6188.jpeg

I forgot to take a picture of the jig taped to the wall, but here's the end result.

IMG_6189.jpeg

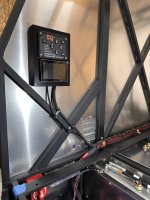
The two control panels installed and the wiring routed out the cable exits.

IMG_6190.jpeg

And here's what it looks like on the outside of the box, the dome head stainless hex screws blend in nicely with the rivets. I have some rubber backed washers showing up later this week that I will add to weatherproof these screws.

IMG_6191.jpeg

I'm really happy with the finished product and it will look even better when I swap it out for a textured enclosure somewhere down the road.
 

gprguy

Well-Known Member
Joined
Apr 14, 2022
Messages
541
Reaction score
1,267
Location
Kitsap Peninsula, WA
Why do all that work on the enclosure at this point? Really it was so I could finish up the wiring from the leveling control panel to the pump.

IMG_6192.jpeg

The leveling system I have is actually from a Dynamax Isata 5 RV and they have all of their components in different locations, plus they use the extremely long 120" CA regular cab chassis. End result is the wiring harness is around 40' long. I was able to take about 30' out of that by cutting and replacing the connector as seen above.

That's all for today - hydraulic hoses and hardware will be here the end of this week, I may start back on some aluminum work again tomorrow.
 

gprguy

Well-Known Member
Joined
Apr 14, 2022
Messages
541
Reaction score
1,267
Location
Kitsap Peninsula, WA
Some new toys showed up today, a couple of the new Orion XS DC-DC chargers.

IMG_6194.jpeg

I knew they were smaller than the older orions but it's still a bit surprising how much smaller they are. They will probably go here more or less, but I'm going to do the responsible thing and put them back in their boxes for now and get back to more important things. I'm also undecided on whether I'll put both in the truck or save one to replace the older Orion-Tr in my camper. Might just do that..
 

jsalbre

Well-Known Member
Joined
Oct 29, 2019
Messages
2,572
Reaction score
3,283
Location
ID
Some new toys showed up today, a couple of the new Orion XS DC-DC chargers.

View attachment 72148

I knew they were smaller than the older orions but it's still a bit surprising how much smaller they are. They will probably go here more or less, but I'm going to do the responsible thing and put them back in their boxes for now and get back to more important things. I'm also undecided on whether I'll put both in the truck or save one to replace the older Orion-Tr in my camper. Might just do that..
Funny coincidence, I got one of those in the mail today too. They are shockingly small!

I’m thinking about figuring out a way to mount them directly on top of a fan, to reduce any power reduction due to heat. They seem like they’d be pretty close fit for a 120mm.
 

Users who are viewing this thread

Top