Squatch
Well-Known Member
Just trying to figure out the best toolboxes out there, please share your setups
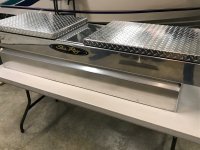
I've got this one all cleaned up and ready to mount. I'm hoping to have time to get it put on this weekend. I'm a big fan of Protech, this one is 20 years old. If I were buying a new on I'd go with a single lid. My dad has a nice one in his truck that mounts down in the bed.


What did you use to shine it up? I have an old Rawson Koenig box that's probably close to 20 years. I'm trying to find something I can use to shine it up. I've tried the aluminum polish from the auto parts store and it didn't really help.I've got this one all cleaned up and ready to mount. I'm hoping to have time to get it put on this weekend. I'm a big fan of Protech, this one is 20 years old, but cleaned up pretty well. If I were buying a new on I'd go with a single lid. My dad has a nice one in his truck that mounts down in the bed., which is a nice option.
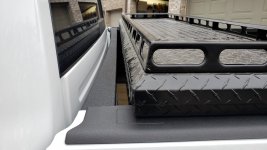
Mine is diamond plate all over. I will probably try the buffing wheels and aluminum polish you recommended.Does your box have any type of clear coat on it? Mine did not, so it was just a matter of polishing the oxidation. I started with a very thorough cleaning inside and out with hot water, simple green and a scrub brush. I also used a scothchbrite pad in some areas that were quite dirty, but I don't recommend that because it lead to scratches I had to put extra work into later.
I started on the lid and used some cheap cotton buffing wheels from amazon in a cordless drill with Mothers polish and chemical guys aluminum polish. I also tried a foam power ball, but could see the diamond plate would eat that up quickly. I just kept working it until it seemed good, then did a pass by hand.
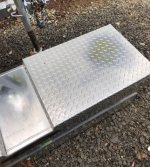
Next I started on the smooth/ flat parts. The lower portion was more scratched up, so it took more work. I sanded it starting with 600 grit wet dry sandpaper after a light mist of WD40. I then moved up to 800, 1000, 1500, wiping clean between stages. Followed by a round of polish with the buffing wheels, (these left swirls that had to be worked later) next I used thenpower ball and finally by hand. I wasn't thrilled with the results so I ordered sandpaper from Amazon in the 1200-2500 range and repeated the process.
The upper portion and ends were in better shape so I just did those by hand to avoid creating scratches or swirls that would create more work.
After a final by hand polish with the Chemical guys polish I waxed it with a liquid wax.
I think it would have been easier with and orbital polisher and a microfiber cutting pad, which I plan to try next time. There are decent Youtube videos on polishing aluminum diamond plate and sanding aluminum to polish
When I started this project my plan was if it didn't work out I'd have it painted black, which I think would look good also. All in all though I'm pretty happy with the result.

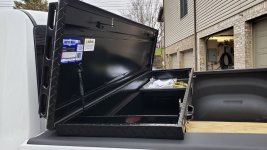
Considering on of these. New decked tool box.
I’m going back and forth with them right now trying to figure out if the widest point on the bottom tub is going to fit between the supports blades on my headache rack. Their total measure currently includes the handles which doesn’t help me much at all.Those have my interest as well.
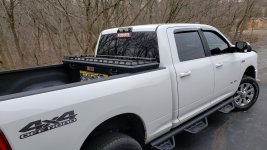
Did someone try to pry their way into yours? the middle of that lid looks a little kinked.I have the standard old delta box works for what i need it for...
My bike caused that i fixed it, its perfectly straight now, i use ramps in the box to lift the front of the bike now to prevent it form happening againDid someone try to pry their way into yours? the middle of that lid looks a little kinked.
")
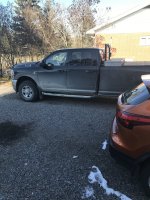
I've always had a longbed and always used a toolbox. Things will still slide under them, so I rarely feel the need to pull it off the truckWell, I put my order in for the 27.5inch wide weatherguard, 116-5-02. kinda worried I’m taking up too much bed-space, guess now I’ll know what it feels like to have a 6 foot bed