Ram Heavy Duty Forum
You are using an out of date browser. It may not display this or other websites correctly.
You should upgrade or use an alternative browser.
You should upgrade or use an alternative browser.
Dan's 2023 2500 Tradesman UNLimited
- Thread starter 44Dan44
- Start date
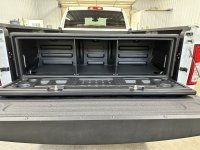
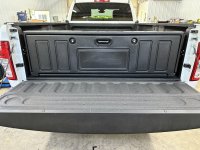
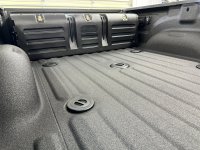
So, I wanted a place to throw junk and stuff and if you're keeping track you'll know the back seat belongs to the dogs but typical cross body truck boxes aren't the direction I wanted to go so I started looking at chests and undermount/flush mount boxes and came across this item and it fits my needs perfectly. Dividers are removable for golf clubs and the like.
Easily removable, easy access, portable.
Easily removable, easy access, portable.


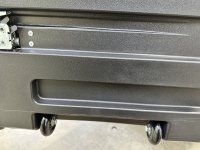
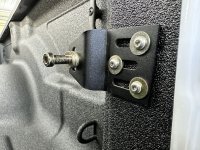
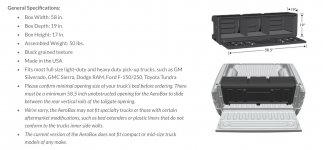
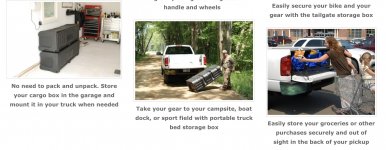
Some detail pics and marketing from the company that makes them. Save you the trouble of looking it up. Somewhere in there: It's a no for RamBox
Because of AeroBox's unique design, it can do things that most other truck boxes cannot
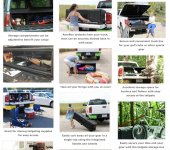
Rear mounting allows for easy access to cargo without the need to climb into the bed
Can be easily removed and rolled away to provide you with all of your truck bed area when needed
Sits below rails which allows for use with most traditional tonneau covers
Puts weight over rear wheels for increased traction
Patented design Improves truck's aerodynamics
AeroBox increases your fuel economy by reducing your truck's wind drag. The unique position and computer engineered shape of the AeroBox™ provides significant aerodynamic improvement, increasing fuel economy. According to CFD analysis of a truck with the tailgate up as opposed to a truck with an AeroBox, it was found that AeroBox reduces the drag coefficient by 4.25%. ProPickup Magazine 03/2012 article on truck aerodynamics (http://www.propickupmag.com/tailgate-down-myth/) indicates that, "such a reduction in the pickup’s drag could be translated to the equivalent of a free gallon of gas for every 20-gallons burned.
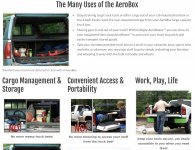
The AeroBox™ is a rear mounted, secure truck cargo box that improves aerodynamics and creates an easily accessible and portable space for storage. This unique tailgate cargo box integrates practical, well-designed features such as tie down hooks, easy access to cargo at tailgate, configurable storage, and much more, to make your work easier and your truck more useful for you and your family. AeroBox™ also works terrific with hitch cargo racks on SUV's, vans, and cars.
GET ORGANIZED
Avoid the hassle of trying to retrieve loose items that have rolled around in the truck bed. Keep items secure from damage and out of sight of thieves. You don't have to stuff your valuables in the cab anymore because you don't have a good way to store them in all that space you have in the bed! The AeroBox rear mounted cargo box will greatly increase the ways you can use your truck by providing easy to access, secure storage space at the tailgate.
ADD UTILITY
The unique rear mounted truck bed position of the AeroBox™ provides many advantages over traditional tool/cargo boxes mounted behind the cab. See how much more use you can get from your truck when your stored items are more easily accessible at the tailgate! The Aerobox is also portable and can be easily "un-docked" from the truck to open up the full cargo capacity of your bed, wheeled away to your job-site, campsite, or nicely stored in the garage. Try that with a traditional truck bed tool/cargo box! The AeroBox can also be used with many tonneau covers (please confirm fit before buying).


Rockcrawlindude
a rock crawlin’ dude
I dig that.
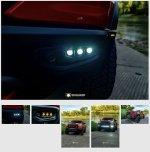
I like and want the more linear look of the factory led vs the square look of Diode Dynamics or Baja Designs.
I want fog lights that exist but do not YET exist for HD trucks. I'm holding out for a bit to see if MandR develop a kit with bracketry and bezels for HD. Presently they are producing them for the TRX. 12,000 lumens for the total package, dual function white and amber and more of the "look" I want. If they take too long or don't ever offer for HD I plan to home-brew my own kit with their lights.
I said all that to say all this:
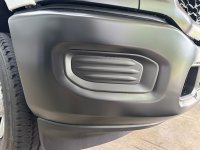
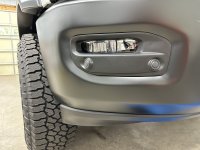
While I wait and hope and plan, I didn't want to invest a lot into fogs that I will just replace later so I took a flyer on the led kits you see on sketchy parts sites and amazon in the $100 price range complete with bulbs, brackets, wiring, etc.
Knowing that I'm not buying quality for now I will judge them only on two things;
1. do they light up?
2. appearance vs blank bezels
and therefore it's a win in my books. I'm just wiring to an upfitter switch.
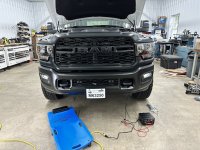
I want fog lights that exist but do not YET exist for HD trucks. I'm holding out for a bit to see if MandR develop a kit with bracketry and bezels for HD. Presently they are producing them for the TRX. 12,000 lumens for the total package, dual function white and amber and more of the "look" I want. If they take too long or don't ever offer for HD I plan to home-brew my own kit with their lights.

I said all that to say all this:
While I wait and hope and plan, I didn't want to invest a lot into fogs that I will just replace later so I took a flyer on the led kits you see on sketchy parts sites and amazon in the $100 price range complete with bulbs, brackets, wiring, etc.
Knowing that I'm not buying quality for now I will judge them only on two things;
1. do they light up?
2. appearance vs blank bezels
and therefore it's a win in my books. I'm just wiring to an upfitter switch.


Crusty old shellback
Well-Known Member
- Joined
- Apr 10, 2021
- Messages
- 2,949
- Reaction score
- 4,574
The bezels look the same between the TRX and the HD. Look up the part numbers for the different bezels that are available from Mopar and see if they are the same number.
jak
Member
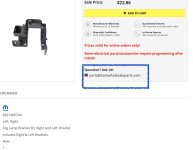
Mopar has the most screwed up parts look up I have ever seen and I order a lot of parts for a lot of different things. I assume their trying to direct everyone to the dealers?
From what I've heard the dealers aren't much help unless you happen to get a good one. It's a lot of work of course cataloguing millions of items, but I agree the bare minimum has been done on pictures and descriptions to guide you in the right direction. I imagine many people just keep the wrong part they've ordered and throw it on the shelf rather than going through the return hassle, that works nicely for FCA. FWIW, (in my experience) places like BAM have some knowledgeable people on staff that can actually help if you have the time to use their 'request more info' link on each part's page. I found them pretty quick to respond and knew the differences in similar parts.Mopar has the most screwed up parts look up I have ever seen and I order a lot of parts for a lot of different things. I assume their trying to direct everyone to the dealers?
Aux switch power at rear of truck: Hopefully this helps someone.
For this aux switch, (6) I want to make use of the red/white battery powered wires available above the spare tire at rear of truck. This will eventually serve for auxiliary lighting that I would like to also use when the truck is not running, if you can imagine uses such as hooking up a trailer or setting up a camp, I feel this would be handier than ignition powered.
There are many aux threads that can get a little confusing but are great resources.
I will NOT be depinning any connectors, this method will suit my needs better, leaving me with a handy always-on battery/hot in cab.
Step 1. Plug in supplied upfitter kit under dash
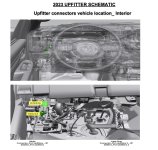
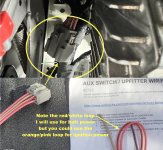
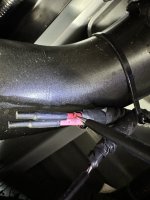
With this connector plugged in you now have power at the rear of the truck. Red/White is battery power. Orange/Pink is ignition-on power
Factory schematics incoming, don't let your eyes cross lol, just for handy reference, annotated for simplicity. Remember we are using Aux switch 6 in this case.
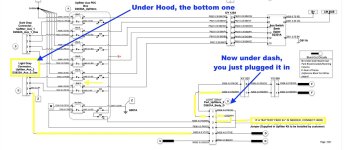
Last schematic I swear, stay with me.
Step 2. Make a jumper, pics continued on next post.
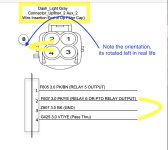
For this aux switch, (6) I want to make use of the red/white battery powered wires available above the spare tire at rear of truck. This will eventually serve for auxiliary lighting that I would like to also use when the truck is not running, if you can imagine uses such as hooking up a trailer or setting up a camp, I feel this would be handier than ignition powered.
There are many aux threads that can get a little confusing but are great resources.
I will NOT be depinning any connectors, this method will suit my needs better, leaving me with a handy always-on battery/hot in cab.
Step 1. Plug in supplied upfitter kit under dash


With this connector plugged in you now have power at the rear of the truck. Red/White is battery power. Orange/Pink is ignition-on power

Factory schematics incoming, don't let your eyes cross lol, just for handy reference, annotated for simplicity. Remember we are using Aux switch 6 in this case.

Last schematic I swear, stay with me.
Step 2. Make a jumper, pics continued on next post.

Last edited:
Step 2 continued:
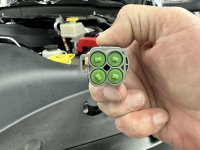
For Aux switch 6 we are using the lower/light gray connector, slide the red switch, push a bit on the side while pulling out from the base.
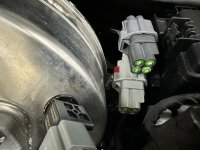
Pull out green plugs from 2 and 4
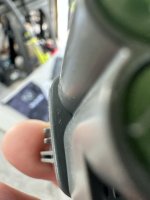
Release this little catch while sliding the white part towards you.
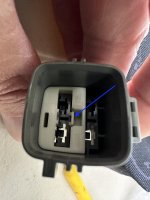
Insert your jumper spade terminals and slide the white part back to lock.
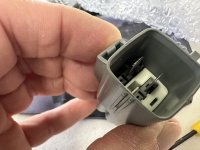
For Aux switch 6 we are using the lower/light gray connector, slide the red switch, push a bit on the side while pulling out from the base.

Pull out green plugs from 2 and 4


Release this little catch while sliding the white part towards you.

Insert your jumper spade terminals and slide the white part back to lock.

Reminder that I am using red/white for battery power at rear of truck.
Step 3:
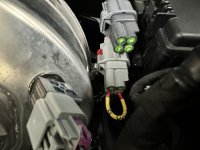
Cut the red/white loop in half. You'll have about a foot of wire to work with on the hot side and the now-dead side of the red/white wire.
This is the step where some people de-pin, I like this method better.
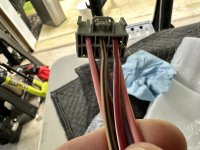
You will now connect the now-dead side of the red/white with the yellow violet wire
You are creating this connection:
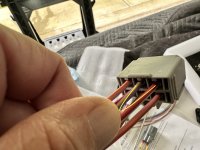
Resulting in this
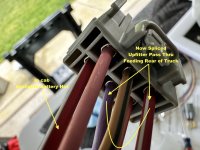
As seen under dash
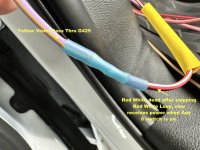
Finished
Aux switch 6 on equals battery power at rear of truck red/white
Other side of red/white remains available in cab for other uses (not aux controlled)
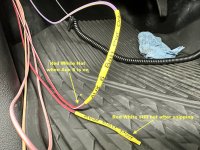
Step 3:
Cut the red/white loop in half. You'll have about a foot of wire to work with on the hot side and the now-dead side of the red/white wire.
This is the step where some people de-pin, I like this method better.

You will now connect the now-dead side of the red/white with the yellow violet wire
You are creating this connection:

Resulting in this

As seen under dash

Finished
Aux switch 6 on equals battery power at rear of truck red/white
Other side of red/white remains available in cab for other uses (not aux controlled)

Last edited:
Sometimes I have ideas, it's do-able, but I'm gonna pass. I'll leave it to your imagination, maybe someone will take the mystery idea and execute it. Hints: does NOT involve removing anything or trimming anything.
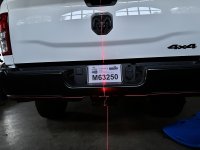
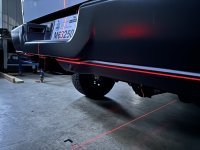
Instead I finally removed all the blue chalk/paint inspection marks and finished up some more wiring. They were everywhere on the truck inside and out. WD40 and soft cloth.
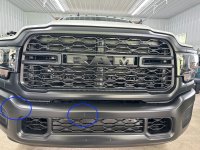


Instead I finally removed all the blue chalk/paint inspection marks and finished up some more wiring. They were everywhere on the truck inside and out. WD40 and soft cloth.

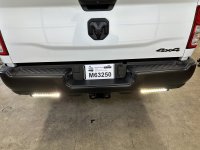
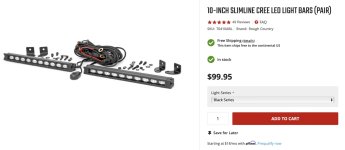
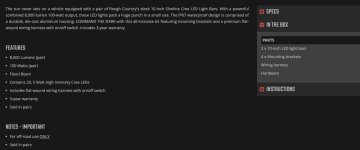
Mounted these up, 8,000 lumen for the pair. I like the length vs a cube size/style light. The provided brackets can be used 2 ways, I chose the orientation that results in nearly a flush mount.
For the look, the price, the warranty, I don't think you can beat these.
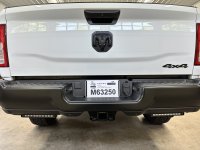
Powered via Aux 6 / Red/White/ Battery
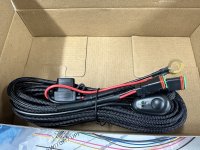
A decent harness with relay/switch/fuse/etc is included, chopped up and just used the connectors at the lights.
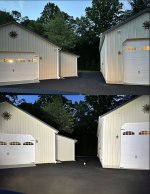
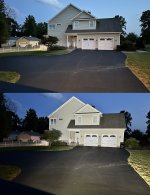
I have them aimed higher rather than ground focused, happy with the resulting light spray.
For the look, the price, the warranty, I don't think you can beat these.

Powered via Aux 6 / Red/White/ Battery

A decent harness with relay/switch/fuse/etc is included, chopped up and just used the connectors at the lights.


I have them aimed higher rather than ground focused, happy with the resulting light spray.


Users who are viewing this thread
Total: 1 (members: 0, guests: 1)

