Ram Heavy Duty Forum

Register a free account today to become a member! Once signed in, you'll be able to participate on this site by adding your own topics and posts, as well as connect with other members through your own private inbox!

Carli Backcountry — Driveway Install — '21 RAM 3500

Dave88LX

Active Member
Joined
Nov 10, 2020
Messages
151
Reaction score
178
Location
York, PA
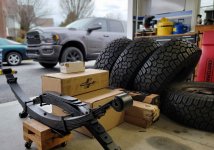
Truck is a 2021 RAM 3500 without the air system. I ordered the base Backcountry kit along with their torsion sway bar and full progressive leaf springs.

To head off a couple questions I get asked:
"Why didn't you just get a 2500?"
I didn't want rear coils.

"Why are you going to "waste" a 3500 by putting such low capacity rear leaf springs on?"
I don't tow heavy nor load my bed heavy. If I do end up some day needing that extra capacity, I can always add airbags later.

Previous install experience has been a Thuren system on my old '07 RAM 2500, and a Carli Backcountry system on my wife's Wrangler. This install looks a bit more involved, but, hopefully nothing too drastic. No welding is required thankfully.

I wish I had a huge garage and a lift installed. Or even a normal sized garage that would fit the truck inside. My garage is 20' deep, so I'm stuck outside. :confused:

I'll be posting a lot of pictures and explaining some things along the way that may hopefully help others out in the future when they do their systems.

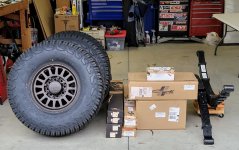
index.php


20211211_152925.jpg


20211211_153148.jpg


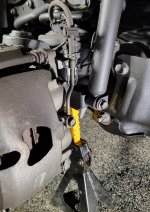
Sway bar drop is because I was going to run the factory sway bar while waiting for production to finish on the Carli sway bar.
The Carli bar came in before I got around to installing the system, so now I'll have to sell that or something.
20211211_191341.jpg


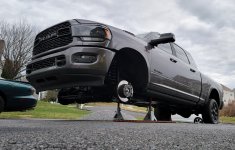
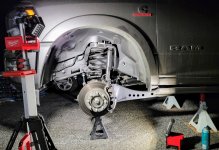
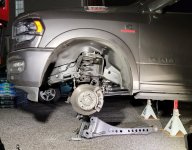
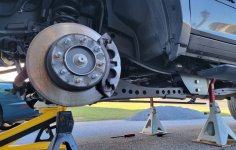
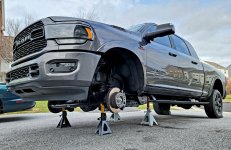
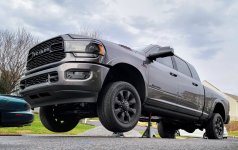
I have almost 30K miles on the truck now. First time up in the air.
(Yeah, I didn't rotate the factory tires, just going to get rid of the wheels/tires anyways once I get these new ones on.)
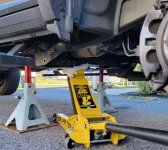
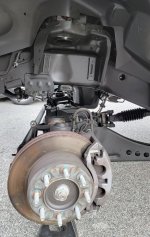
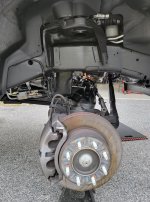
I used the jack under the radius arm/axle connection area of each side to lift the truck.
The diff looked a bit too far off-center to try using that.
Rear wheels chocked.
20211211_160439.jpg


20211211_161243.jpg


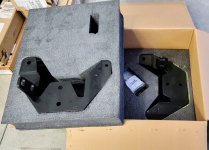
First part to install is the Radius Arm Drop Brackets.
This is the most intimidating part to me as it requires drilling the frame. One drilled hole per bracket.
I've never done brackets. (Fear not, Carli makes it super simple, to be detailed later.)
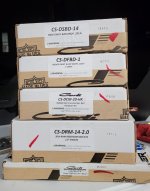
Hell of a packing job with them as well.
20211211_161545.jpg


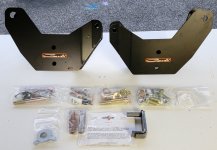
The bolts are conveniently divided up into four sections for the different uses.
Not labeled, but, easy enough to figure out which section is what using a tape measure and the contents inventory.
20211211_162004.jpg
 

Dave88LX

Active Member
Joined
Nov 10, 2020
Messages
151
Reaction score
178
Location
York, PA
I have not seen saltas that color before. truck will look great.
Thanks, I hope so! I bought silver wheels on clearance and had them powder coated. I didn't see the color ahead of time, but gave him a description of what I was looking for and he went with it. He said if I don't like it, bring them back and we can hit them with something else.

This post has a bit more on the backstory of the wheels:
 

Dave88LX

Active Member
Joined
Nov 10, 2020
Messages
151
Reaction score
178
Location
York, PA
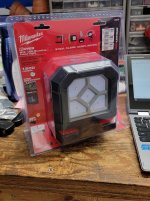
I'm going to start this post professing my love for the Milwaukee lights. No this is not a paid advertisement.:D
I have spent LOTS of money in the past on various halogen and cheaper LED setups. Nothing has compared to what these do.
Now, I'm not saying there's nothing out there capable, but I haven't owned it, and bonus that it uses my M18 batteries.
I'm a big fan of the clarity/color of the light they put out. I'm loving the little cube light as well.
It's also magnetic so you could attach it to the frame, the light itself tilts/swivels in all directions, and you can also clamp it onto 2x lumber etc. if you wanted to go that route.
"Buy once, cry once" is the outlook I've moved to.

20211211_170121.jpg


Also love my Rocket light!
20211211_172220.jpg


"Looks" dirty underneath, but I just recently had it coated in Krown Coatings to keep the rust away.
Good stuff, I suggest looking it up if they treat your roads with garbage in the winter.
Shock bolt and two radius arm bolts come out easily.
The nut on top of the shock also comes out easily, plenty of room for a wrench up there.
20211211_172313.jpg


One radius arm on the ground.
I found it easiest to do all the nuts first, pop out the two front bolts, swing it down, and the pop out the rear bolt.
I'm using ratchets, breaker bars, and wrenches and was able to get this out in about 15 minutes.
Maybe someday I'll upgrade to an impact.
20211211_175918.jpg
 
Last edited:

jadmt

Well-Known Member
Joined
Aug 29, 2020
Messages
2,293
Reaction score
3,065
Age
65
Location
Missoula
trust me once you get a quality battery operated impact you will kick yourself for not getting it sooner. I went over 40 years and finally got one about 5 years ago and never have regretted it. I have installed maybe 20 lifts since I have had it and makes life so much better.
 

Dave88LX

Active Member
Joined
Nov 10, 2020
Messages
151
Reaction score
178
Location
York, PA
The bracket goes on pretty easily once you read through the directions a couple times and make sure to understand everything.
The instructions are for 2014+, and they don't mention that our trucks use the longer transmission crossmember bolts, but it is mentioned on the product page, and they are shipped with the kit and include their own instructions.
The instructions also state that the old crossmember bolts need to be cut off, they don't. It also says something about unclipping and moving a DEF plug, but you don't. Maybe that is for 2014-2018 trucks?

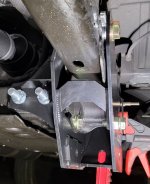
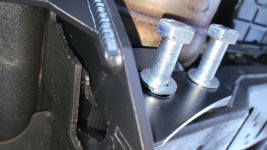
The Radius Arm Drop Bracket (RADB from here on) attaches using 5 bolts through factory mounting locations, to include two on the transmission crossmember.
These are all installed and torqued before the last hole is marked and drilled.
Note that some of these bolts need to be tightened to 280 ft/lbs.

Here you can see the 5 bolts to include the two extended crossmember bolts.
20211212_182338.jpg


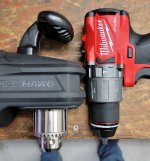
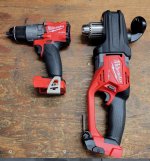
Instructions state to use a right-angle drill for drilling through the frame, as the space is a bit tight.
I was undecided on buying a 3/8" Milwaukee M12 right-angle drill, setting up my air and using an air drill, or buying the Hole Hawg and not questioning anything.
Hole Hawg won, I'll use it for other things I'm sure when I go to refinish my basement later.
Would love to hear what anyone else used for their holes!
I had plenty of space to drill my PILOT hole using my regular drill, but the regular drill did not fit with the 1/2" bit in there with my power steps.
I would suggest getting under your own truck with your drill & bit to see how much space you have, might be able to get away with it.

I had to remove the "palm handle" off the Hole Hawg to get it to fit. Size reference.
20211212_165250.jpg


20211212_165336.jpg


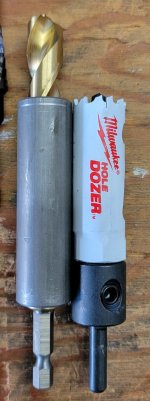
Carli includes this 3/4" Milwaukee hole saw bit.
1/2" drill bit is NOT included.
20211212_152204.jpg
 

Dave88LX

Active Member
Joined
Nov 10, 2020
Messages
151
Reaction score
178
Location
York, PA
OK drilling the hole. How does this all work anyways to guarantee a perfectly landed hole through the frame?
This is what I was most nervous about.

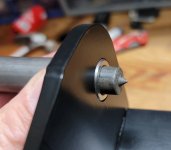
Starts with the included 1/2"-3/4" bushing and a center marking punch (NOT INCLUDED).
This can be picked up from McMaster-Carr for pretty cheap. Don't skimp on this step, this location needs to be precise.
Part # 3374A41

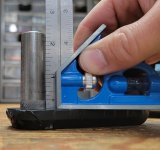
The bushing is very close fit to the RADB hole (.009" difference in diameter, so about .0045" clearance all the way around).
With the RADB bolted to the truck, the 1/2"-3/4" bushing in place, squared up in the hole and against the frame, you'll mark the center of the hole using the center marking punch.
I used a heavier duty centering punch in the hole after to make it a bit more defined.
Obviously this would be on the truck, this is just to show the process.
20211212_203334.jpg


I used a small drill bit and progressively stepped up to the 11/64" bit before switching over to the hole saw.
That's just what I did to feel comfortable -- do what works for you.
20211212_173307.jpg


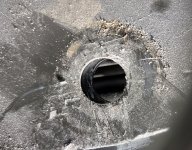
3/4" hole saw worked flawlessly.
I used cutting oil as well at the recommendation of some people, I don't know if it is necessary but I felt better about it.
20211212_181709.jpg


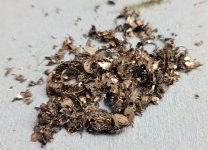
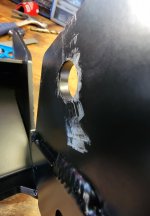
At this point I used a telescoping magnet to get as much of the metal shavings out of the frame as I could, to include the little "disc" that popped through (needle-nose).
I did this again after drilling the second hole, this is just the pile from the first hole.
I will be spraying Fluid Film through all the holes to soak everything again fresh inside the frame rails. Currently coated in Krown.
20211212_191416.jpg


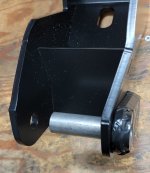
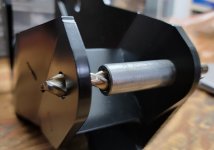
This is the provided jig for landing the 1/2" drill bit exactly where it needs to go in the back (inner) frame rail.
It's square, and comes with a pressed-in bushing. I wrapped it in electrical tape to prevent scratching.
20211212_202152.jpg


Here's what it will look like once pressed into the newly-drilled 3/4" hole.
The jig is clamped in place to prevent potential movement or misalignment.
20211212_203043.jpg


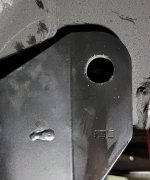
1/2" drill bit does its job, comes perfectly out the back side.
You can test fit all this yourself on a bench before you start mounting or drilling anything.
20211212_203146.jpg


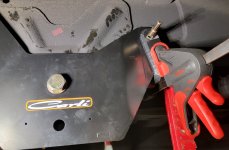
Here's how it looks on the truck.
1/2" bit sitting in place before drilling, along with the jig clamped down.
20211212_182140.jpg


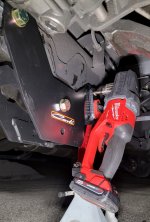
Lots of room for the drill here.
20211212_185404.jpg


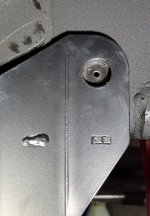
Success! (Backside)
20211212_190305.jpg
 

Dave88LX

Active Member
Joined
Nov 10, 2020
Messages
151
Reaction score
178
Location
York, PA
Couple swear words and ratchet straps, and the driver's side arm is back in.
20211213_105953.jpg


Passenger's side shock, radius arm, and transmission crossmember bolts all dropped out quickly.
20211213_113723.jpg


But that was the end of today's happiness — Honeymoon ended this morning. :D
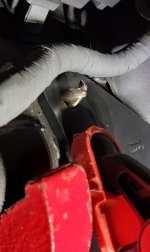
Slid the RADB onto the passenger side, but couldn't get the bolt holes to line up correctly. The ear/tab that goes against the transmission crossmember did also not look close enough.
When I looked at the RADB, I could see that it was gouging from the truck's original bracket.
Pulled it all back off.
20211214_103823.jpg


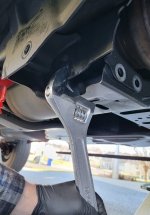
I gave the factory bracket a slight tweak with an adjustable wrench to pull it "in", or, towards the outside of the truck to give a slight bit more room to slide over it.
20211214_104703.jpg


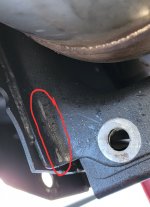
You can see where the RADB is hitting the trans crossmember bracket in that corner nook.
20211214_110114.jpg


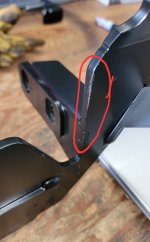
Contact point on the RADB.
20211214_112055.jpg


Contact point on the crossmember.
Option 1: Grind down the corner of the bracket for clearance
Option 2: Clearance trans crossmember, but I'm dismissing this because it's in the "meaty" part. If it was the unsupported corner, I'd consider that.
Option 3: Set truck on fire! Nah. Waiting to hear back from CJC Offroad and Carli on their guidance. I don't want to start grinding on **** without a go-ahead from them.
So, for now, I'm stuck.
20211214_112146.jpg


Misalignment.
20211214_105604.jpg
 
Last edited:

Rockcrawlindude

a rock crawlin’ dude
Joined
Jan 1, 2021
Messages
6,312
Reaction score
16,335
Location
Georgia USA
Pretty normal for parts to need a little modification to fit.

Nice to see people wrenching on their rigs. Subbed.

Hole saws go through frames remarkably easy, don’t they? I have used the same one numerous times making shackle bushing sleeve holes for solid axle swaps.
 

Dave88LX

Active Member
Joined
Nov 10, 2020
Messages
151
Reaction score
178
Location
York, PA
Pretty normal for parts to need a little modification to fit.

Nice to see people wrenching on their rigs. Subbed.

Hole saws go through frames remarkably easy, don’t they? I have used the same one numerous times making shackle bushing sleeve holes for solid axle swaps.
I was surprised! I probably could have done it with a lot less drill, but I knew this one had the fine control and I didn't want to be stuck.

Carli has replied and sent the info to their engineering department. We'll see what they say about it. I'm guessing every bracket comes out the same, so there might be something slightly off with my crossmember bracket.
 

Rockcrawlindude

a rock crawlin’ dude
Joined
Jan 1, 2021
Messages
6,312
Reaction score
16,335
Location
Georgia USA
I was surprised! I probably could have done it with a lot less drill, but I knew this one had the fine control and I didn't want to be stuck.

Carli has replied and sent the info to their engineering department. We'll see what they say about it. I'm guessing every bracket comes out the same, so there might be something slightly off with my crossmember bracket.
If all the trucks and parts came out perfect, there wouldn’t be the need for alignment adjustment slots and bolts
 

Dave88LX

Active Member
Joined
Nov 10, 2020
Messages
151
Reaction score
178
Location
York, PA
If all the trucks and parts came out perfect, there wouldn’t be the need for alignment adjustment slots and bolts
This is true!!
I'm expecting to have to take a little off the corner of their RADB, I just want to hear it from them before I start up the grinder.
Also hoping to hear if any other trucks have ran into this...if so they may need a slight alteration on their pattern.
 

Dunn08

Well-Known Member
Joined
Aug 6, 2021
Messages
98
Reaction score
385
This is true!!
I'm expecting to have to take a little off the corner of their RADB, I just want to hear it from them before I start up the grinder.
Also hoping to hear if any other trucks have ran into this...if so they may need a slight alteration on their pattern.

I just installed these and luckily didn’t need to alter anything.
 

Brewbud

Brewmeister Meisterbrew
Joined
Aug 21, 2020
Messages
1,987
Reaction score
3,073
Location
SoCal
Pretty normal for parts to need a little modification to fit.

Nice to see people wrenching on their rigs. Subbed.

Hole saws go through frames remarkably easy, don’t they? I have used the same one numerous times making shackle bushing sleeve holes for solid axle swaps.

Same with a step bit. And the Harbor Freight bit did better than the damn Milwaukee LOL
 

Users who are viewing this thread

Top